Implementing Operation Black Mesa's Renderer - Part 1 - Doing what we can on D3D9
Table of Contents

Introduction
Hi! I am Andrew, also known as Sears, and I was an Engine Programmer / Technical Artist at Tripmine Studios. I will be discussing and showcasing some of the new features I have been adding to the project over the past 4 years or so, as well as the struggles and benefits to implementing these features.
I have always been interested in how games do their graphics since I was a kid, and would always tinker with skin-mods, and do random stuff on reshade.
For the past 4 years, I have been working with the talented team at Tripmine Studios on Operation: Black Mesa. It is a remake for Half-Life’s Expansions, more specifically Half-Life: Opposing Force, and Half-Life: Blue Shift that runs on the Source Engine. Operation: Black Mesa is a huge endeavor, both in keeping in line with the story we are meant to recreate, and how we present that story in a more modern fashion.
This is a high-level overview of the techniques that are implemented on the D3D9 version of the game and is subsequently ported to the D3D11 version.
All techniques presented here are possible on Source’s D3D9 Renderer.
All performance metrics shown in this article are not indicative of final performance of the game, as the game is still WIP.
Goals
To fully realize my vision for the game’s presentation, we have to set some general goals:
- An overhauled materialsystem shader backend that allows materials to be used anywhere regardless of what’s rendered.
- A unified, fully dynamic lighting system that can replace the standard lighting system that Source Engine typically has.
- Optimize Source Engine’s rendering system to cope with the detail and performance normally present in games of today.
Starting Out
Starting out on a project as large as OBM is a daunting task, and so i laid my goals for the game right from the start. and while the scope has grown in size, the end goal is the same, it was the goals listed above. To achieve this, i first learned how newer source engine versions handles materials differently from the SDK. the largest difference is the introduction of 4 Way Blends. This increased world geometry detail but is only supported on the CS:GO Engine and only for displacements.
At first, i only ported my test assignments (Lens Flare, Chromatic Aberration, etc) to the new engine, but as i was doing that i was experimenting with how Projected Textures work on the CS:GO Engine.
Projected Textures are a light type present on almost all Source Engine games that render dynamic shadows. it is typically used for the flashlight of the player. On newer games though (Portal 2 for instance), it was used on other light sources like the test chamber lights, as well as changing its filter (HL2, SDK Projected Textures used noise filter, while Portal 2, CS:GO Projected Textures used a gaussian filter.). Later versions of the entity also introduced a volumetric feature, mainly used on SFM.
As disccused earlier on earlier posts, Projected Texture lighting on the Source Engine are rendered by rendering the models involved twice, once with the normal shading, and one more time with the specific light’s shading. This didnt change with the newer versions of Projected Textures. This is the reason i quickly abandoned the idea of improving them and search for alternatives.
Deferred?
OBM’s G-Buffer Layout
I joined Tripmine partly because I was inspired by Black Mesa’s Graphical overhauls over the original. this has inspired me to be interested on how do things get redone, how to make something look as good as it is despite the old engine used, and other things. One thing that caught my attention while playing the game is their dynamic lighting system. It was a deferred lighting system where they have a pass that renders the G-Buffer that they have, outputting material and spatial properties to a set of textures, and then using those textures on a lighting pass that uses box light proxies to render lighting. More information can be read here.
I considered adapting the same strategy however implementing a dedicated G-Buffer pass we run unto the same problem as multipass lighting: We are rendering the scene twice. (This time once on the gbuffer, and another on the final pass). This has a notable advantage of using the lighting result of the deferred pass on a forward shader, alleviating any translucency issues if we turn on/off the deferred lighting on a per-renderable basis, however we are rendering the scene twice so I realized that is not the way to go.
Instead I implemented a basic forward + gbuffer approach and re-arranged the rendering code. I kept the basic forward rendering code, however at the very end of the shader i added the G-Buffer outputs aside from the normal rendering output:
... basic forward shading happens here

o.color0 = finalColor.xyzw;
o.color1 = float4(albedo.xyz, alpha);
o.color2 = float4(worldNormal.xyz, sunMask);
o.color3 = float4(roughness,metalness,ao,depth);

return o;
Implementing the G-Buffer pass as integrated to the forward shading has a major advantage of us not requiring a separate G-Buffer pass, but it comes as a cost of needing to re-arrange some of the rendering code to avoid rendering G-Buffer data to translucents, and applying the lighting before rendering translucents. I think at this time the cost is worth it to avoid rendering the scene twice.
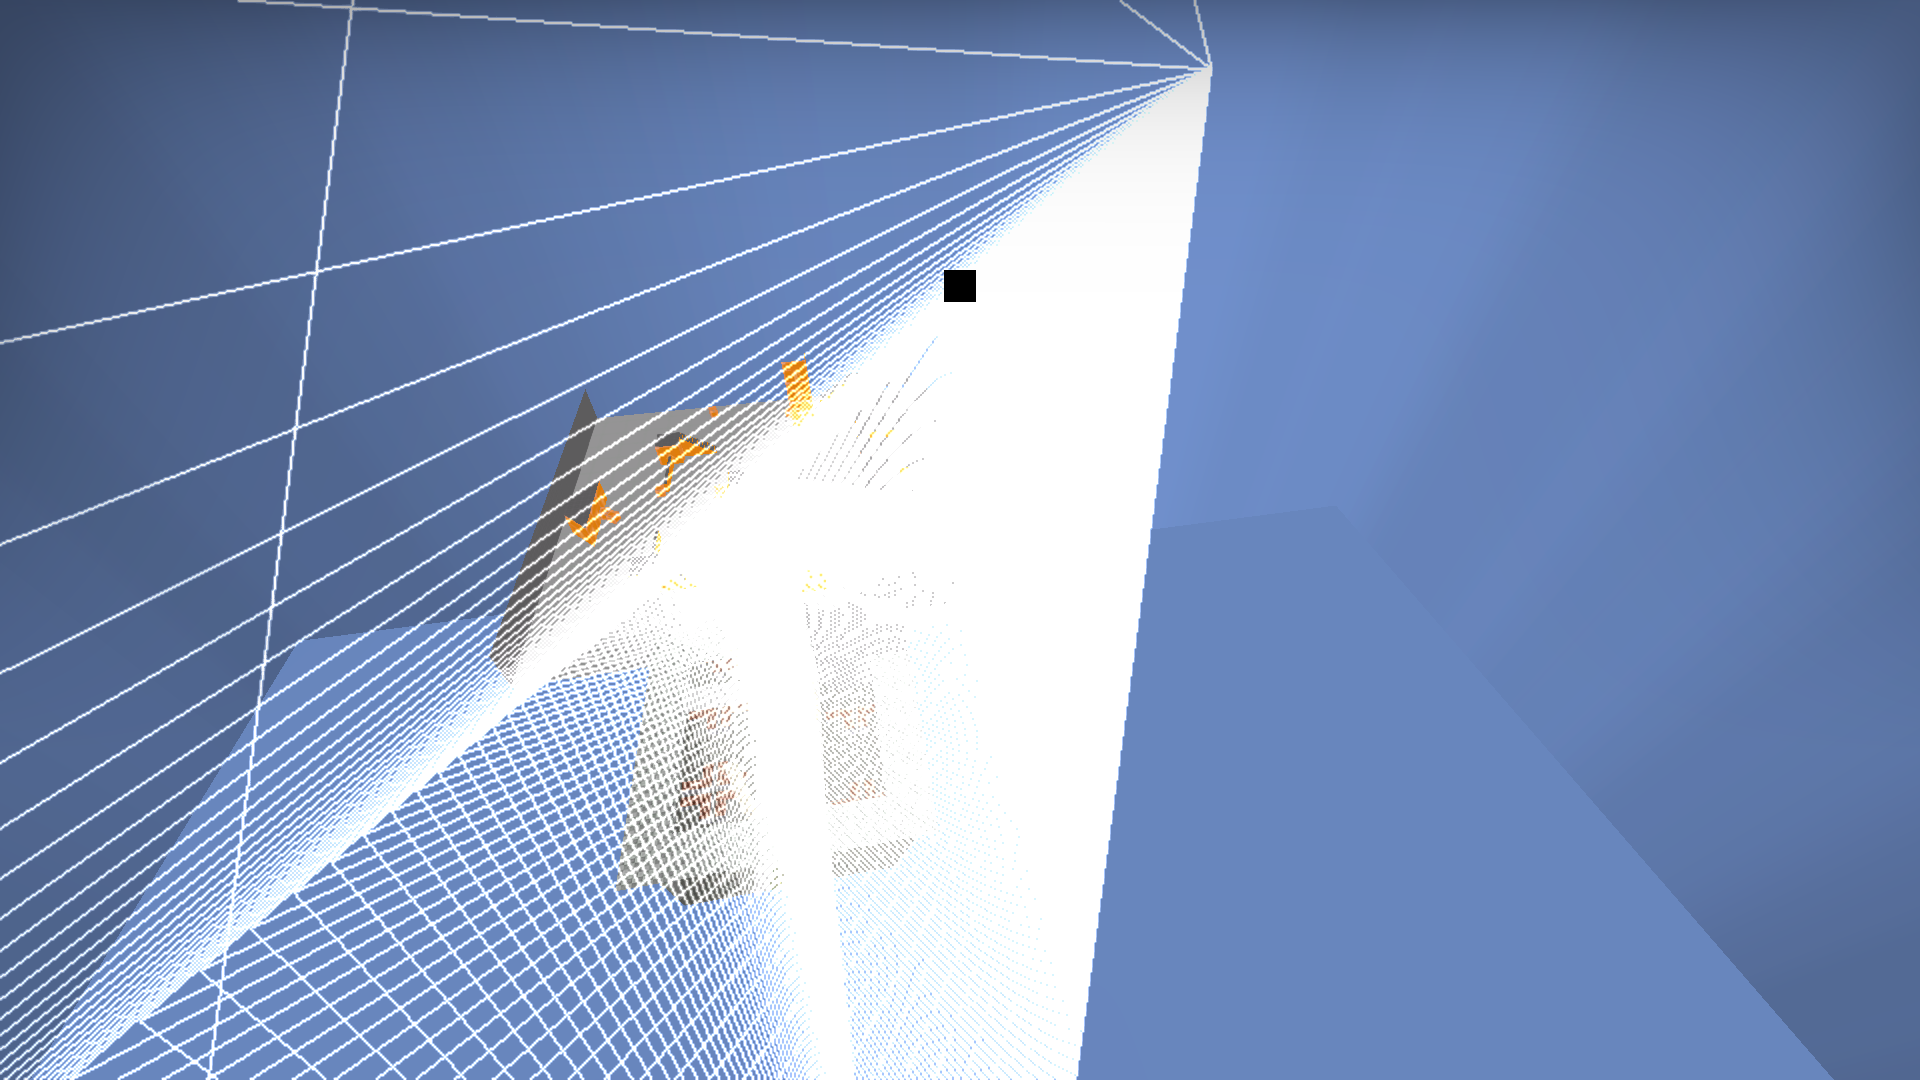
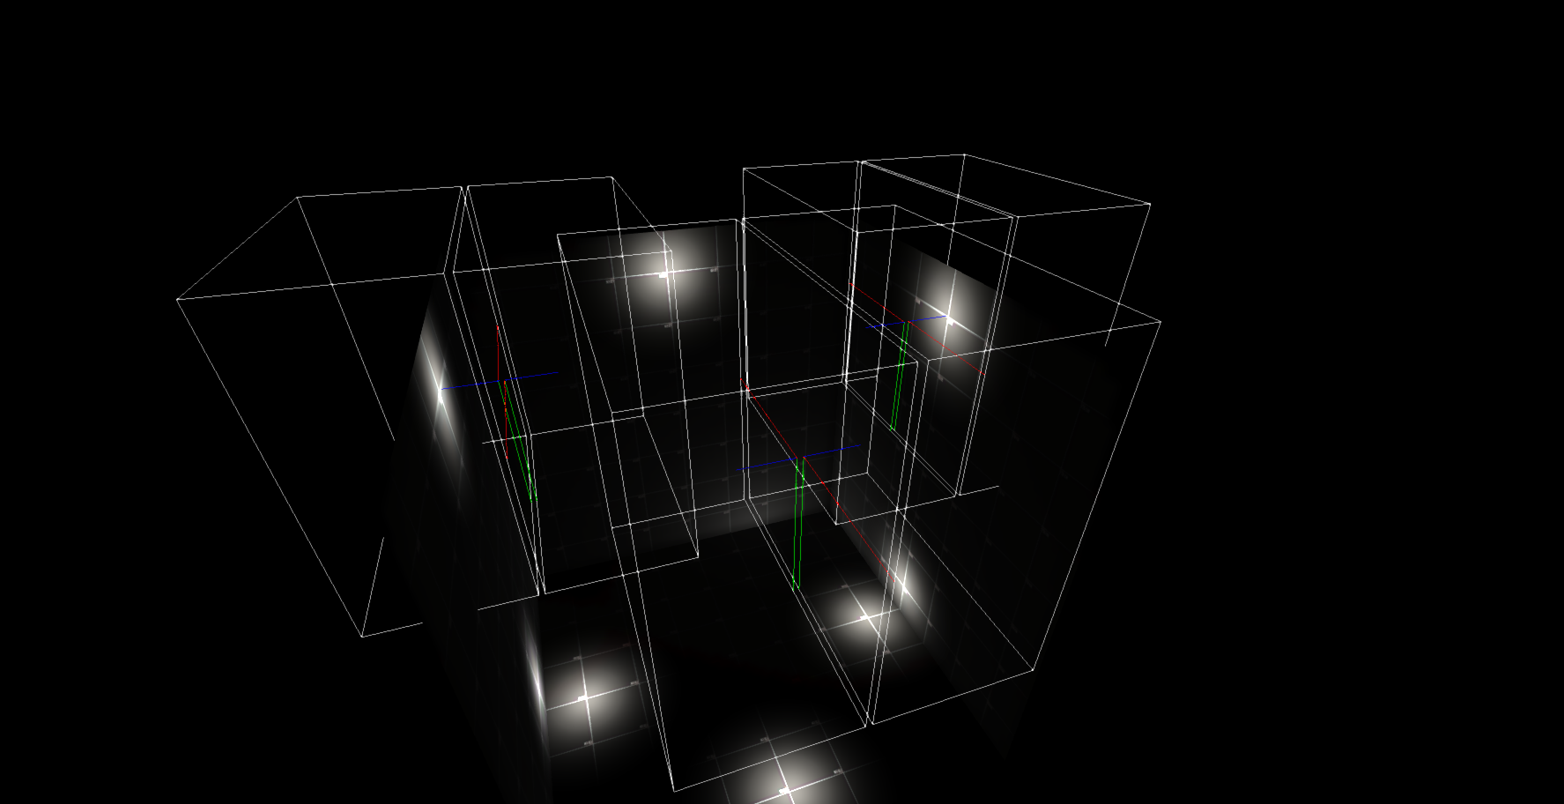
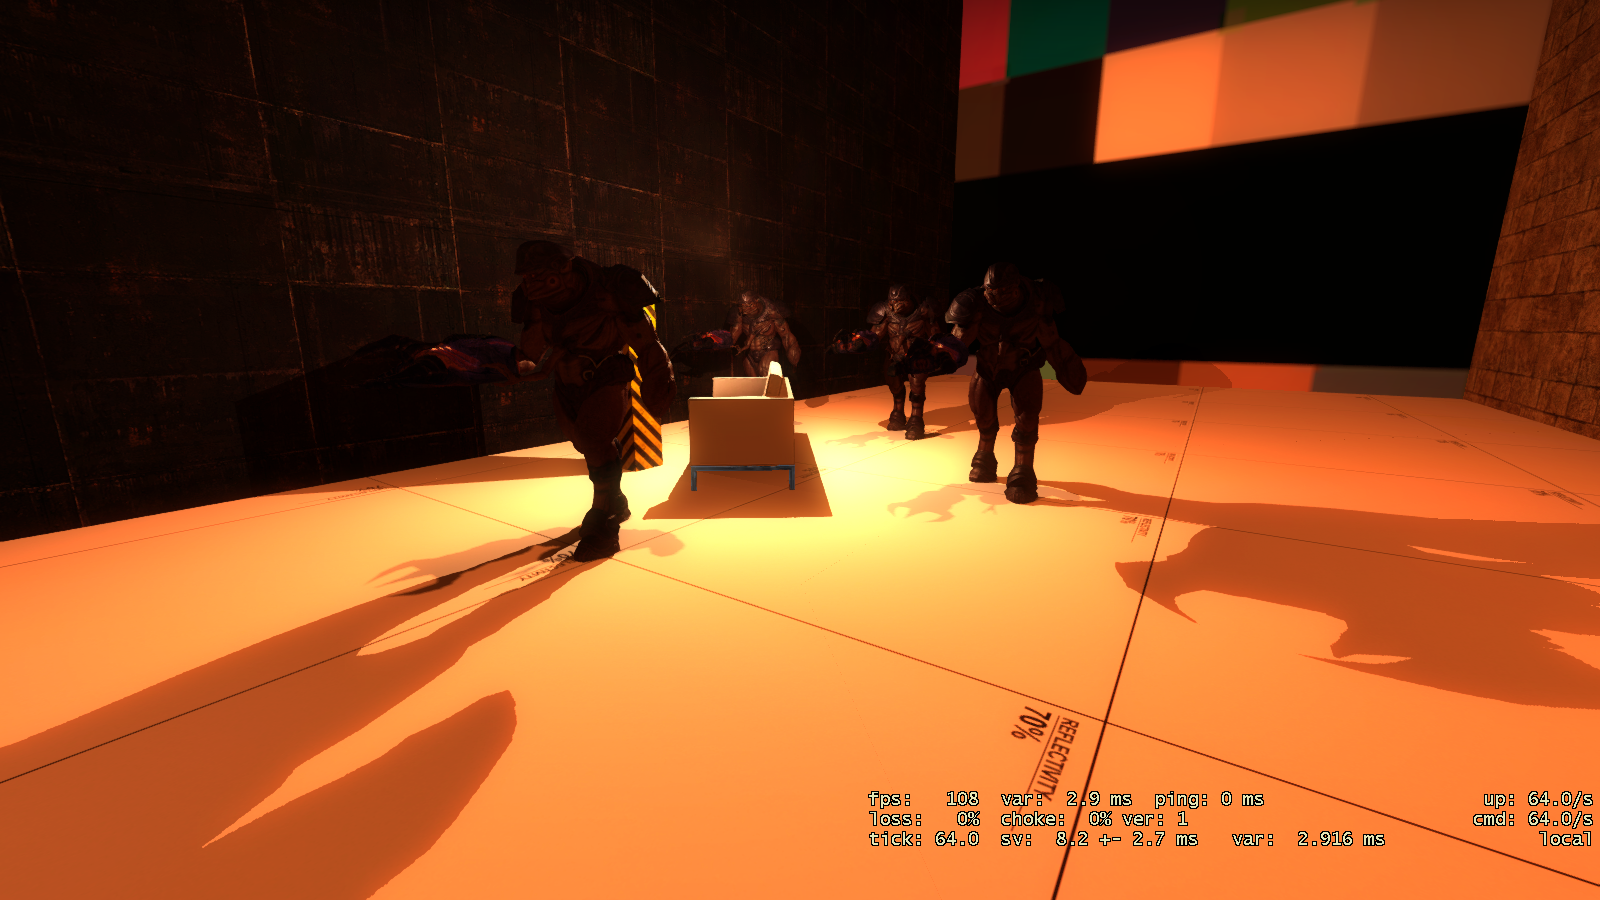
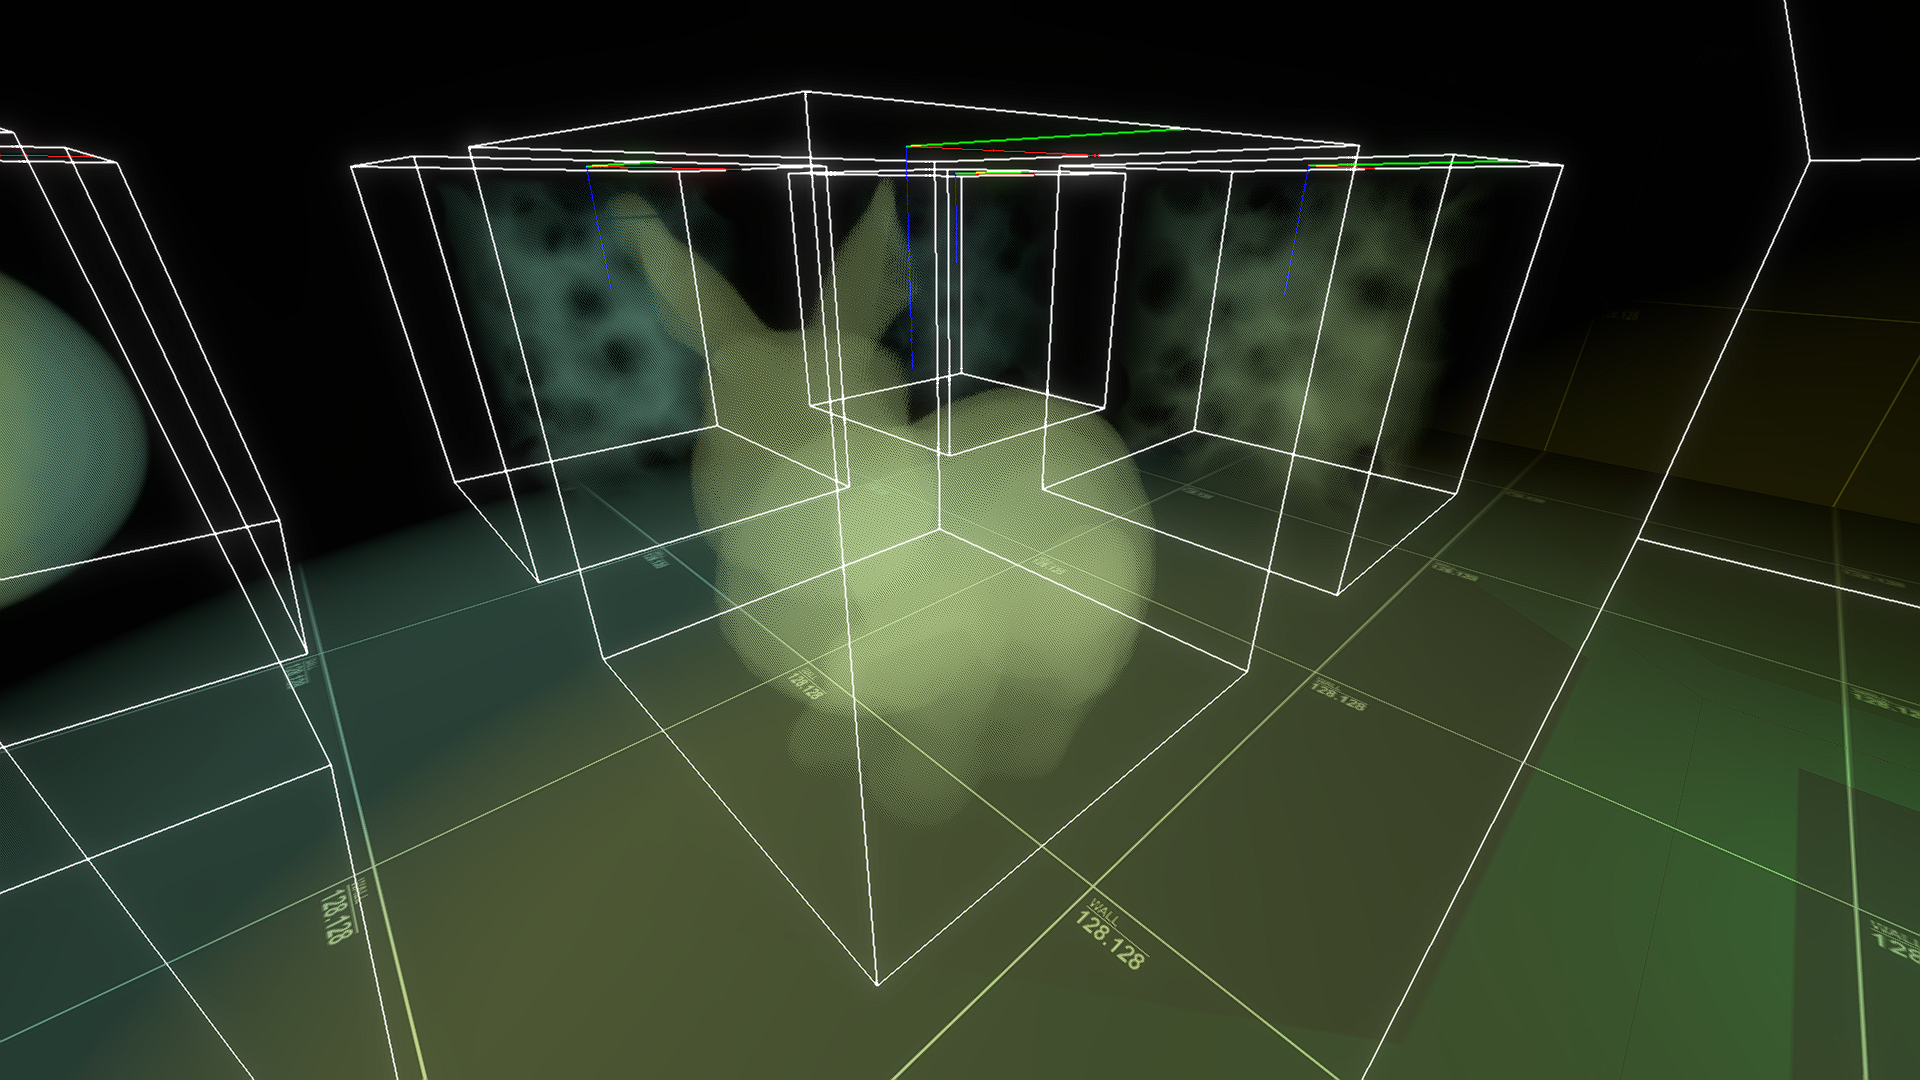
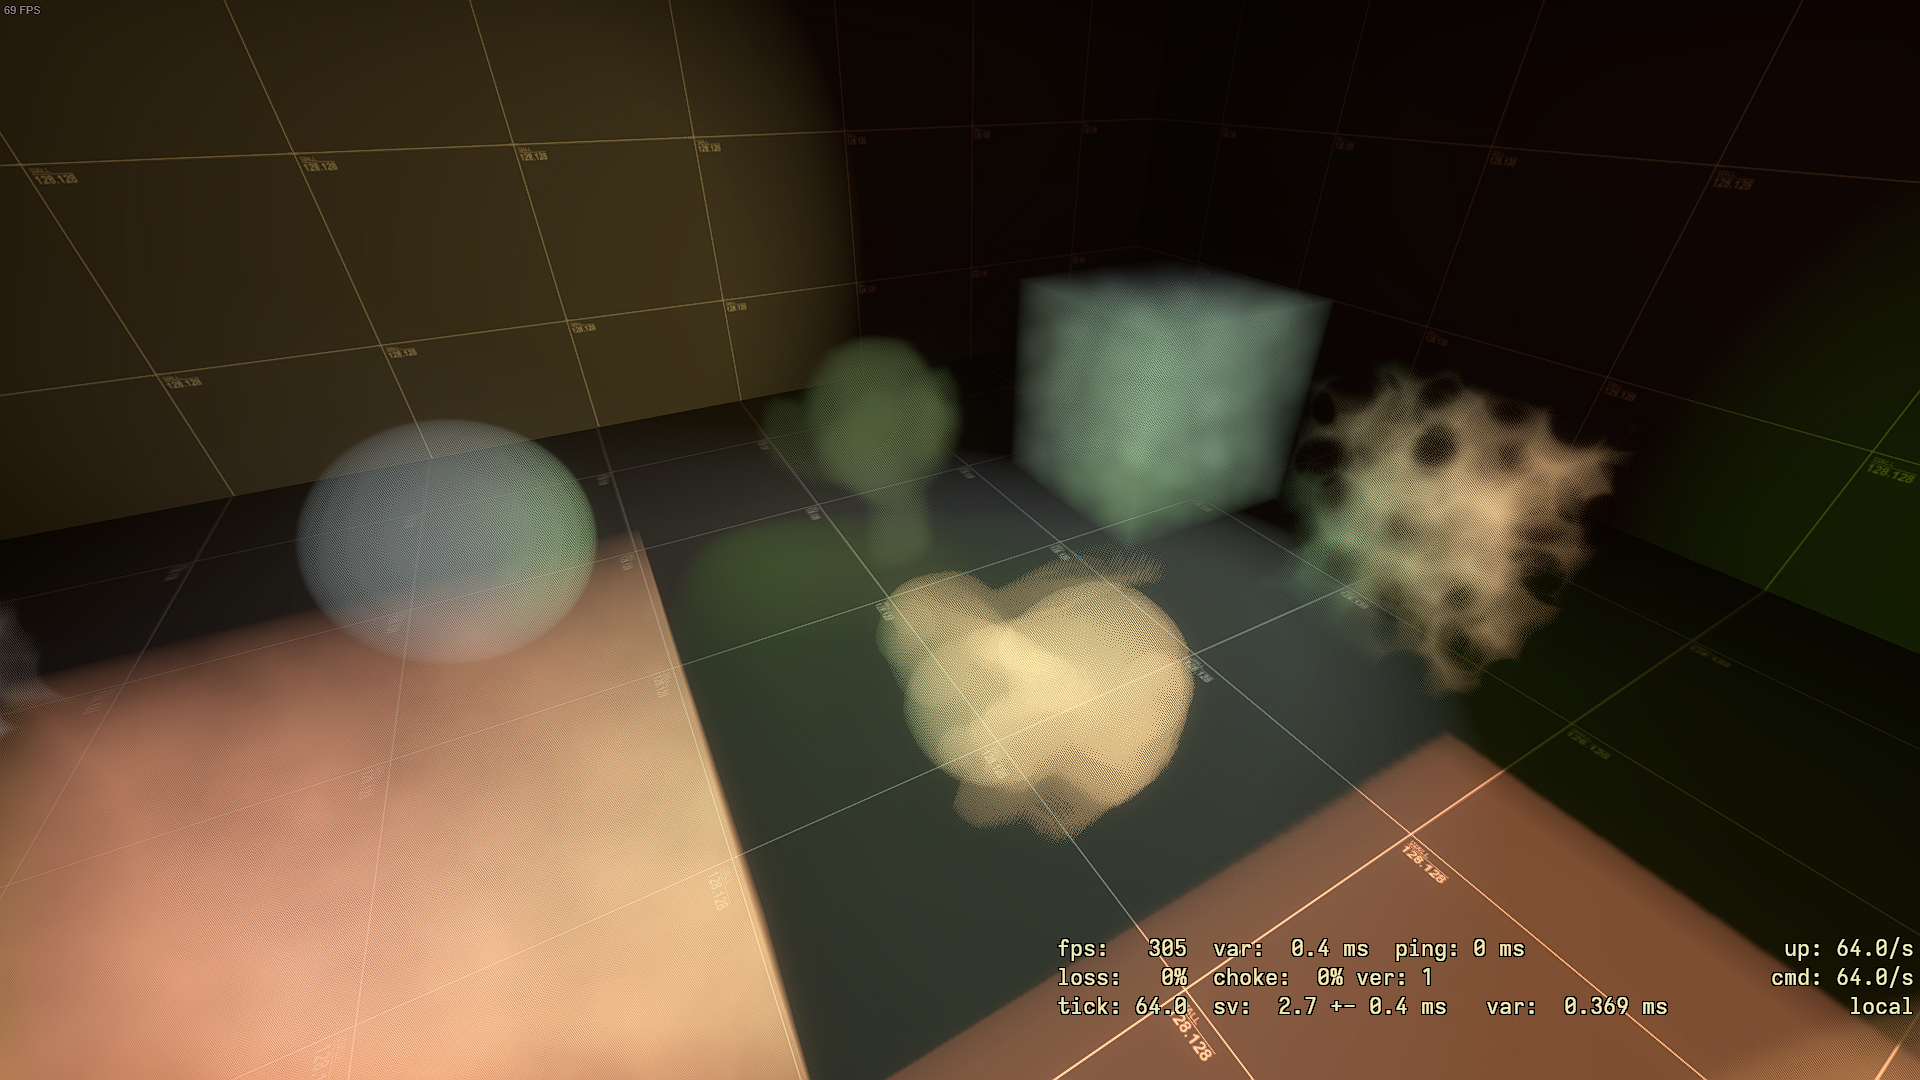
One more thing that i differed in terms of implementation is that instead of using Boxes to render lighting, I used spheres / cones depending on Light Type (spheres for point lights, cones for spot lights.) This has an added vertex pressure to the GPU but it saves us pixel shader invocations on parts of the light entity that isnt really affected by the light. It is better explained by the picture below.
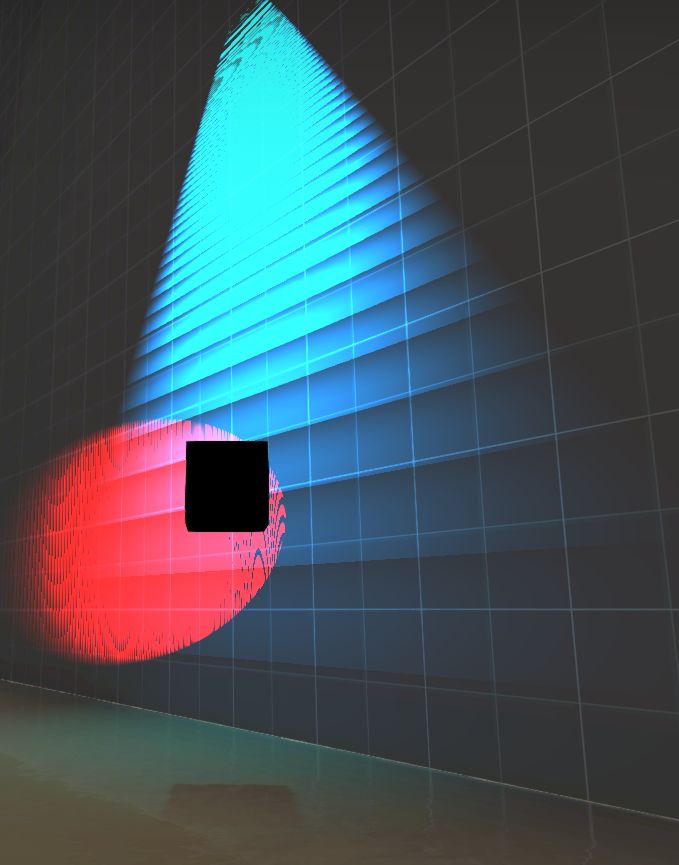
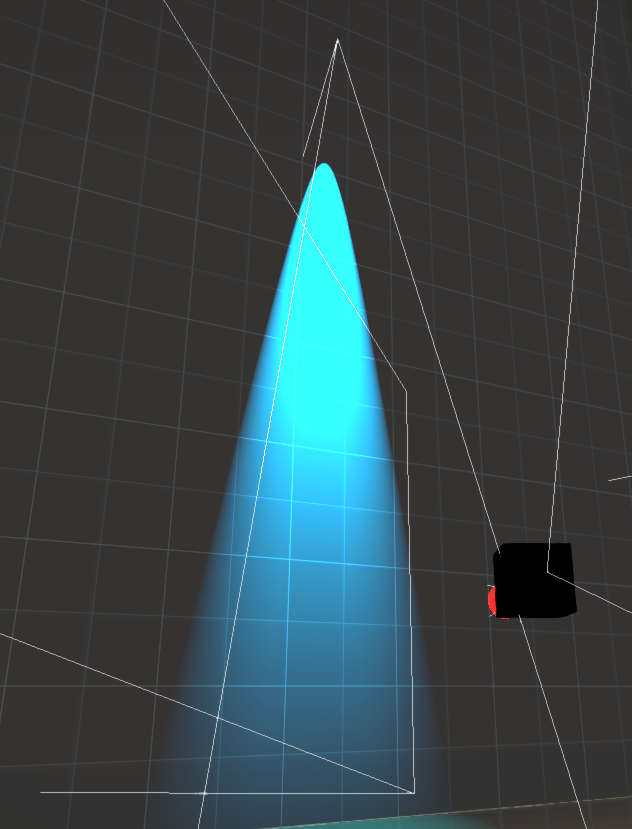
The yellow diagram is a box solution, it encompasses the light, but loosely so, a triangle / frustum proxy mesh (Orange) more closely resembles how a spot light looks like and fits more, wasting less pixel shader invocations.
Lighting Features
Shadows
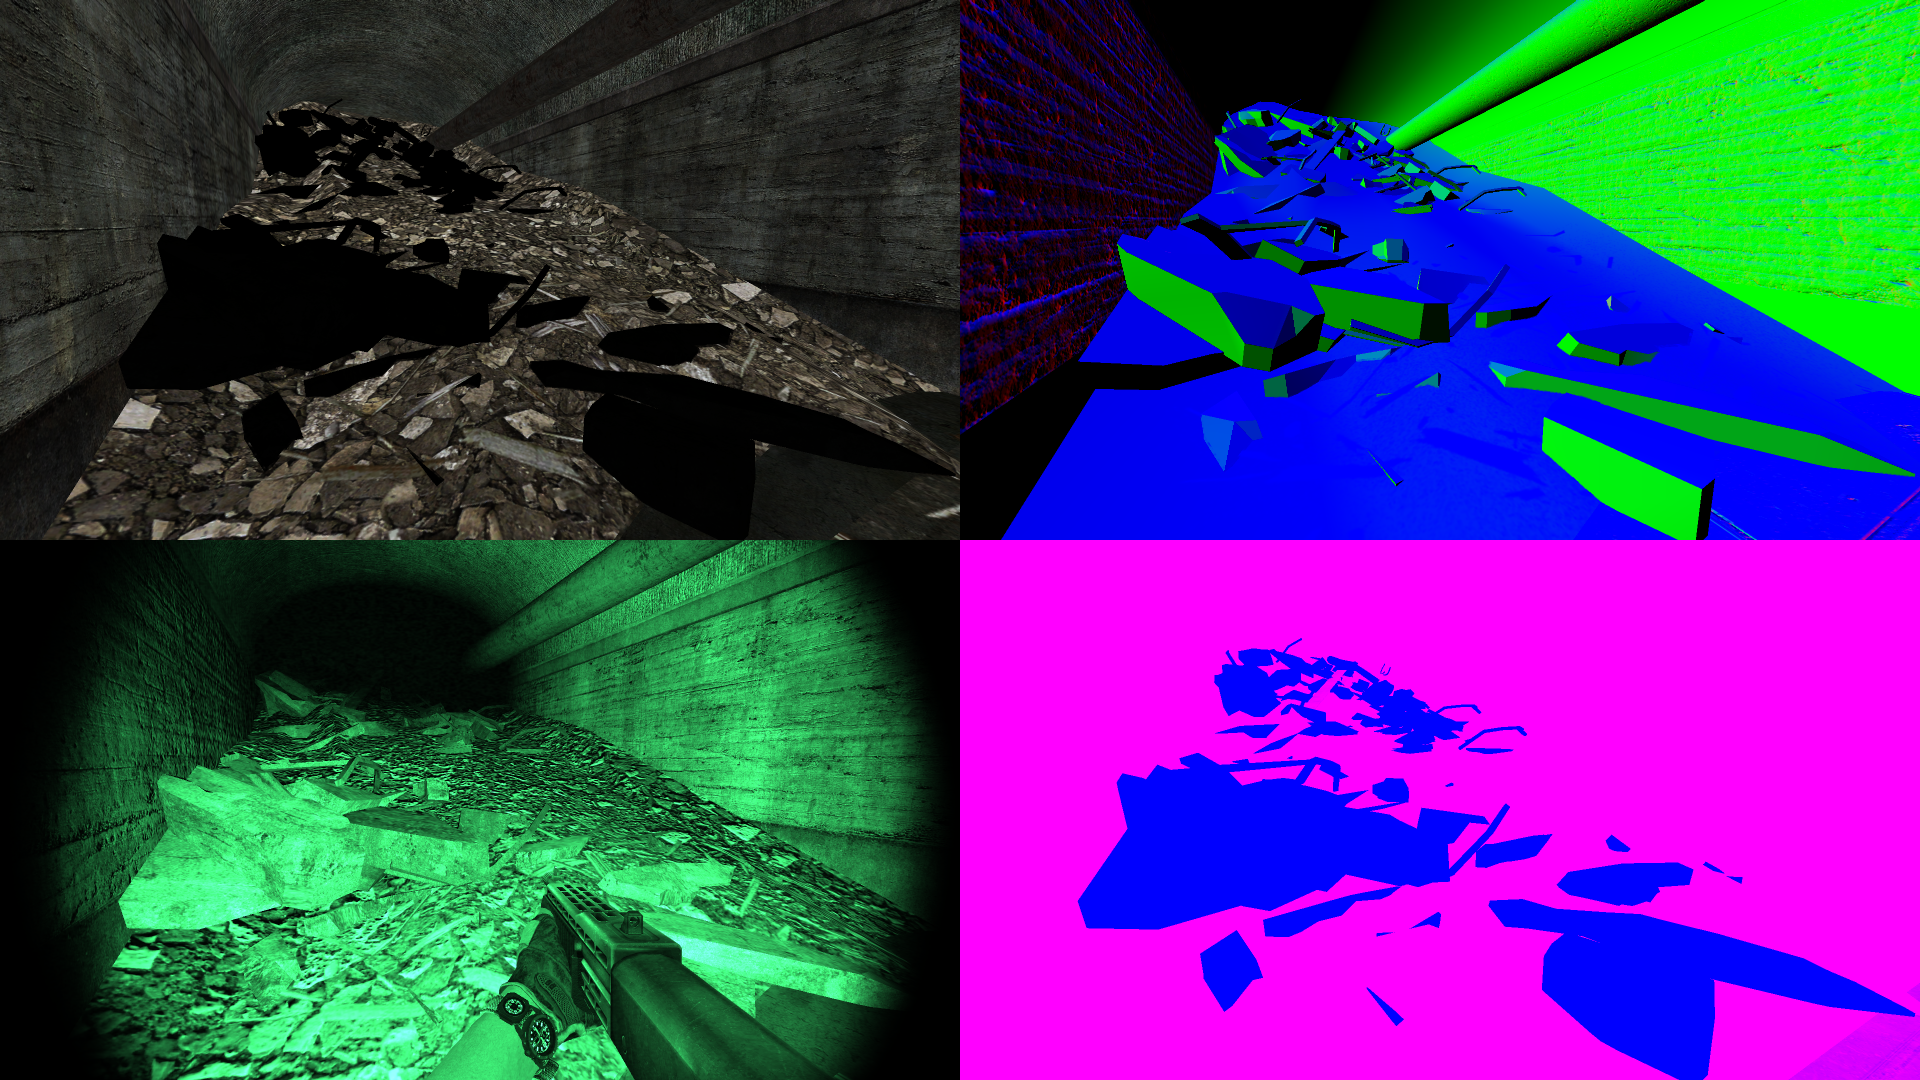
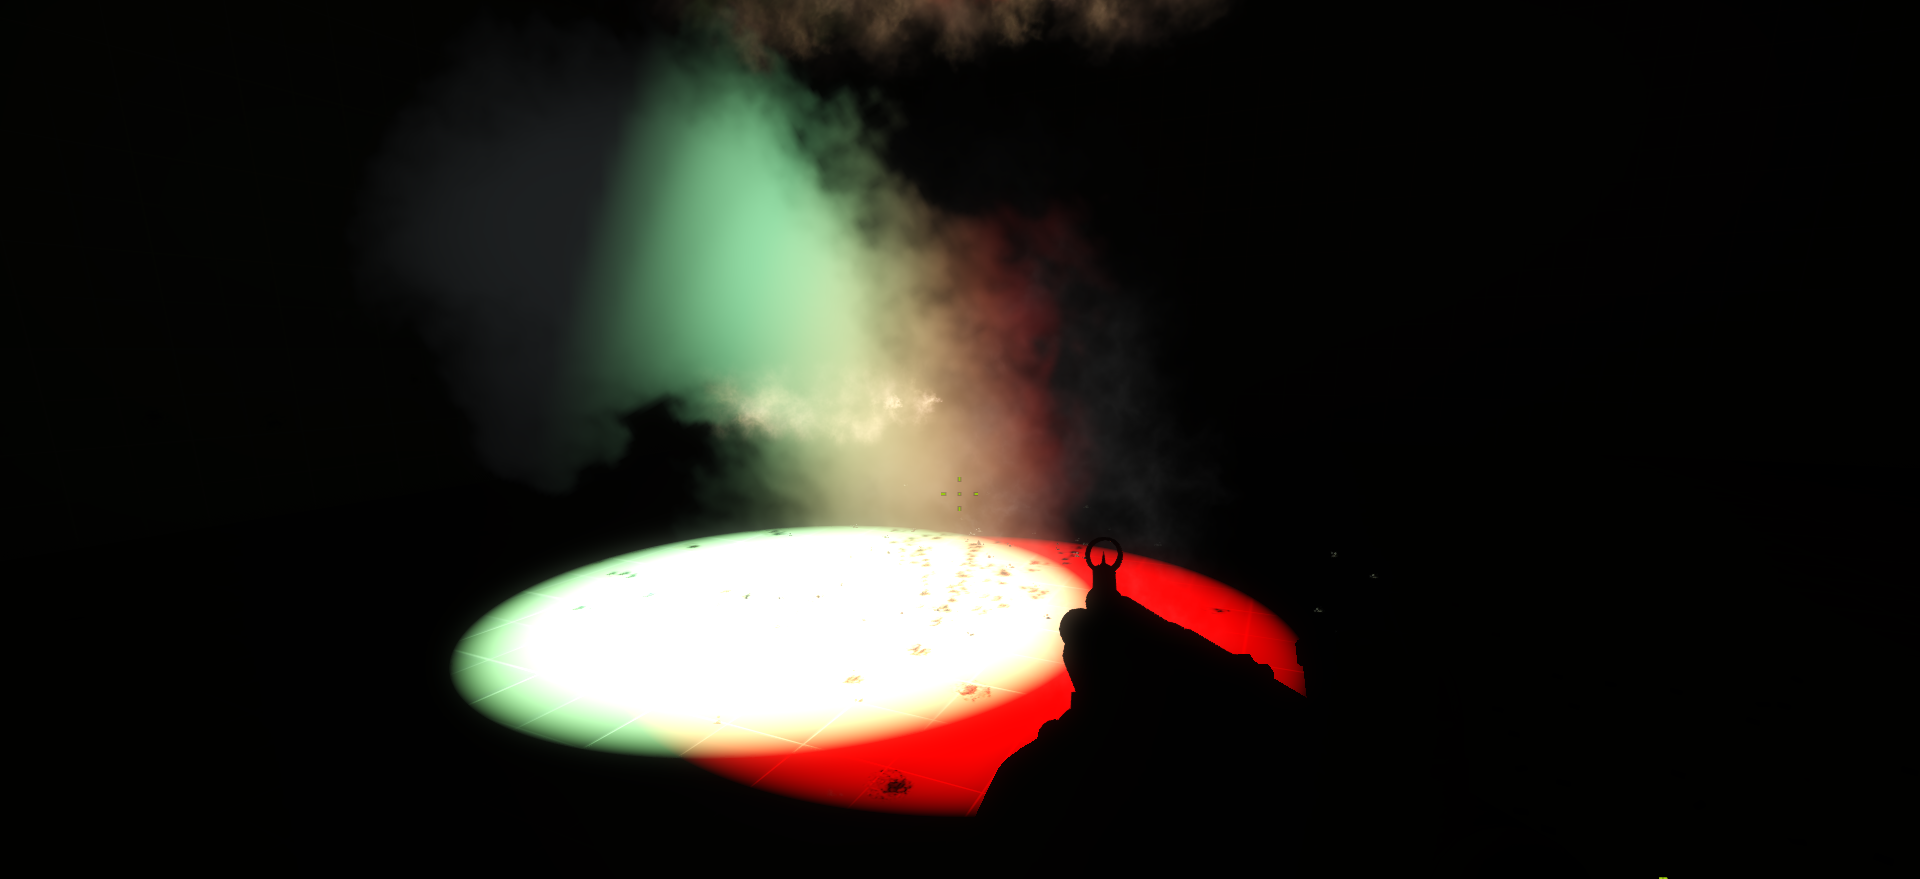
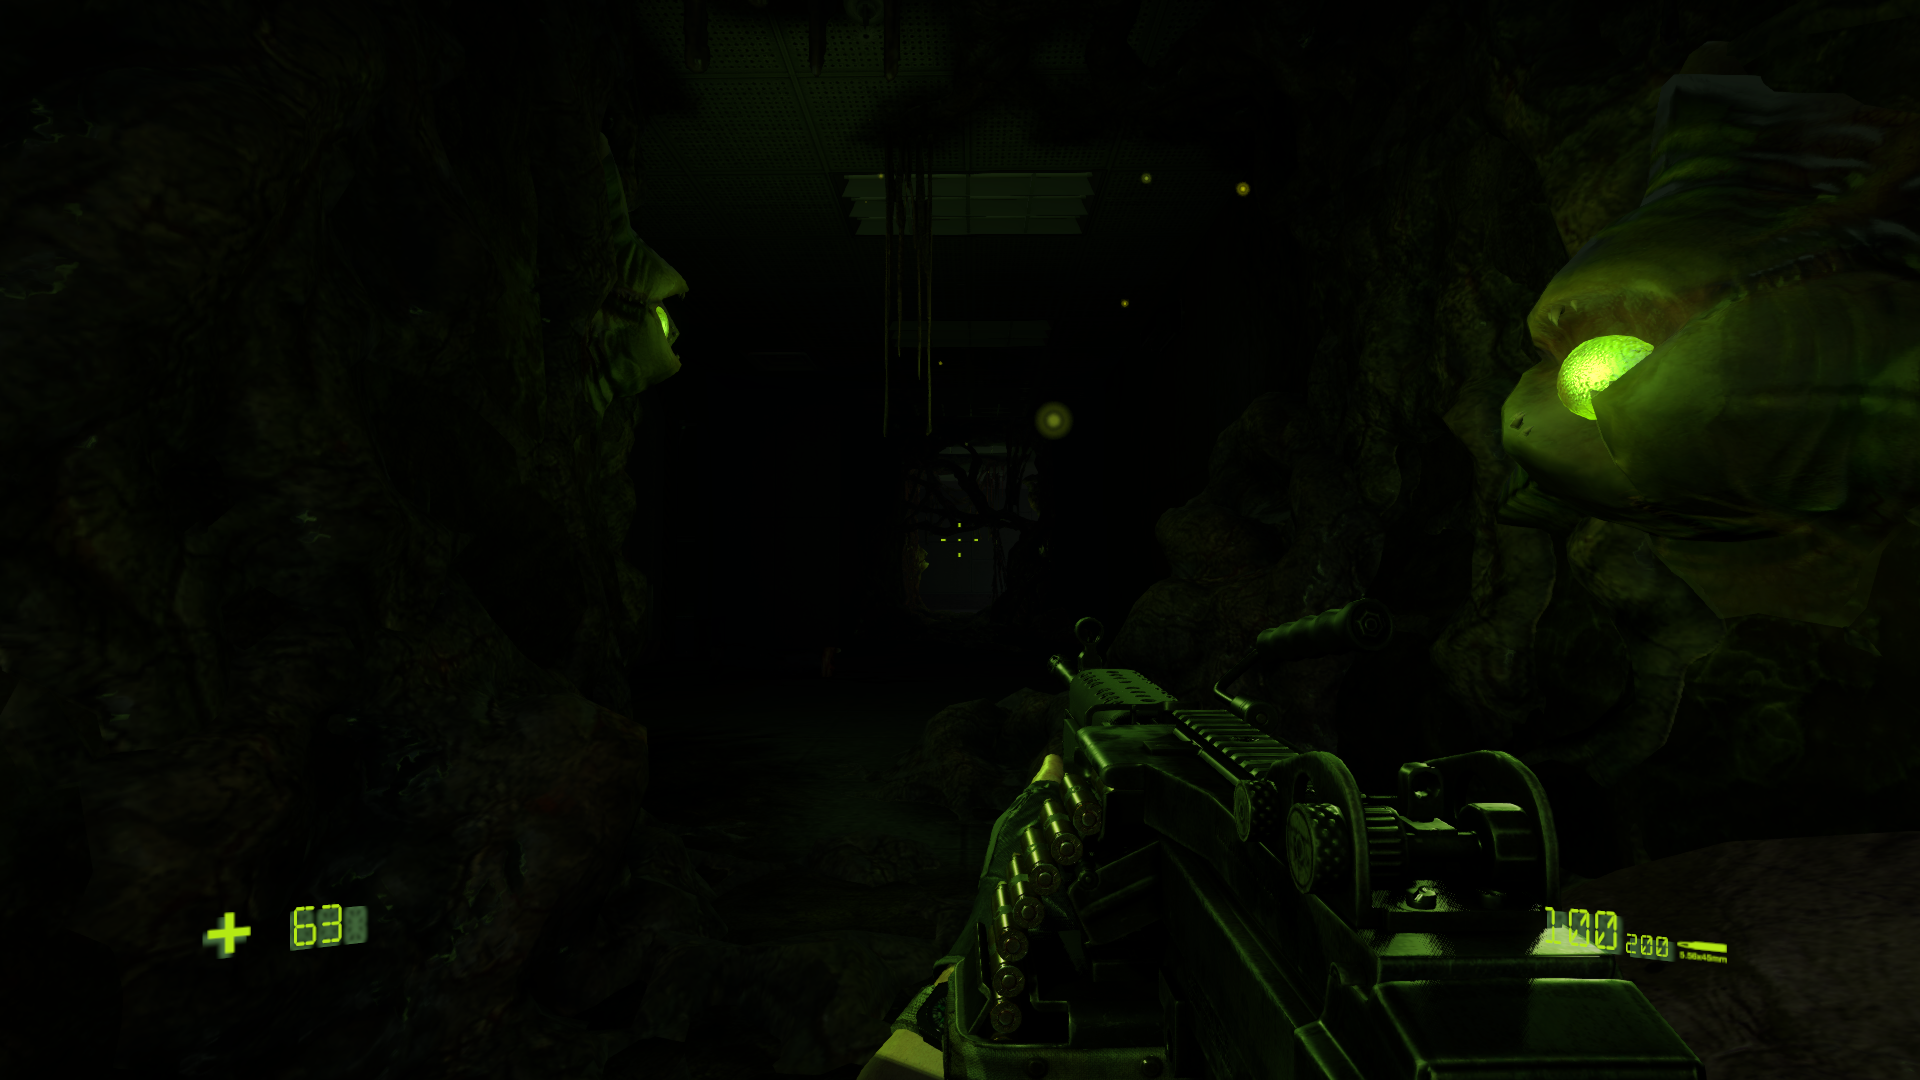
To render shadows for these lights, for spot lights i used typical projected shadowmapping. However, point lights are another beast, since point lights affect all around it, projected methods will not work/will have a lot of distortions, especially on the edges.
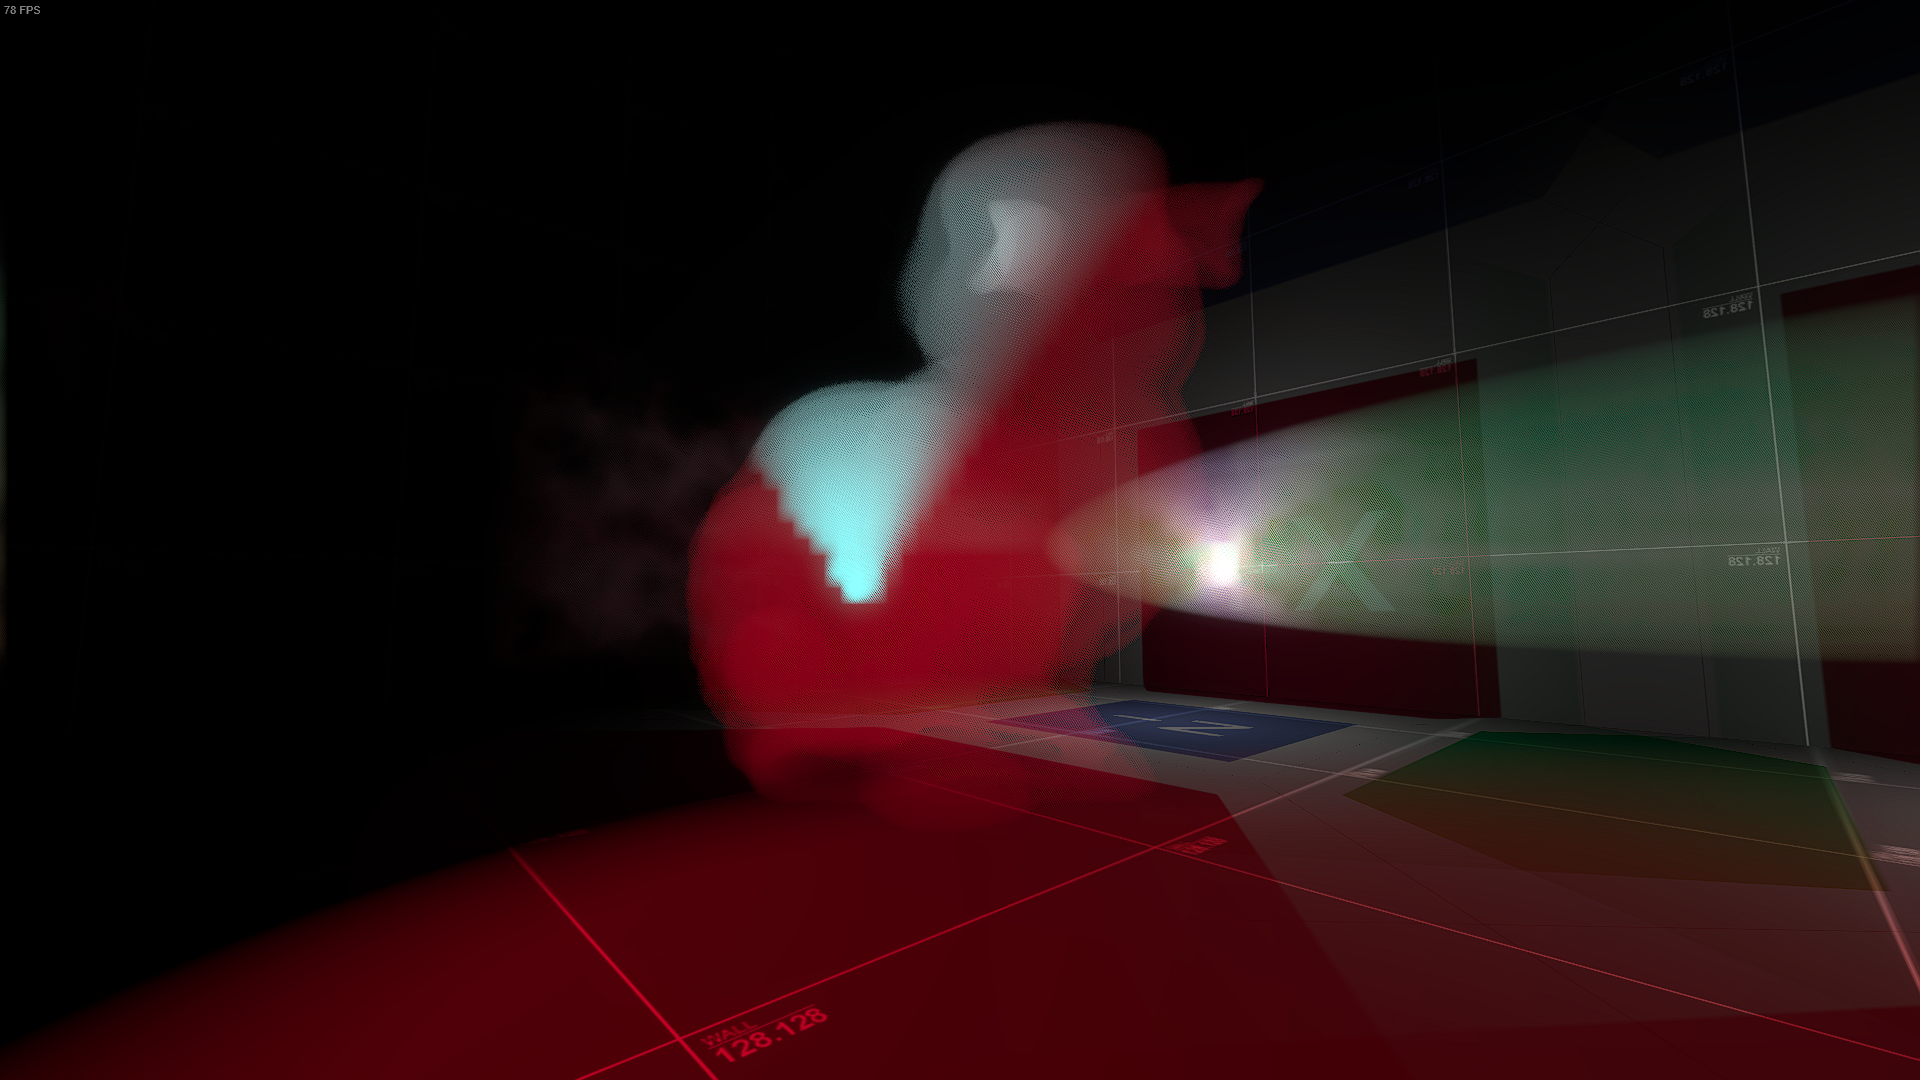
For point lights, i did consider DPSM (Dual Paraboloid Shadow Mapping) but the inherent limitation by using vertex shader to do the paraboloid projection hurts low-poly surfaces, especially the world geometry.
OBM’s Shadow Implementation. Left image is the 2 DPSM views to render each hemisphere, Right image is the lit image with DPSM artifacts
Since DPSM proved to be an inadequate solution especially on world shadow casting geometry, I opted for cubemap shadows instead. This requires the shadowmap to be rendered on all 6 faces of the light, but suffers minimally from artifacts.

I also experimented with alternative shadowing techniques like Variance Shadow Mapping and Exponential Shadow Mapping, but later decided that the simplicity of a Gaussian PCF kernel outweighs the potential performance benefits of such alternative shadowmapping methods.
All the shadows are merged together in a Shadow Map Atlas to save texture slots for D3D9 (D3D9 has a maximum of 16 texture/sampler pairs for each shader.)
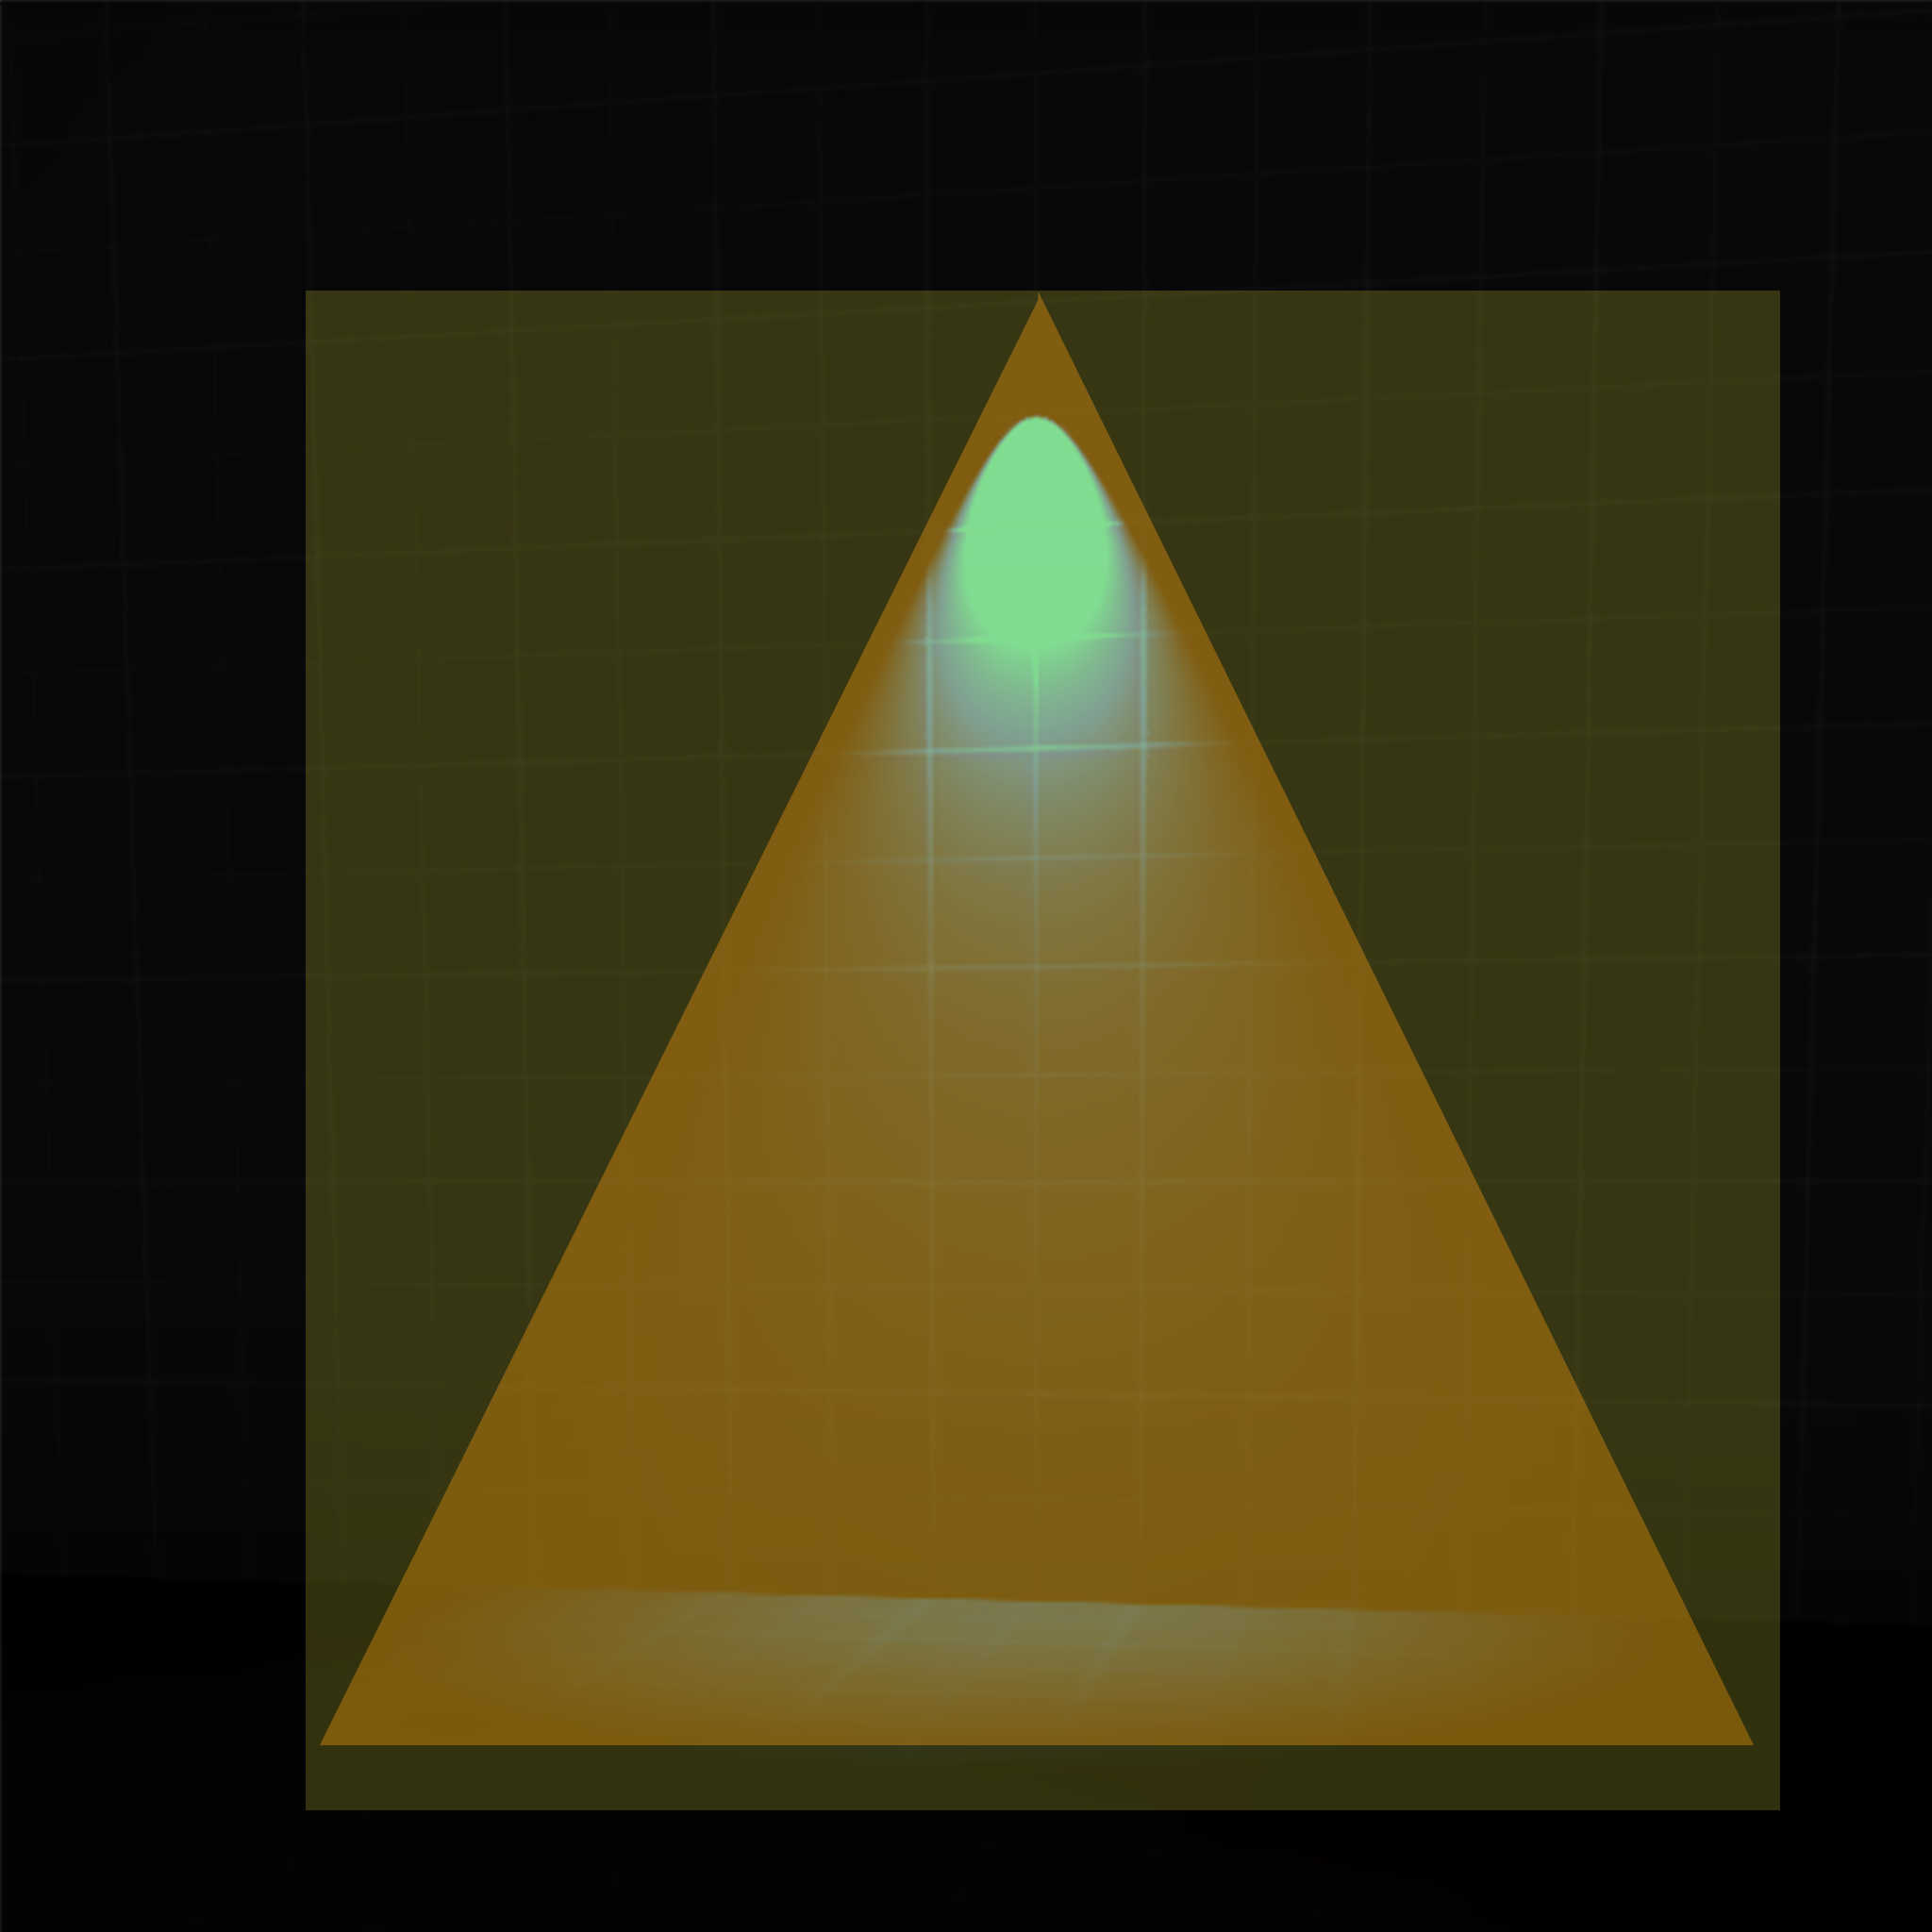
Area Lighting
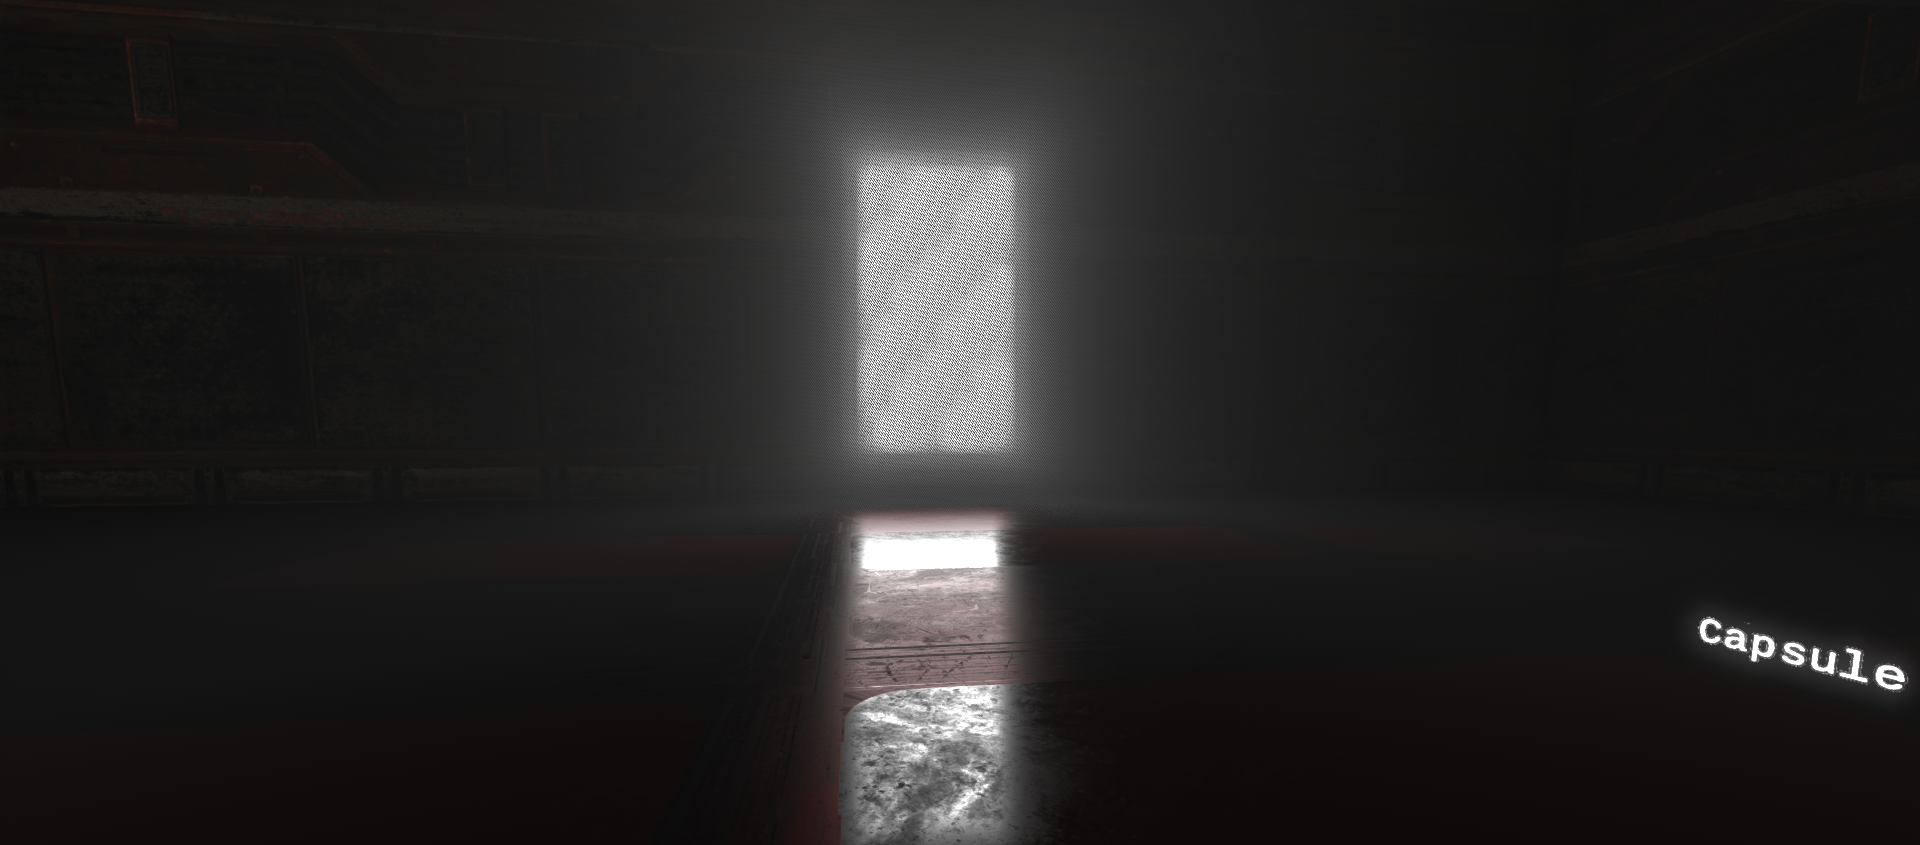
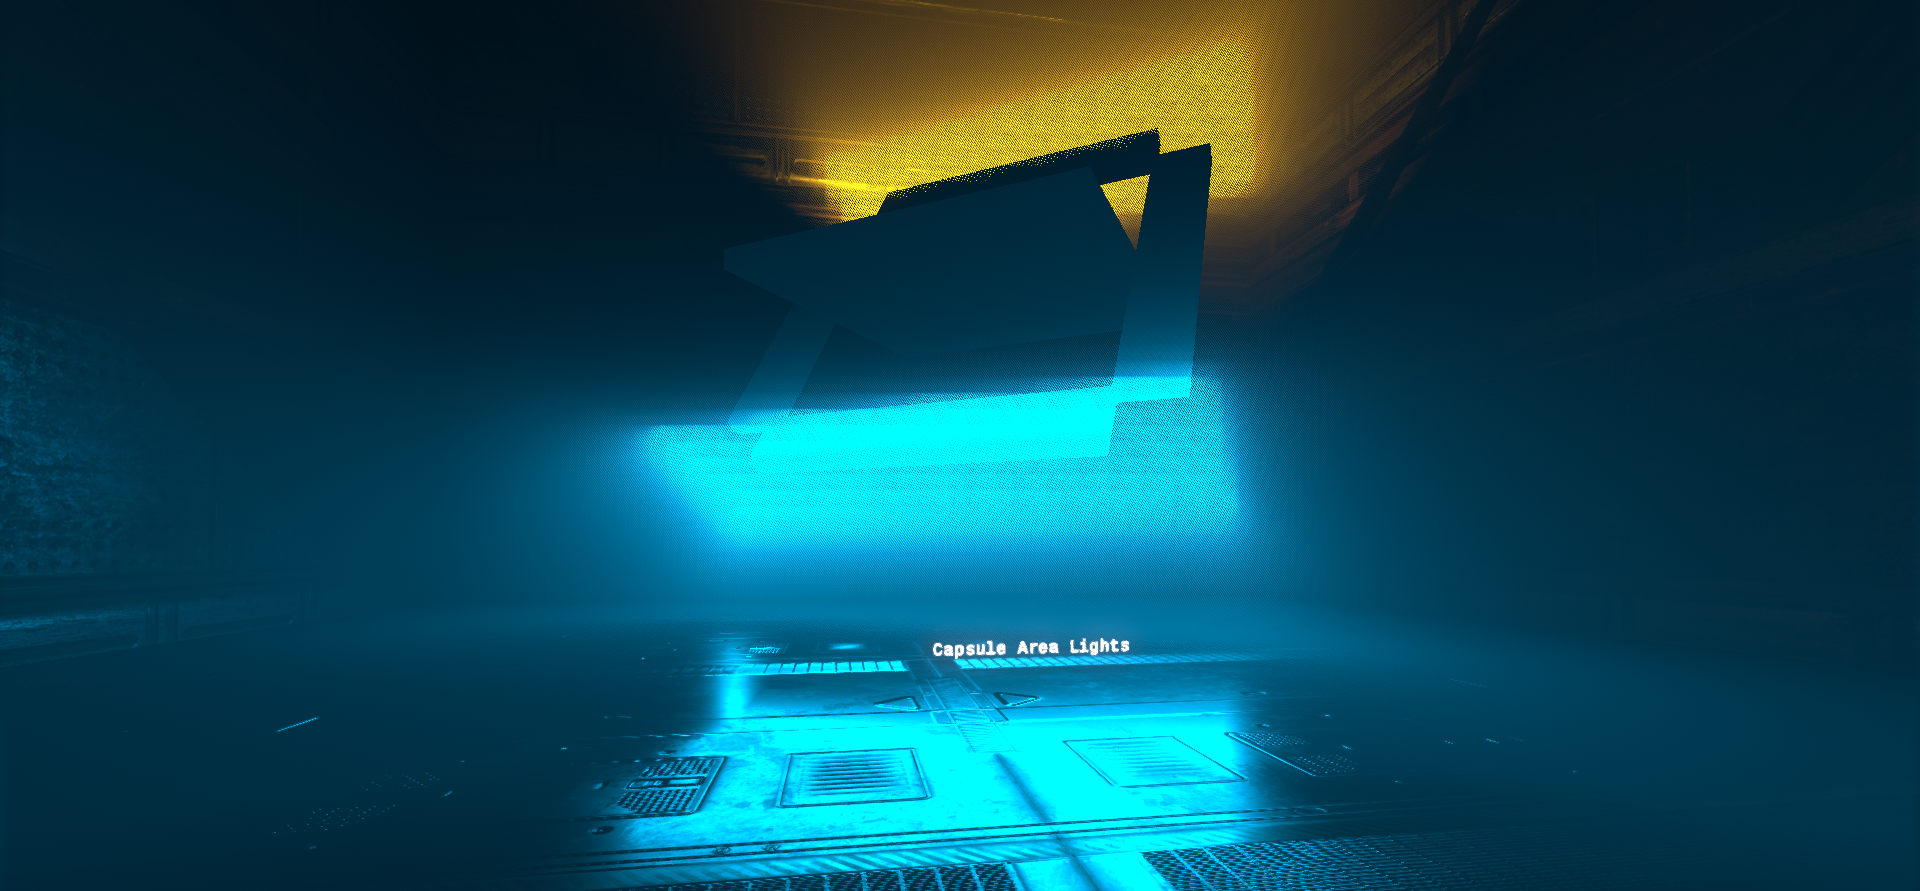
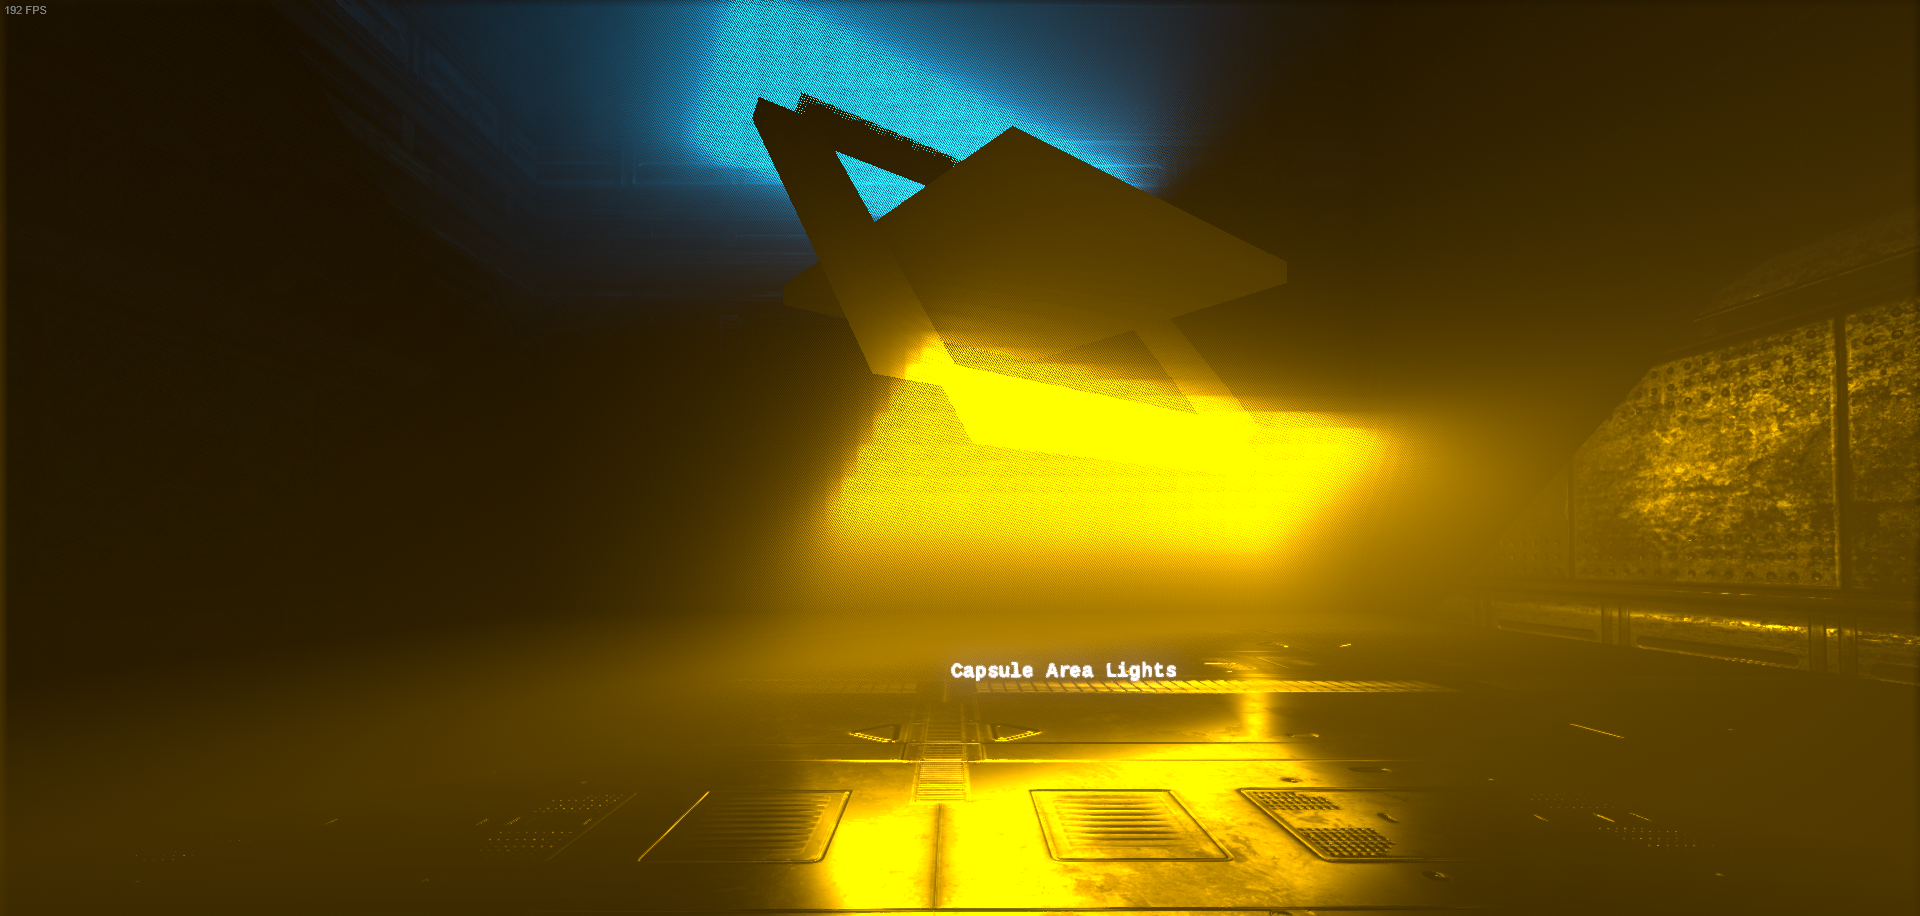
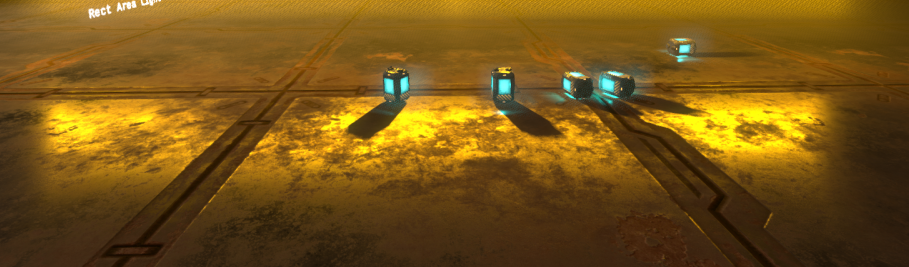
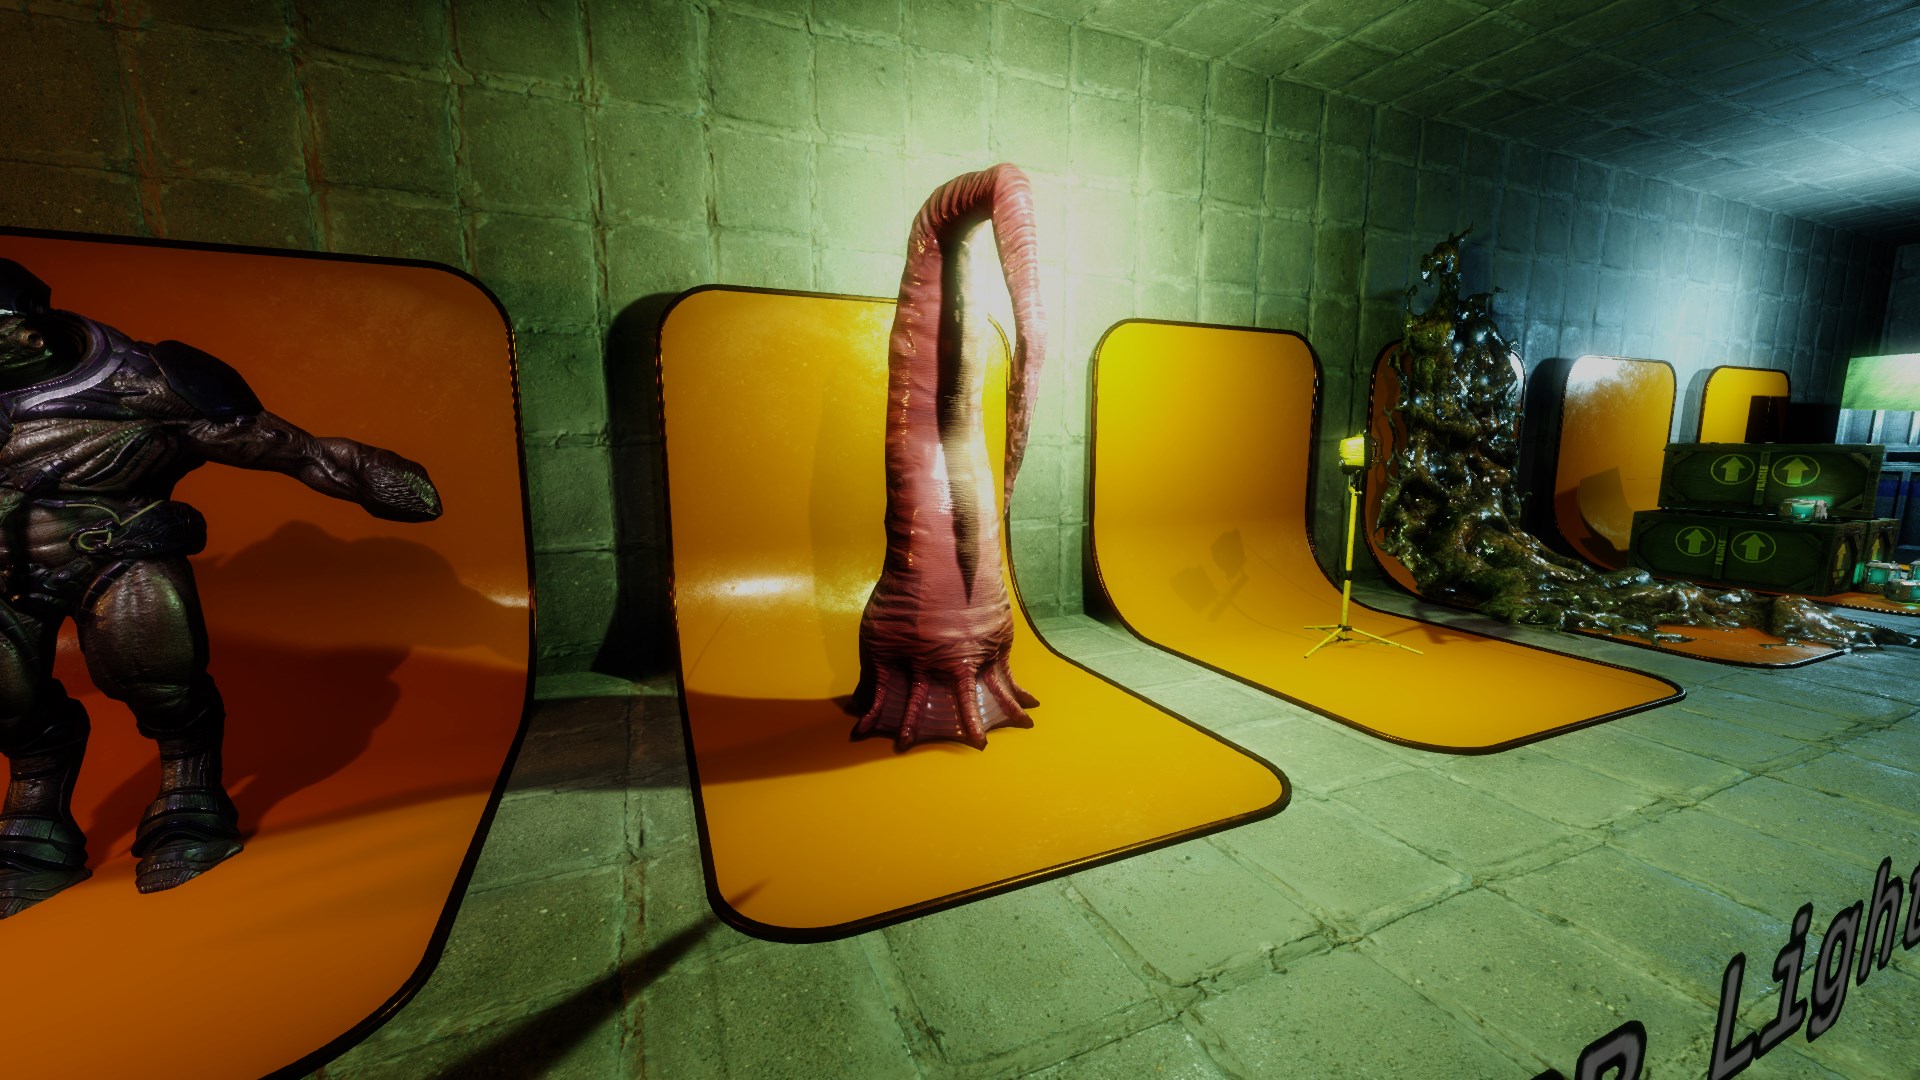
Real-world lighting doesnt come from a single infinitesimal point, but rather, there is an object that emits the light, and that object has a shape. For OBM I implemented 2 types of shaped lights: Capsule and Planar. Spherical lights can be achieved using the capsule mode without any length, only a radius. Planar lights need side length, side width, and a light normal to determine the plane.
The light shape not only affects the specular reflections, but also the volumetric lighting that the light emits as well.
This is especially useful on indoor-outdoor transitions, large LCD Screen lighting, flourescent bulbs, and other real life light sources that arent point emitters.
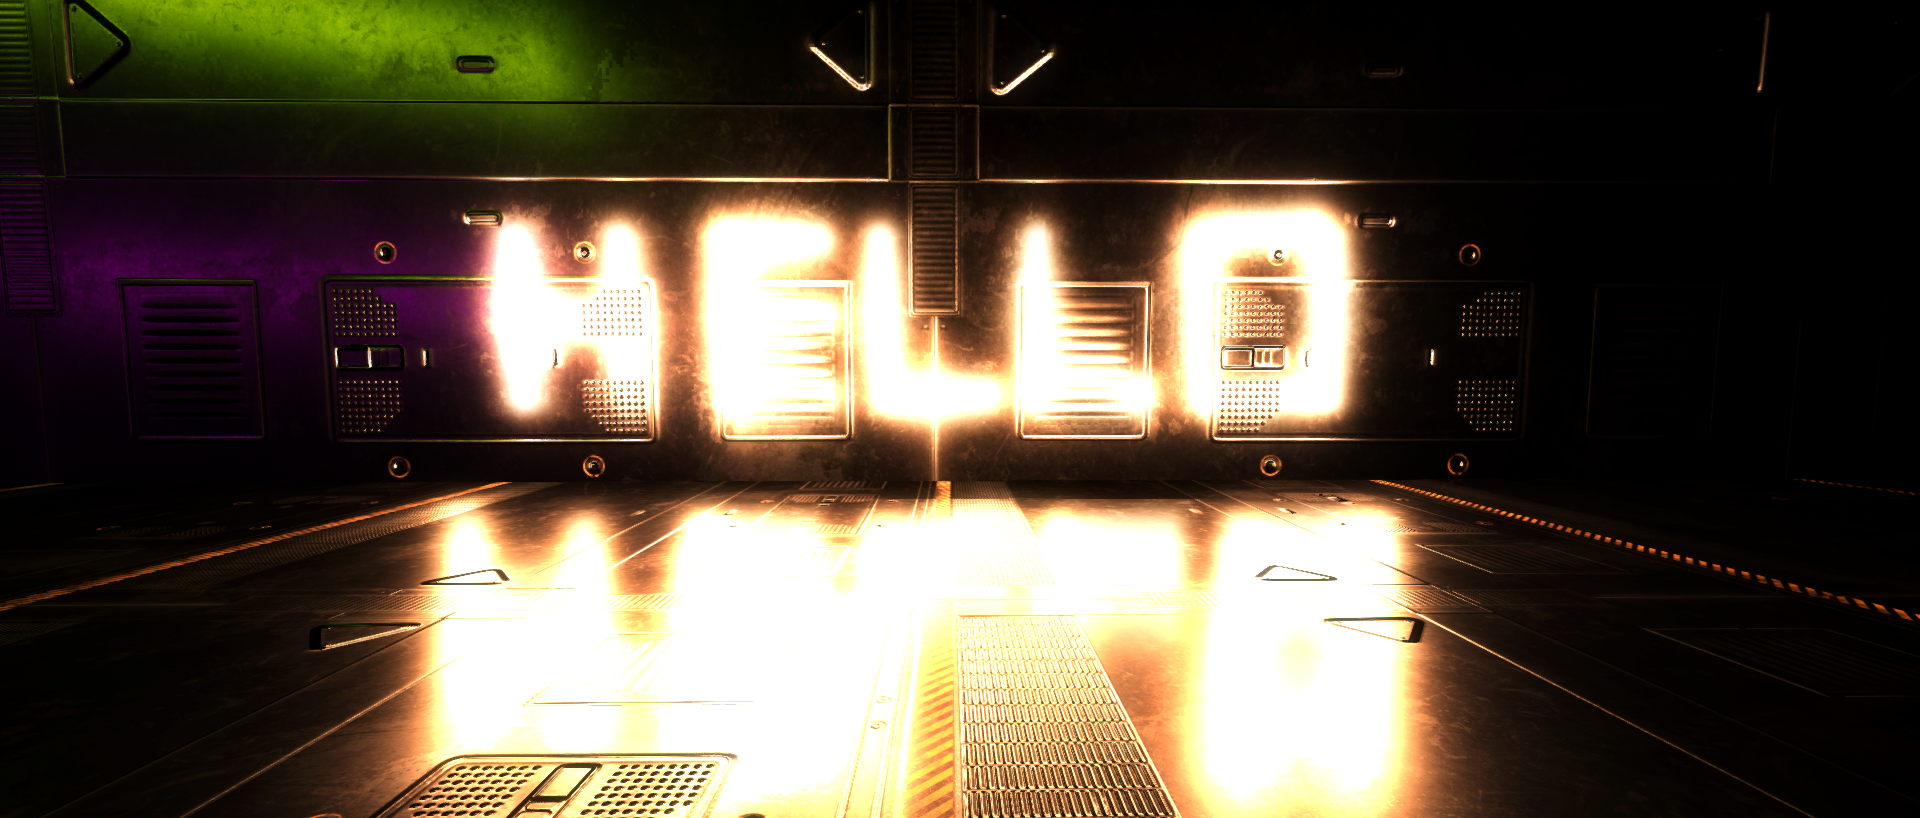
Volumetric Lighting
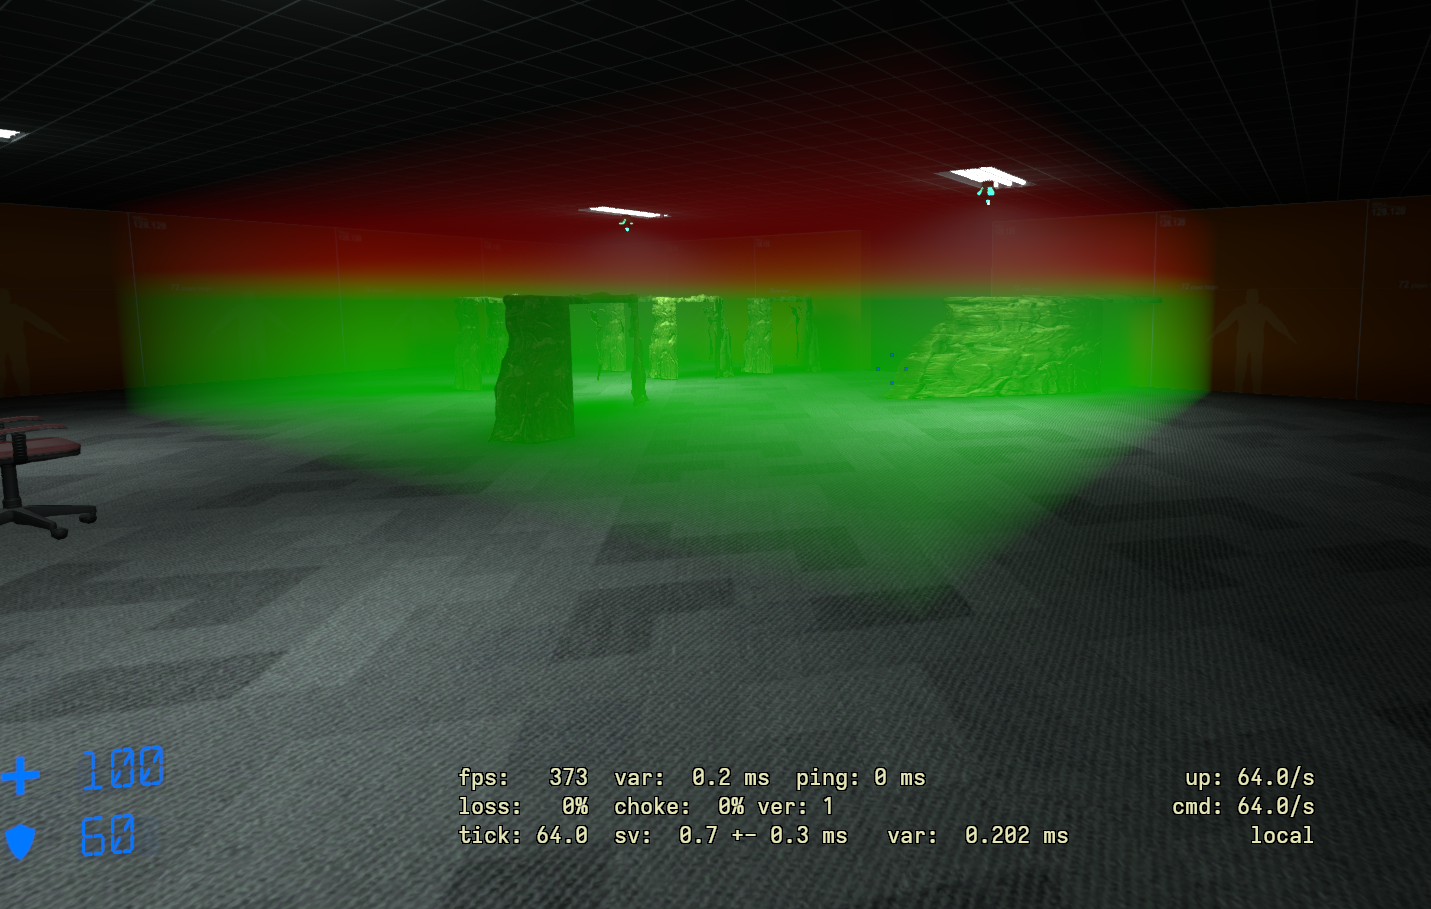
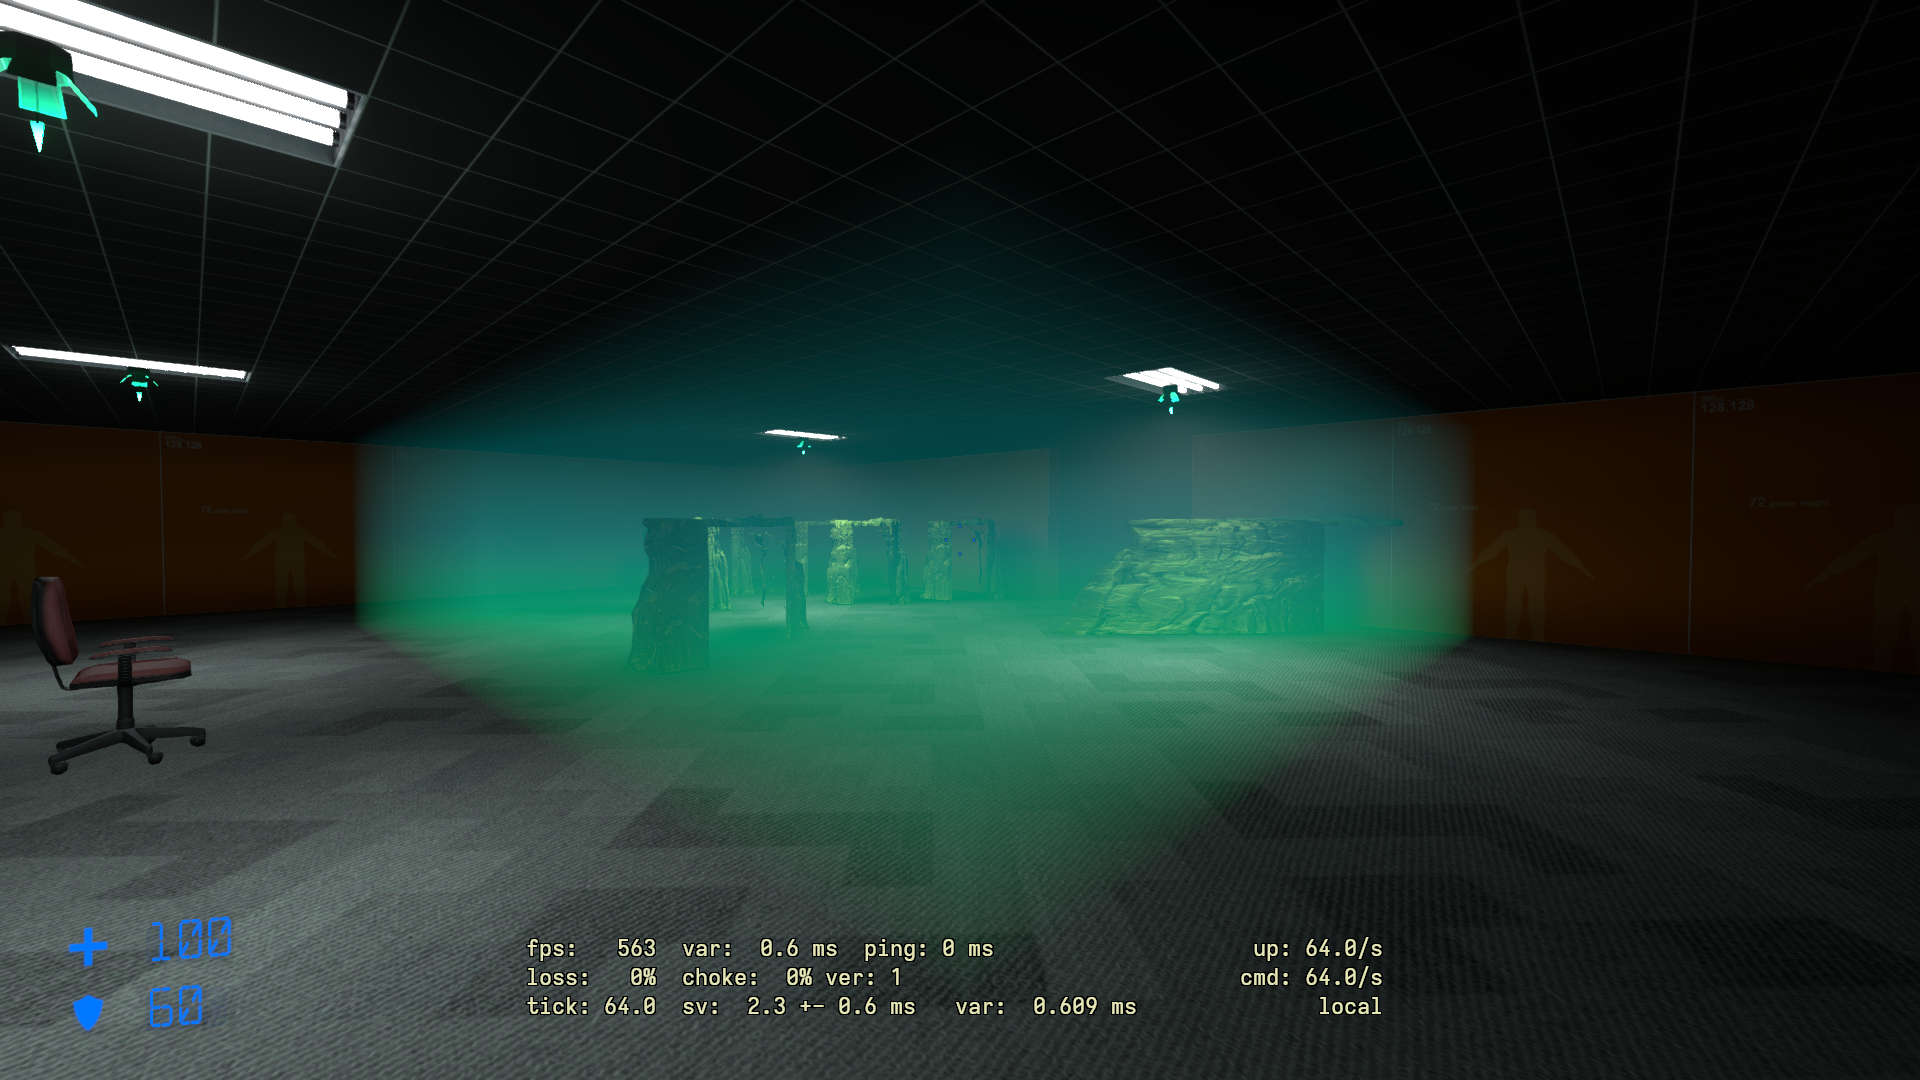
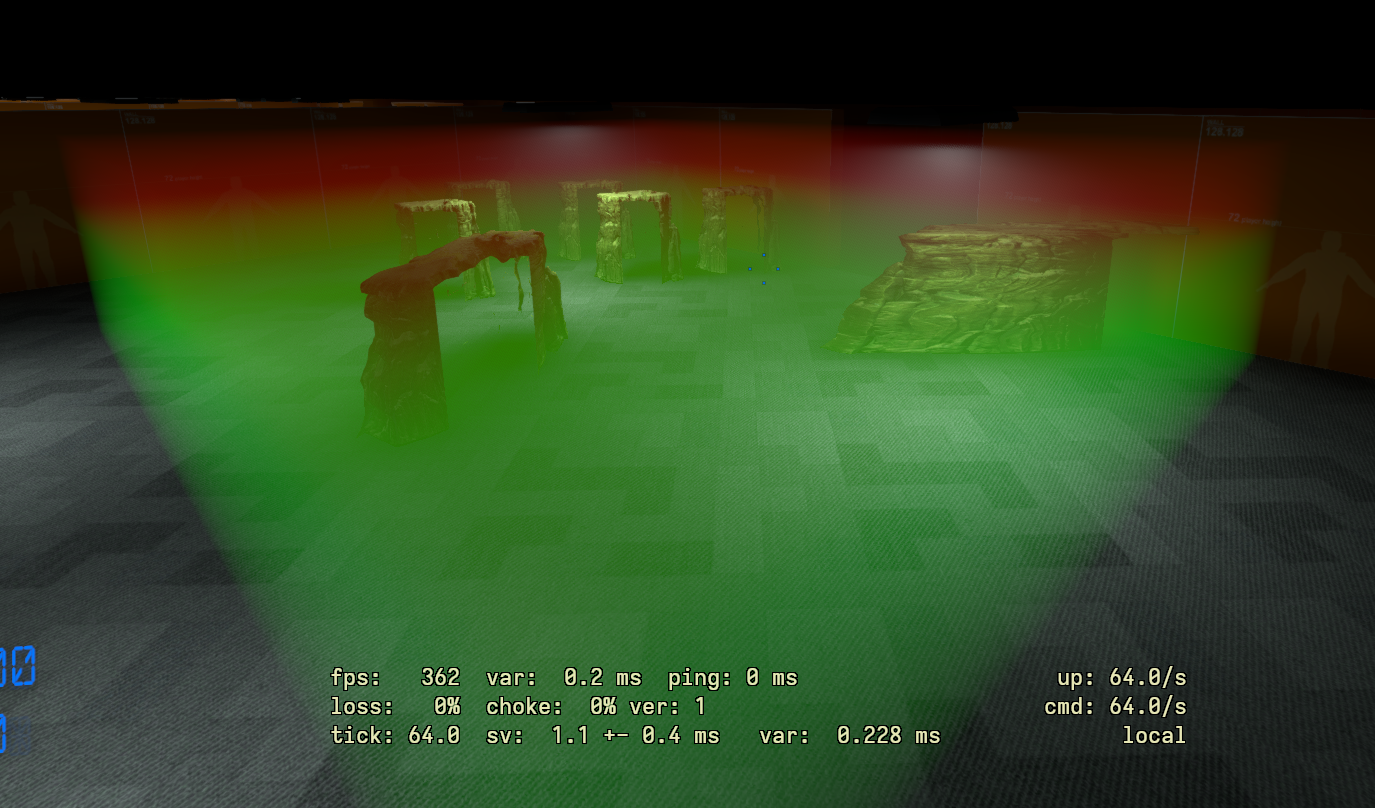
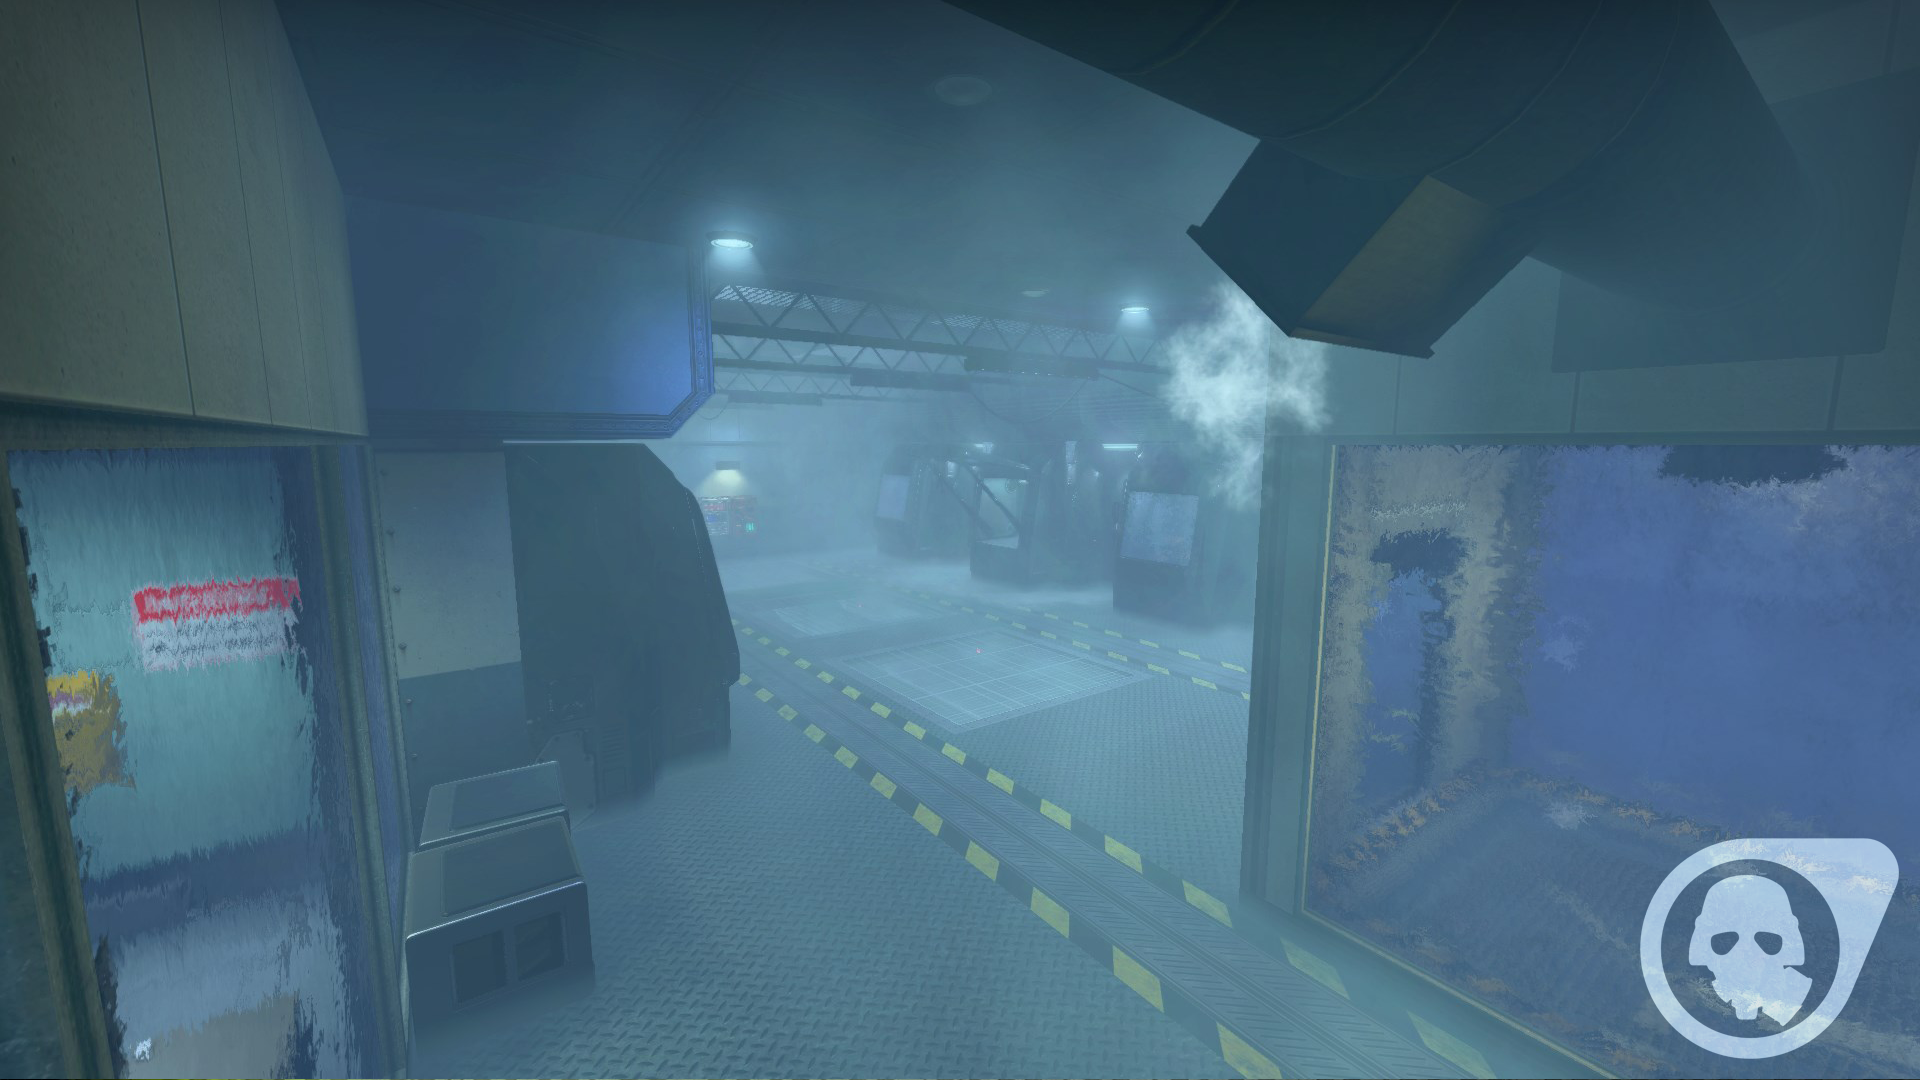
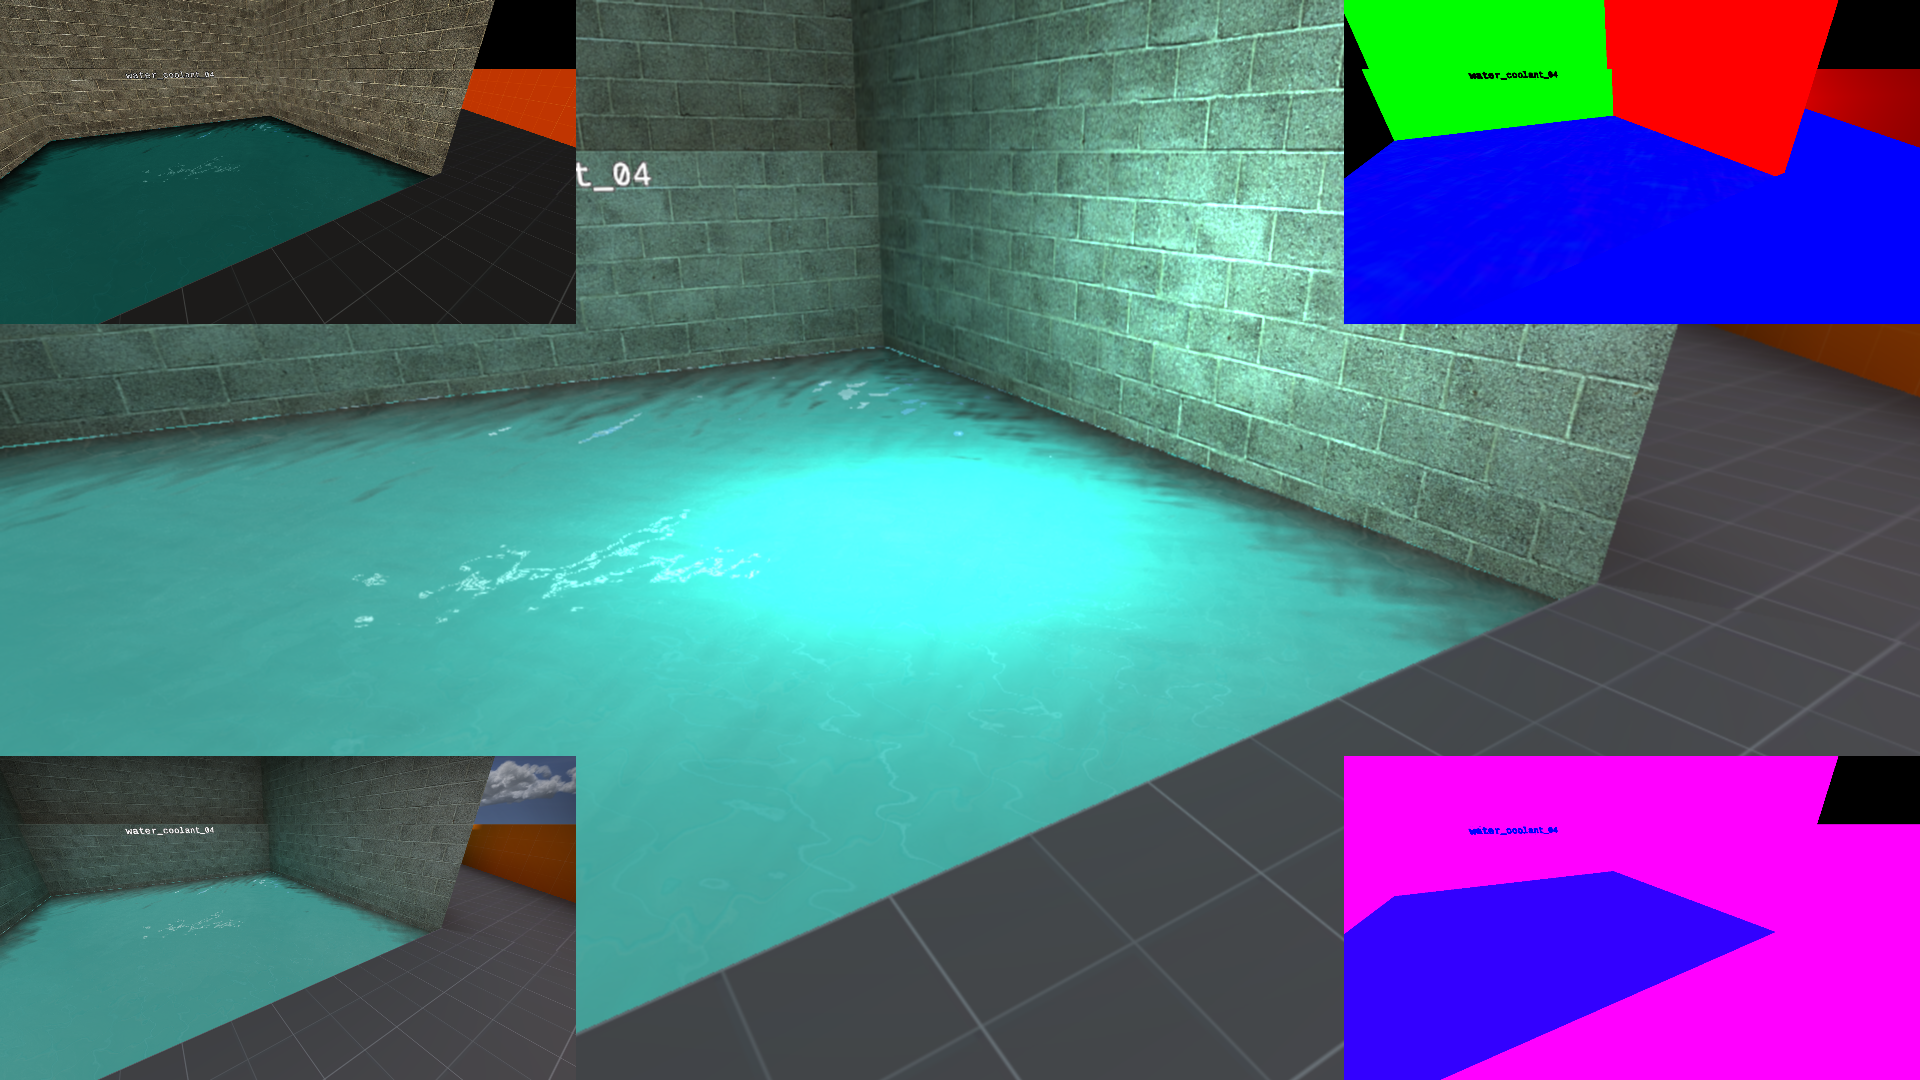
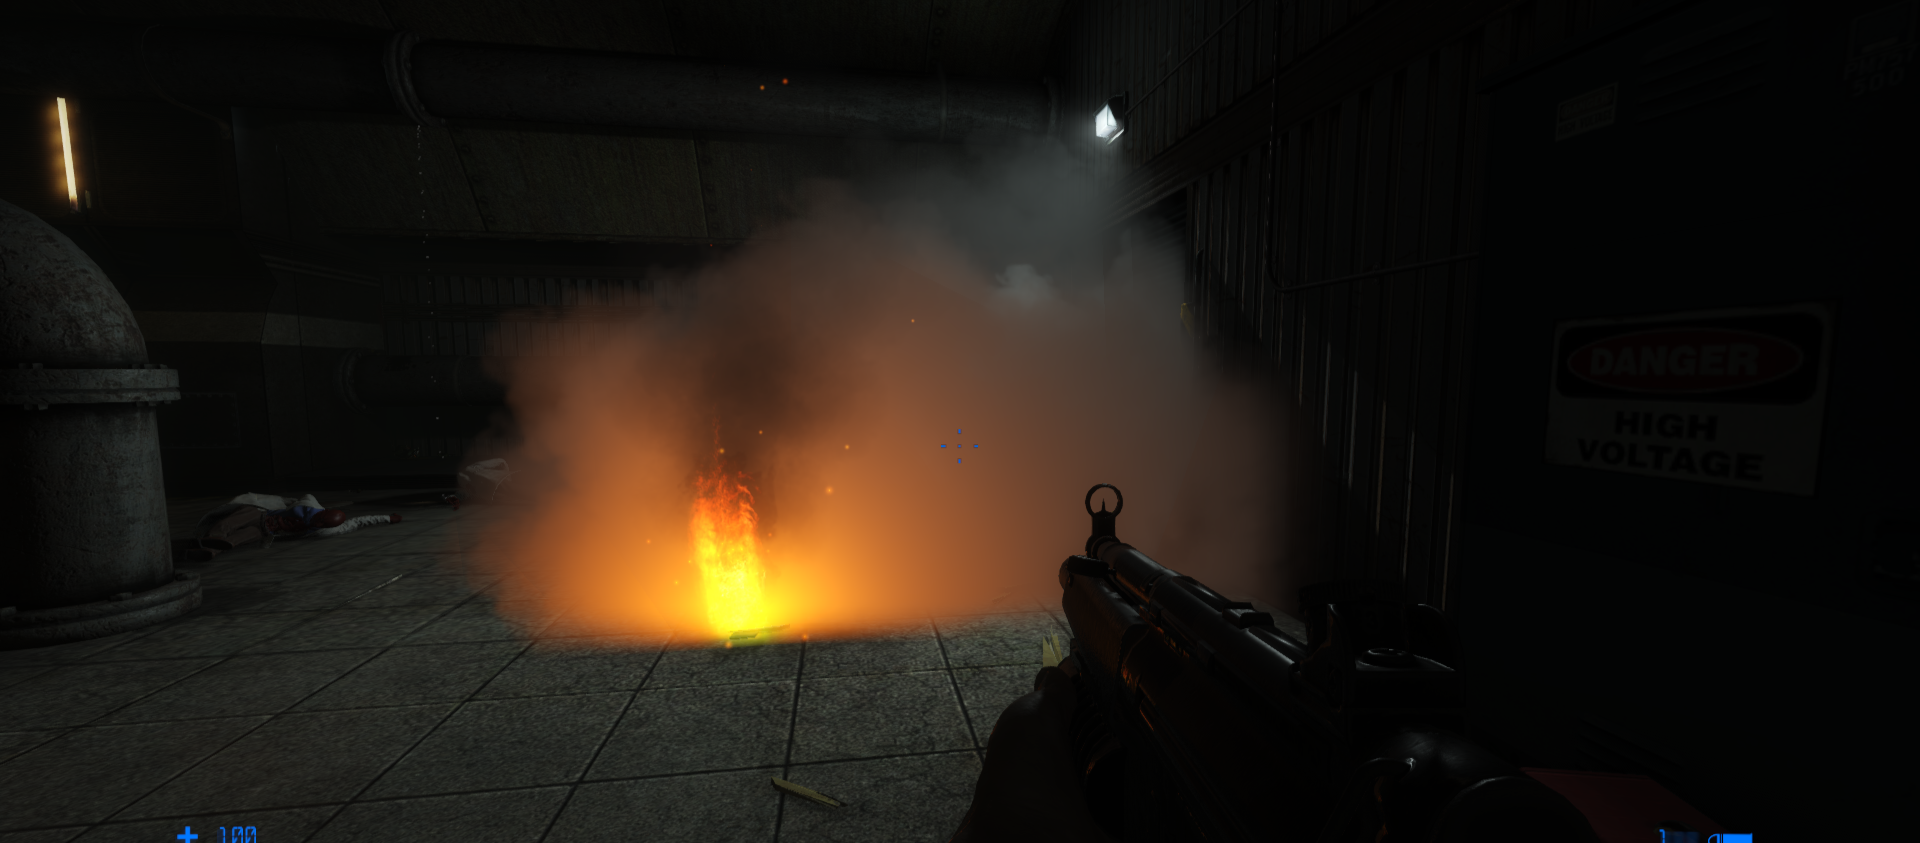
Aside from normal surfaces, in order to have a realistic unified lighting, the lighting must also affect volumetric objects. This includes translucent surfaces, Smoke, Fog, and other objects. In order to achieve this, I implemented a froxel solution on D3D9 using a texture strip atlas.
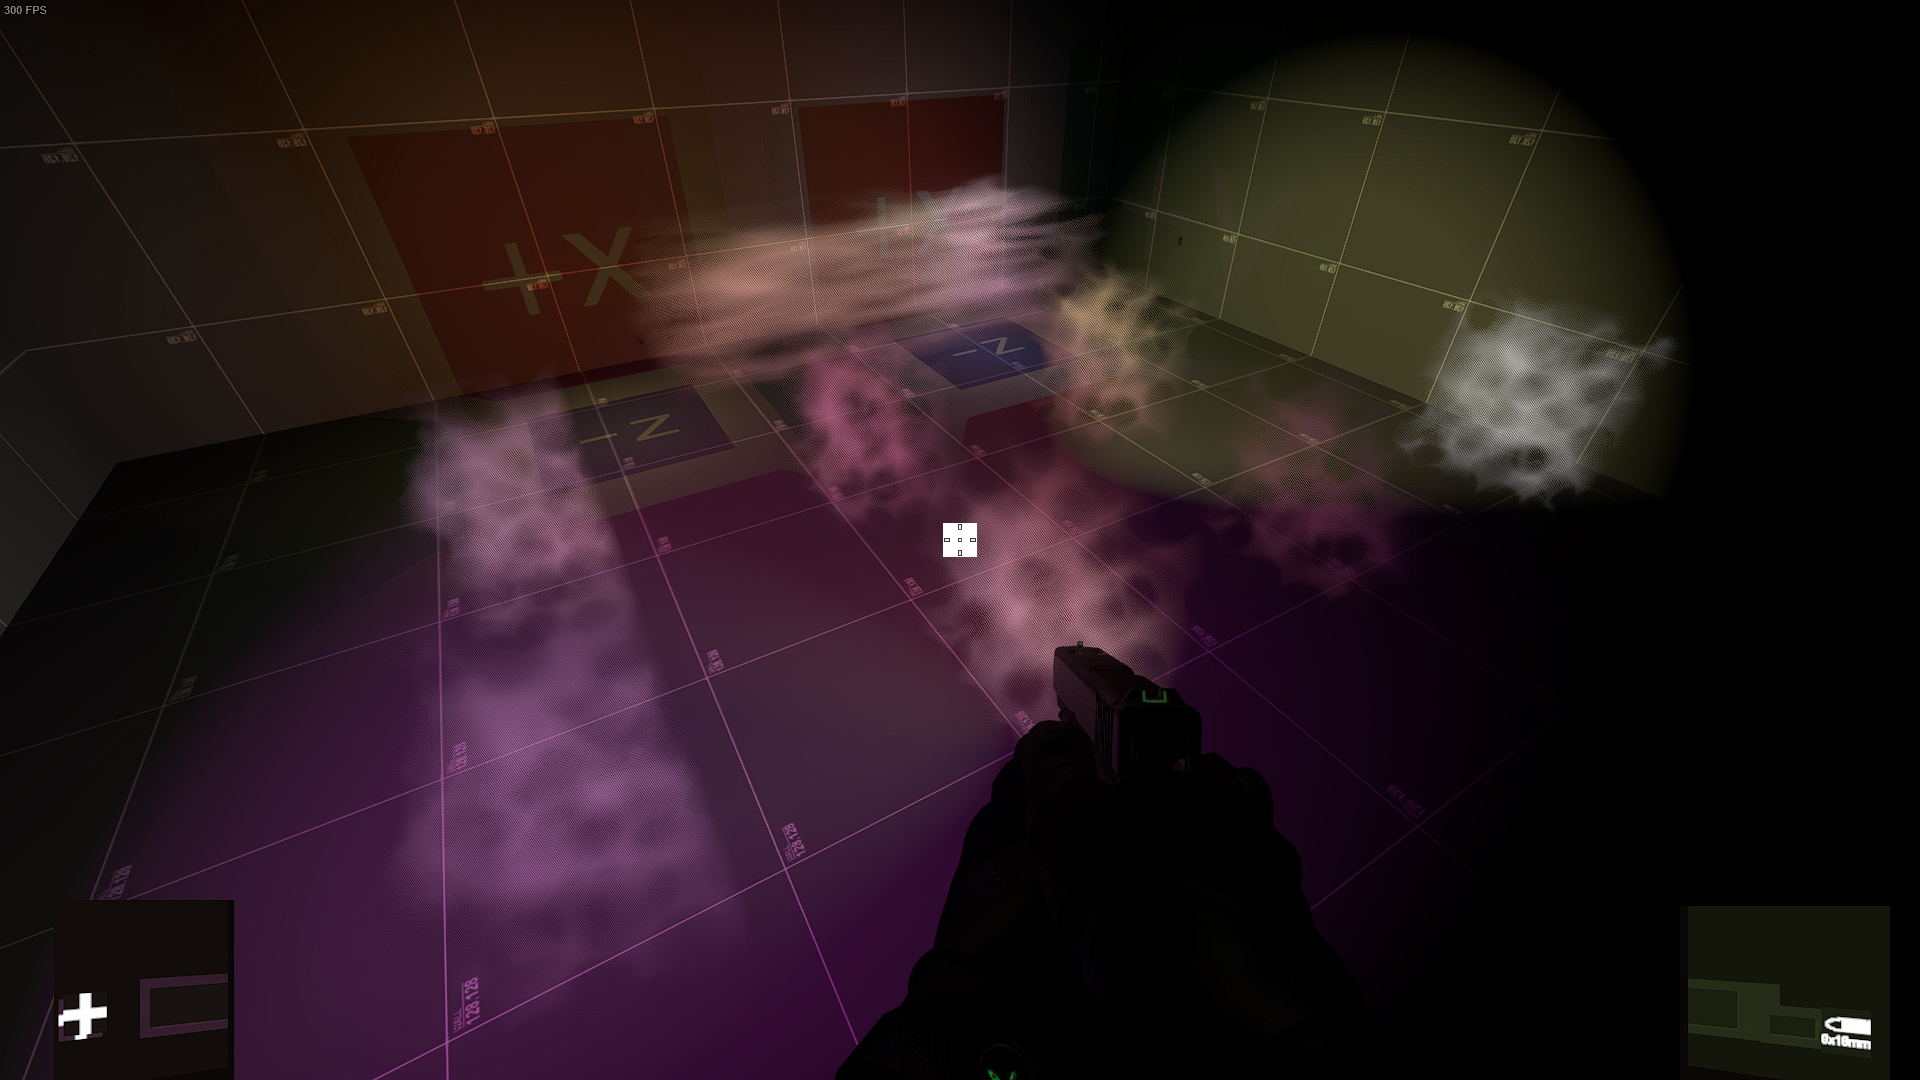
OBM’s Volumetric Texture Strip (Left) derived from scene lighting, at specific depths from the camera.
Each section of this atlas corresponds to a specific depth from the camera in which we capture the lighting information. We store this information to the section, and then on translucent objects, we look up this pseudo 3D texture for radiance information at that specific point. This is incomplete since it lacks directional information but it works well enough for volumetrics.
To Render the lighting to the strip, we do:
    for slice in numSlices:
        zDepth = ((slice / slices) * farz) + nearz;
        worldPosition = depthToWorldPosition(zDepth, matViewProjInv);
        lighting = CalculateLightVolumetric(worldPosition);
To Render the lighting from the strip to a translucent renderable (or per raymarch step), we do:
        currProjPos = WorldToTexture(currWorldPos, matViewProj);
        volLighting += tex2D3DStrip(volumetriclighting, float3(texCoord.xy, currProjPos.z), numSlices, farz);
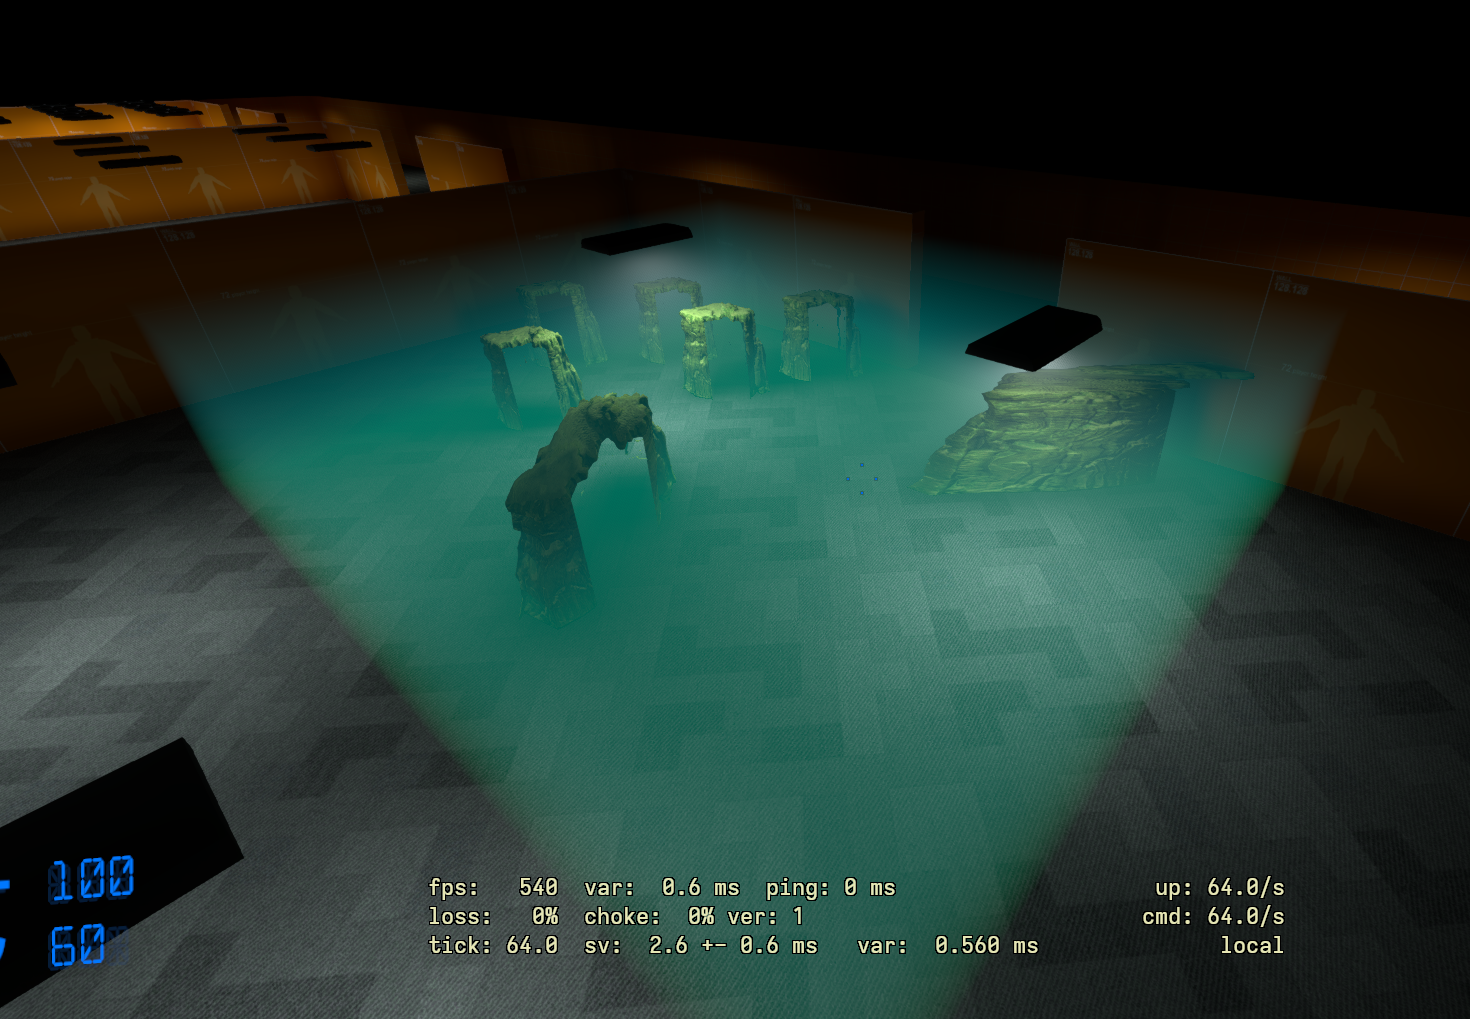
For fog volumetric lighting i did a custom approach: Instead of rendering volumetric fog by raymarching from the camera to the specific depth, I instead created a fog volume entity. The idea behind this entity is that inside is a localized fog volume. This is similar to Black Mesa’s Xog implementation, but this version, as stated earlier, can catch dynamic lighting.
Using the bounded volume fog idea, instead of raymarching from the eye to the surface, we can now raymarch within this volume, therefore making sure that we only raymarch where its actually needed.
The bounded fog also supports a variety of density texture types: A projected texture from the screen, an actual 3D volumetric density texture to define the clouds, or a 2D psuedo volumetric density texture that can be rendered using Blender/Houdini.
The bounded fog also supplies basic height density options as well as color gradient options.
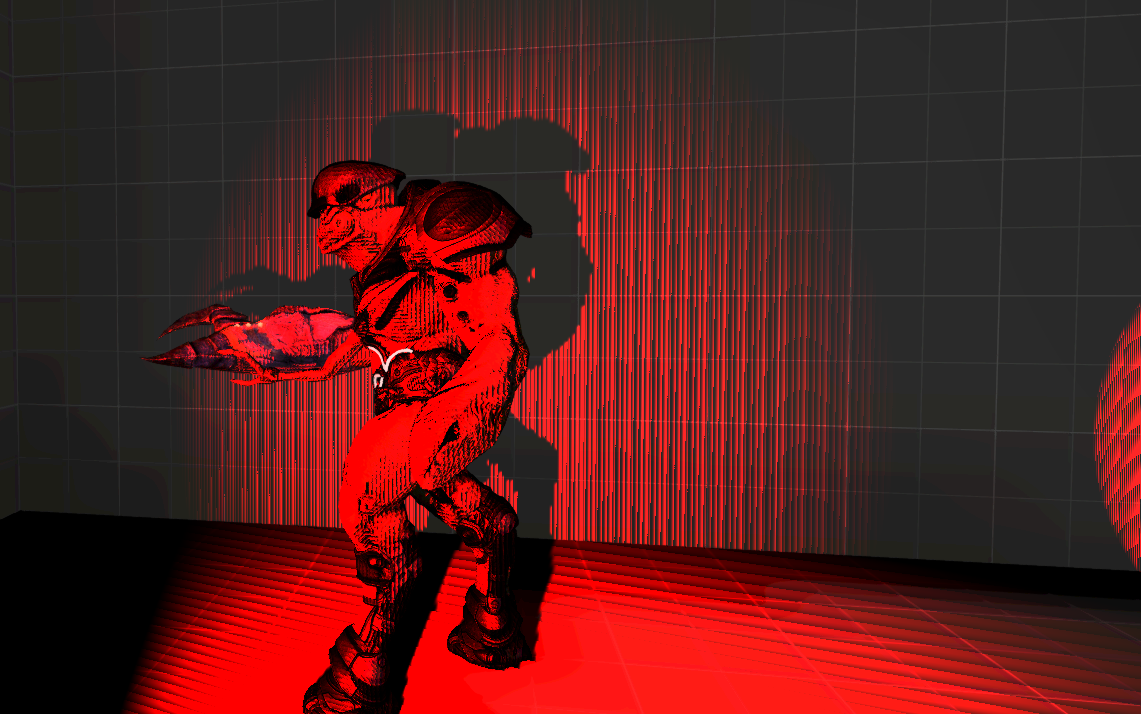
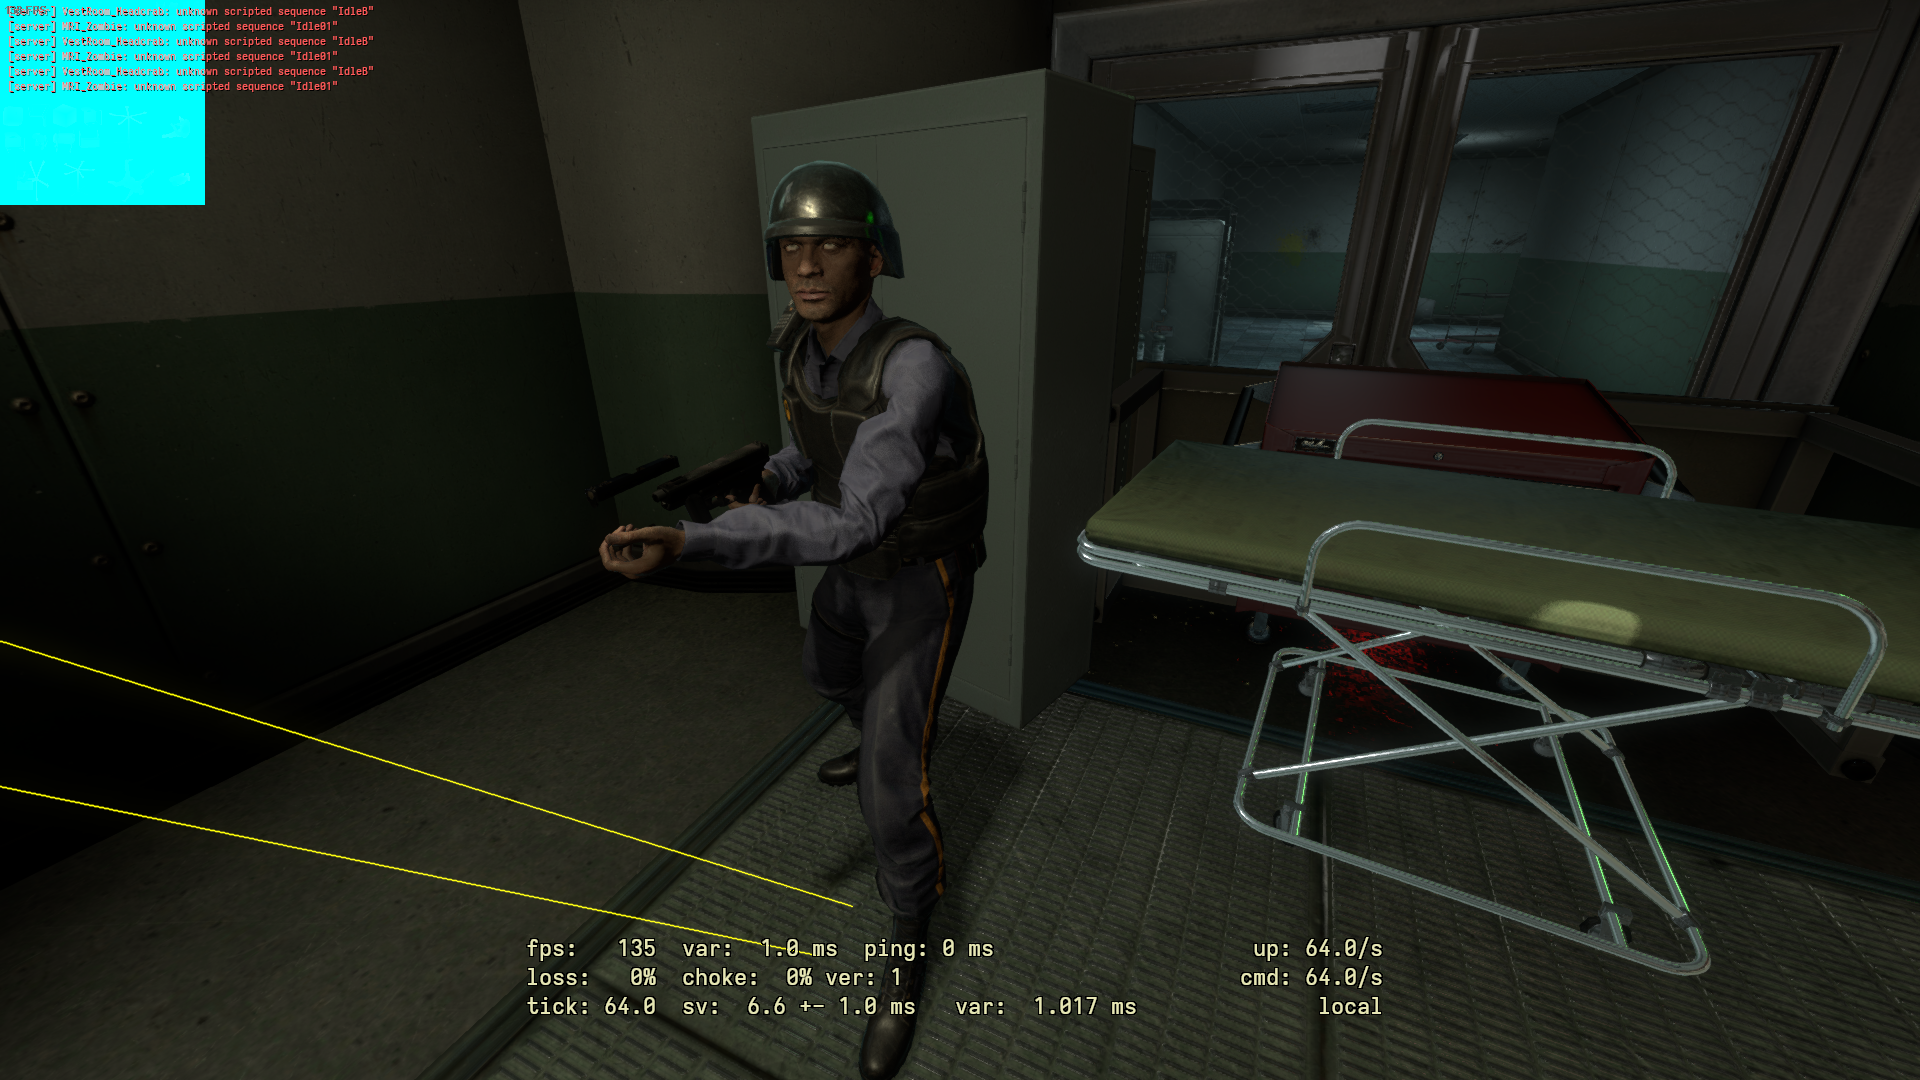
Viewmodel Shadowing
In addition to typical world shadowing, in order to ground the player into the Black Mesa Facility, I reimplemented viewmodel lighting to allow for per-light viewmodel shadows that affects all lights, even the old ones too.
This tech is made possible by combining 2 shadowing techniques. normal projected shadow mapping and Screen-Space Shadows.
To render the projected shadow, a custom shadowmap view is made pointing from the light position to the viewmodel position. the Origin and the FOV of the view is then adjusted depending on the Viewmodel AABB in worldspace. This results on a shadow that is crisp even if the casting light is far away. Screenspace shadows then fixes the peter panning of the projected shadow.
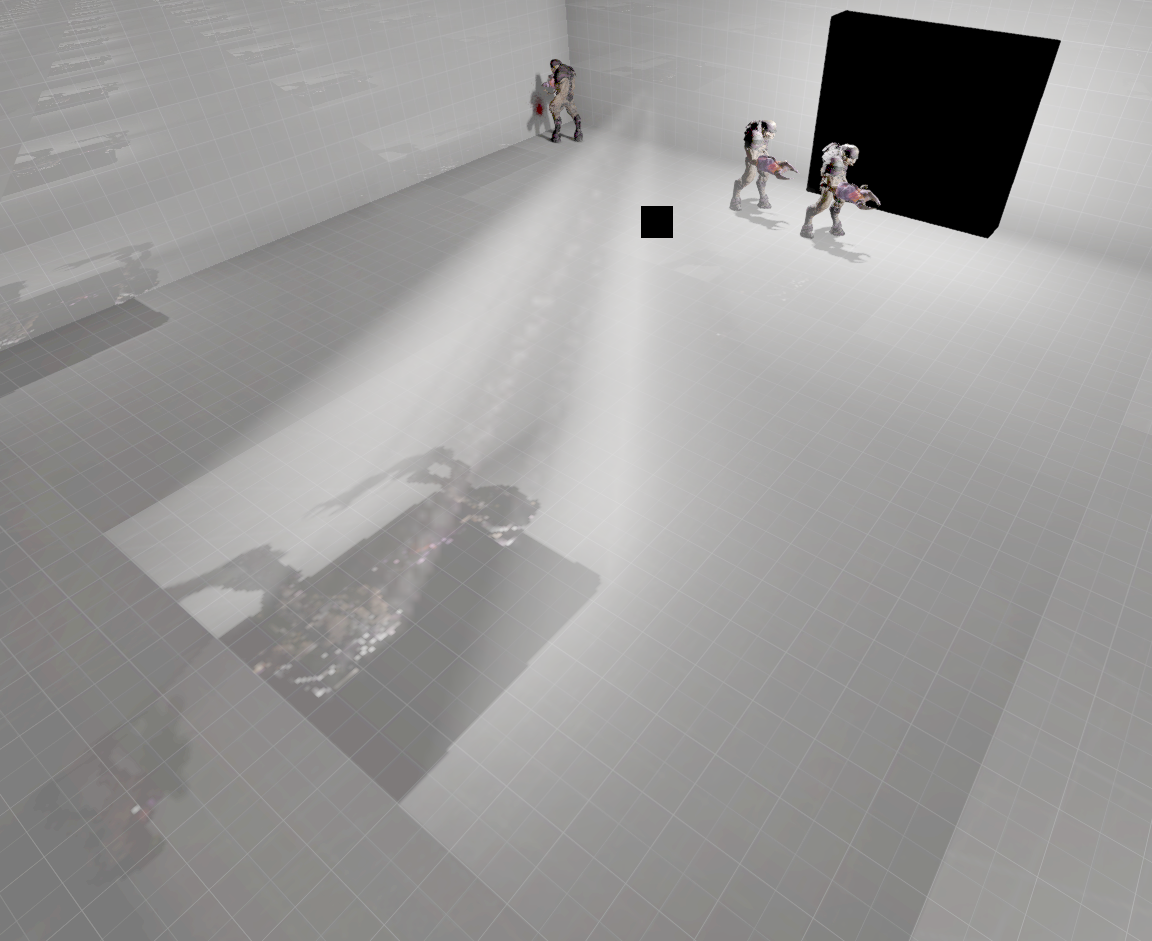
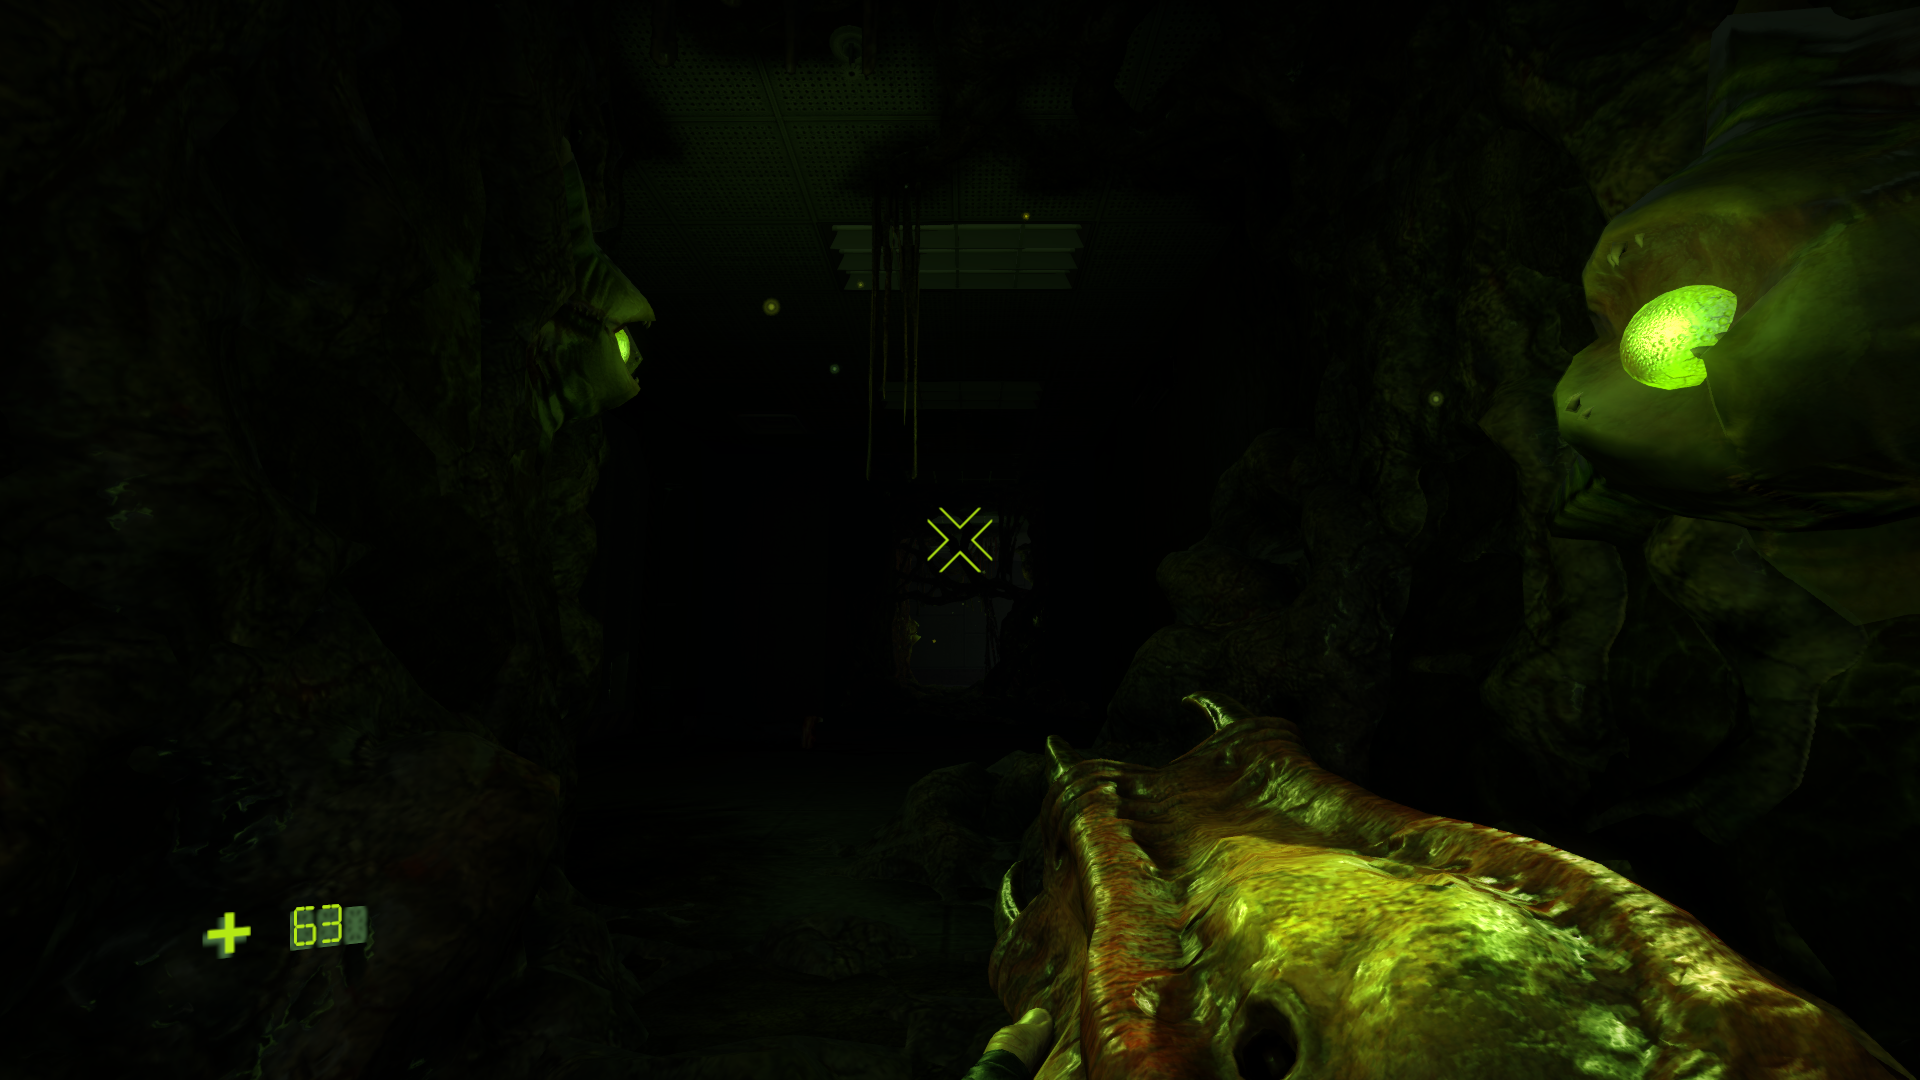
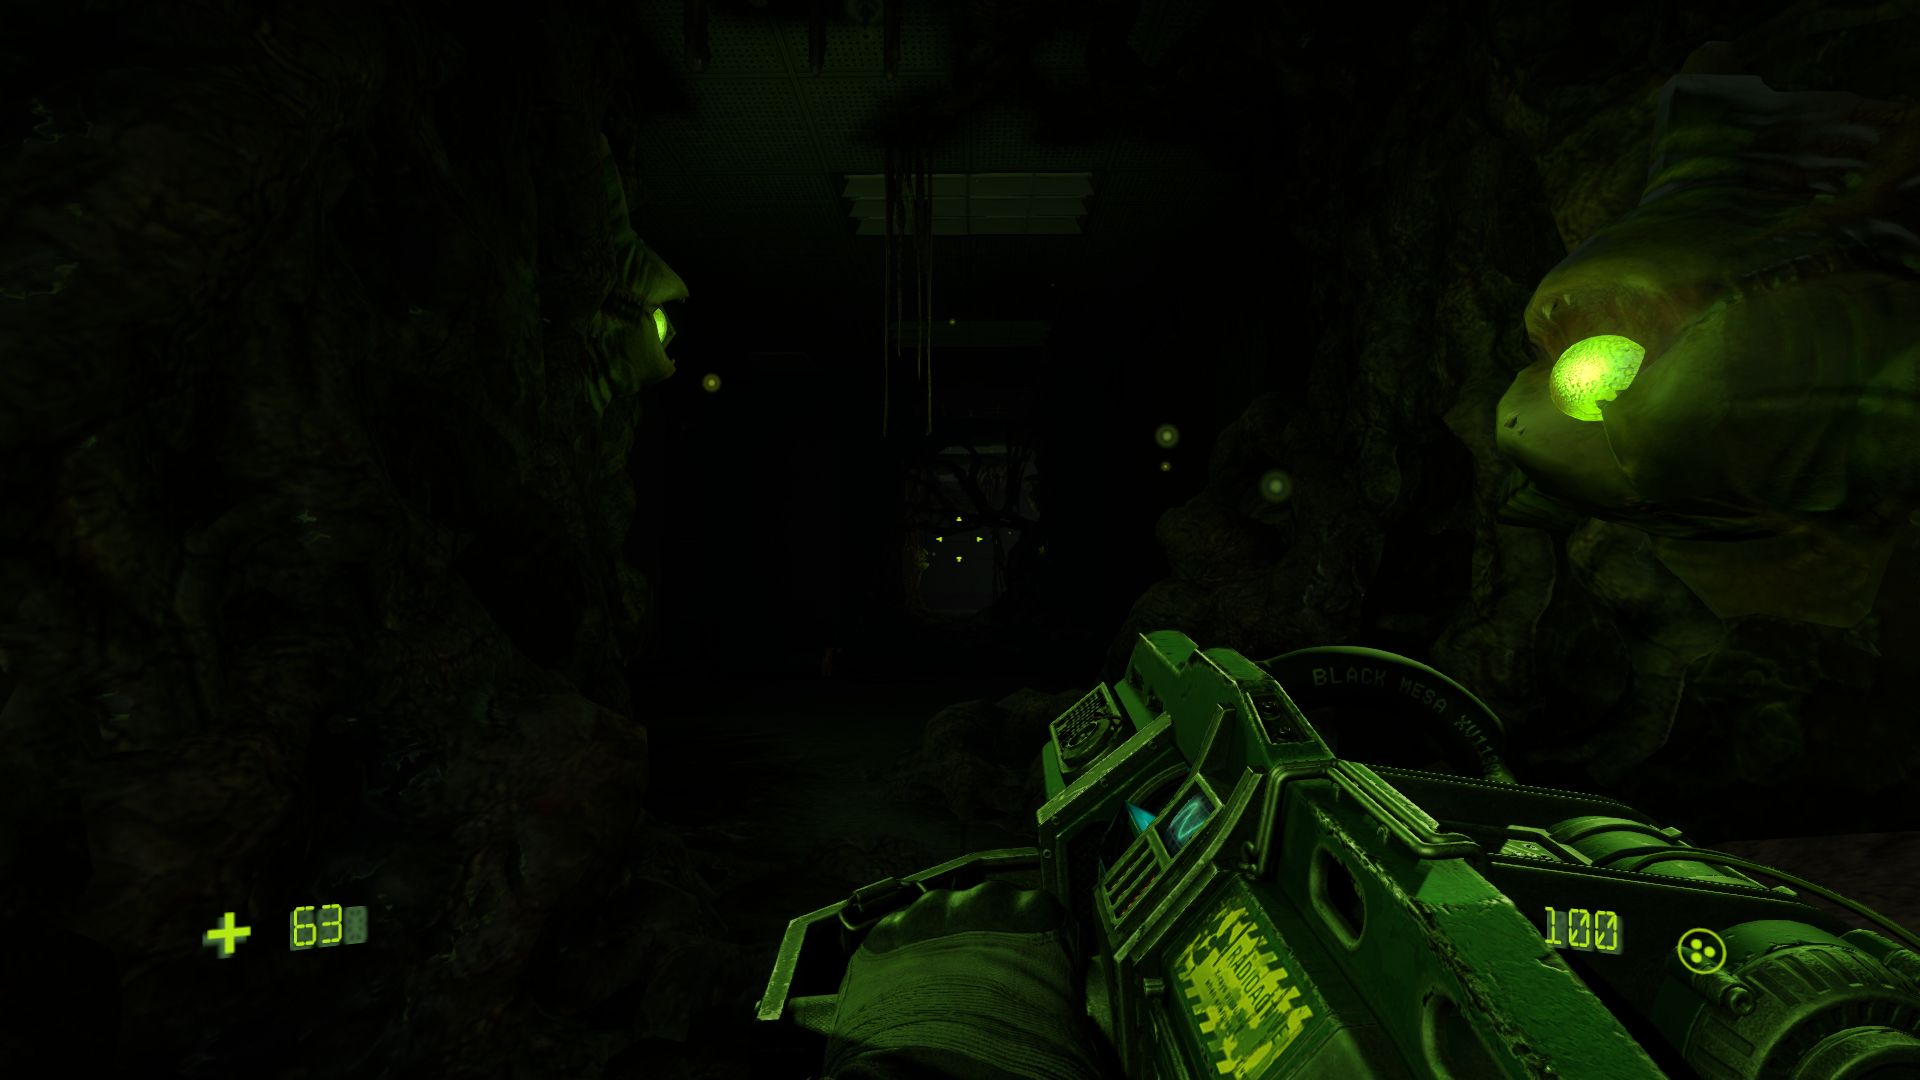
Ambient Occlusion using RTT Shadows
Since realistically lighting comes from all surfaces and bounces around, we need a solution for ambient occlusion. Ambient occlusion is the amount of occlusion on every point of the surface that is the average of all self-shadowing happening within the object. It is the tendency that a point or a surface is obscured from the average lighting in an area. Ambient Occlusion is a part of the global illumination algorithm that is responsible for darkening the creases where bounced light has a harder time reaching towards.
For OBM, we opted for a hybrid solution to solve this problem. I implemented a custom SSAO algorithm as normal, but I also implemented a custom self-shadow AO solution that relies on a shadowmapped render-to-target texture.
Source has render-to-target texture shadow support already from the start. Dynamic RTT shadows are then implemented to newer versions of the engine so that the shadows follow the brightest light on the local area. This allows for better dynamic shadowing, but still inadequate for moving lights and other special lighting scenarios.
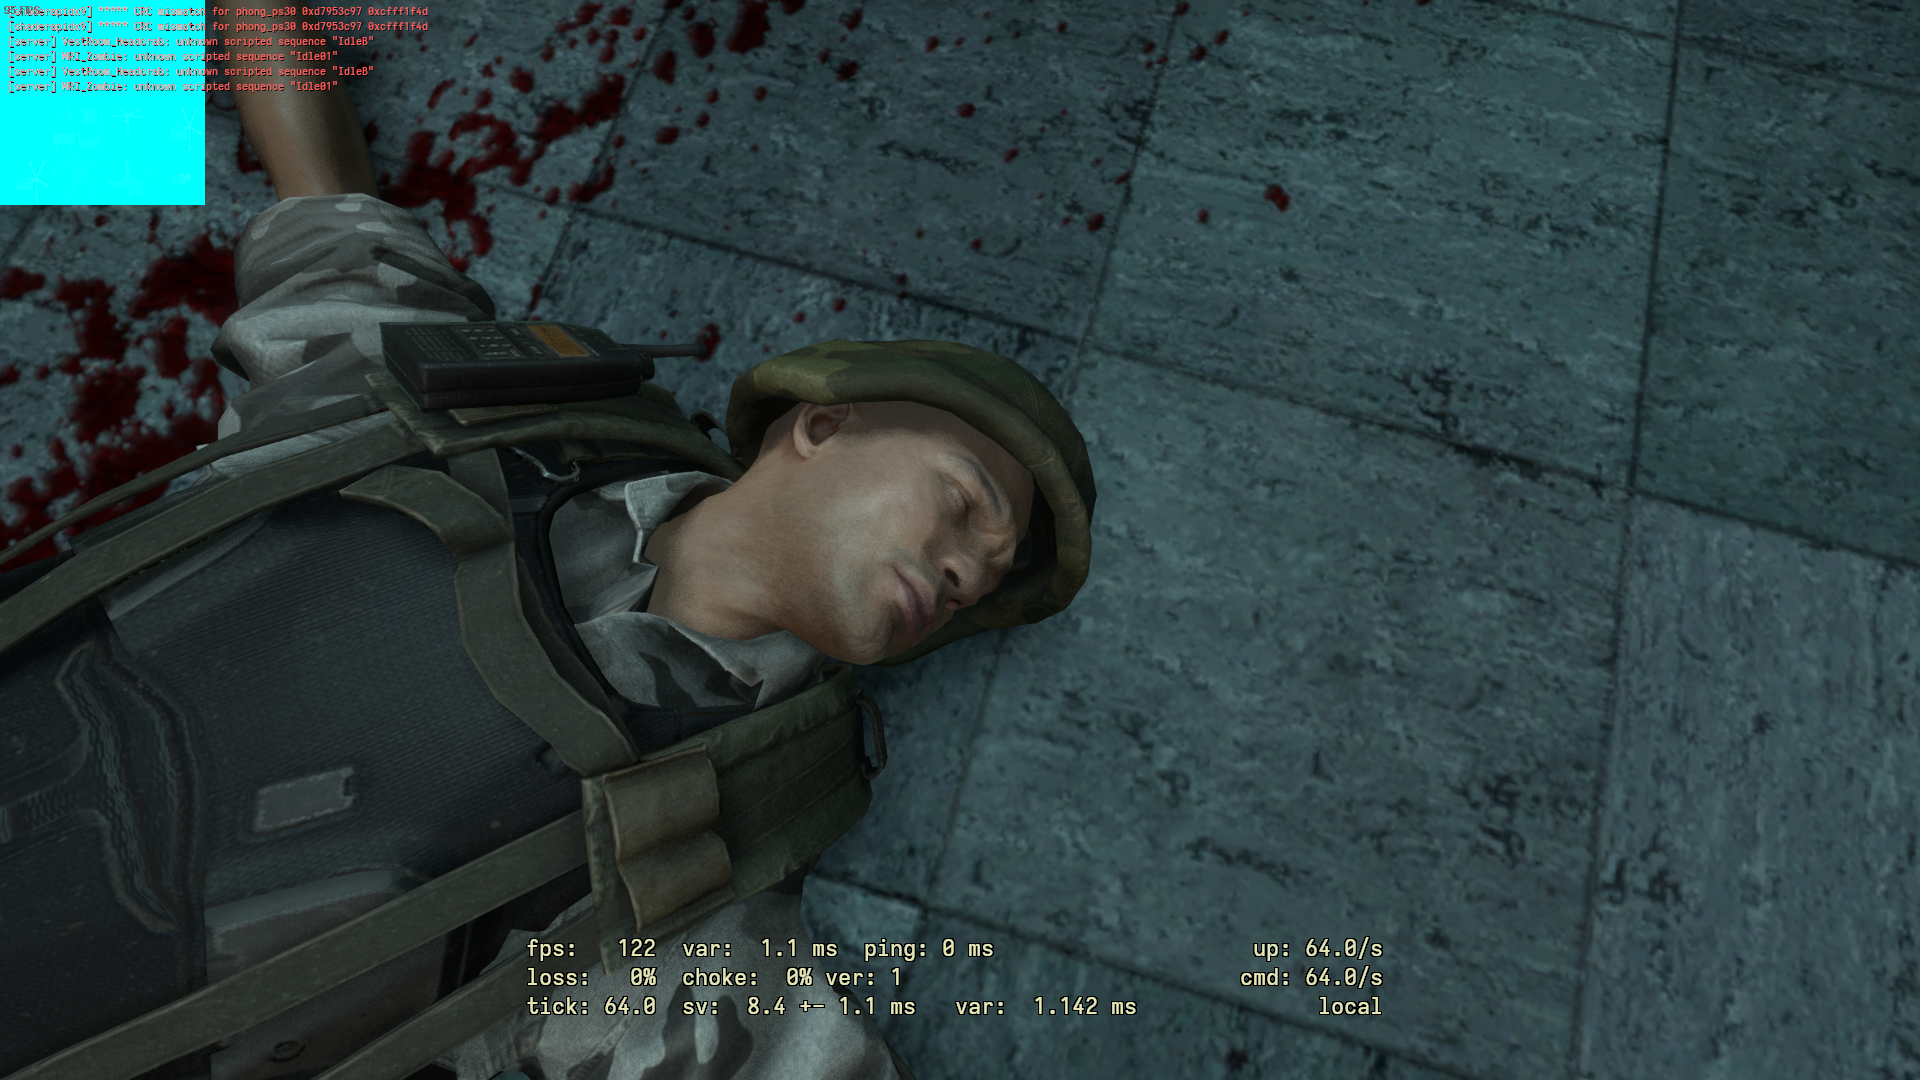
To add more depth and ambient occlusion to our characters and to ground them even more to the world, I expanded upon this system so that the shadows can self-shadow on the object casting on it, as shown on the screenshots above. This was done by changing the Render Target format for the shadow atlas _rt_Shadows to a color depth format like R16/R32, and then extracting the projection matrix of the render-to-texture, supplying it to the shader, and doing shadow mapping like normal. I also implemented PCSS so that the shadow contact-hardens and gets fuzzy if the shadow is farther away from the model casting it.
A comparison between default shadows and the enhanced RTT ambient shadow algorithm. the enhanced RTT ambient shadow more accurately catches the shadow to the model and darkens the appropriate pixels. It grounds the NPCs more to the world instead of them feeling like a cut-out from it.
Misc Lighting Features
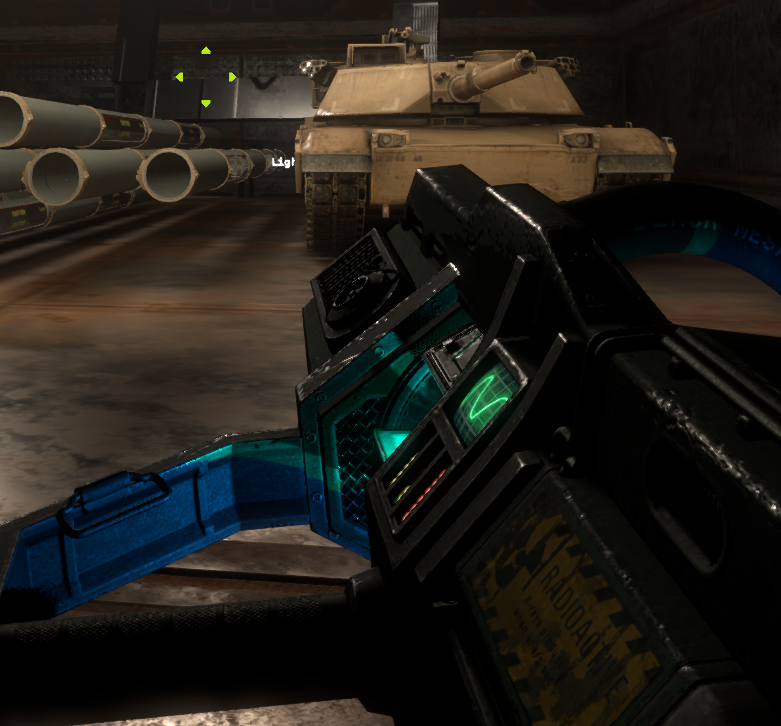
In order to ground the viewmodels to the world they live in more, I implemented viewmodel inherent lighting. We attach the new lighting system (complete with shadows!) to certain attachment points of the Viewmodel. It reacts and moves depending on the firing state/animation of the viewmodel. Currently supported on the Displacer, Tau, Snark, and other guns.
Battery pickups also support this feature, creating shadows on the battery as shown above.
Deferred Bounced Lighting
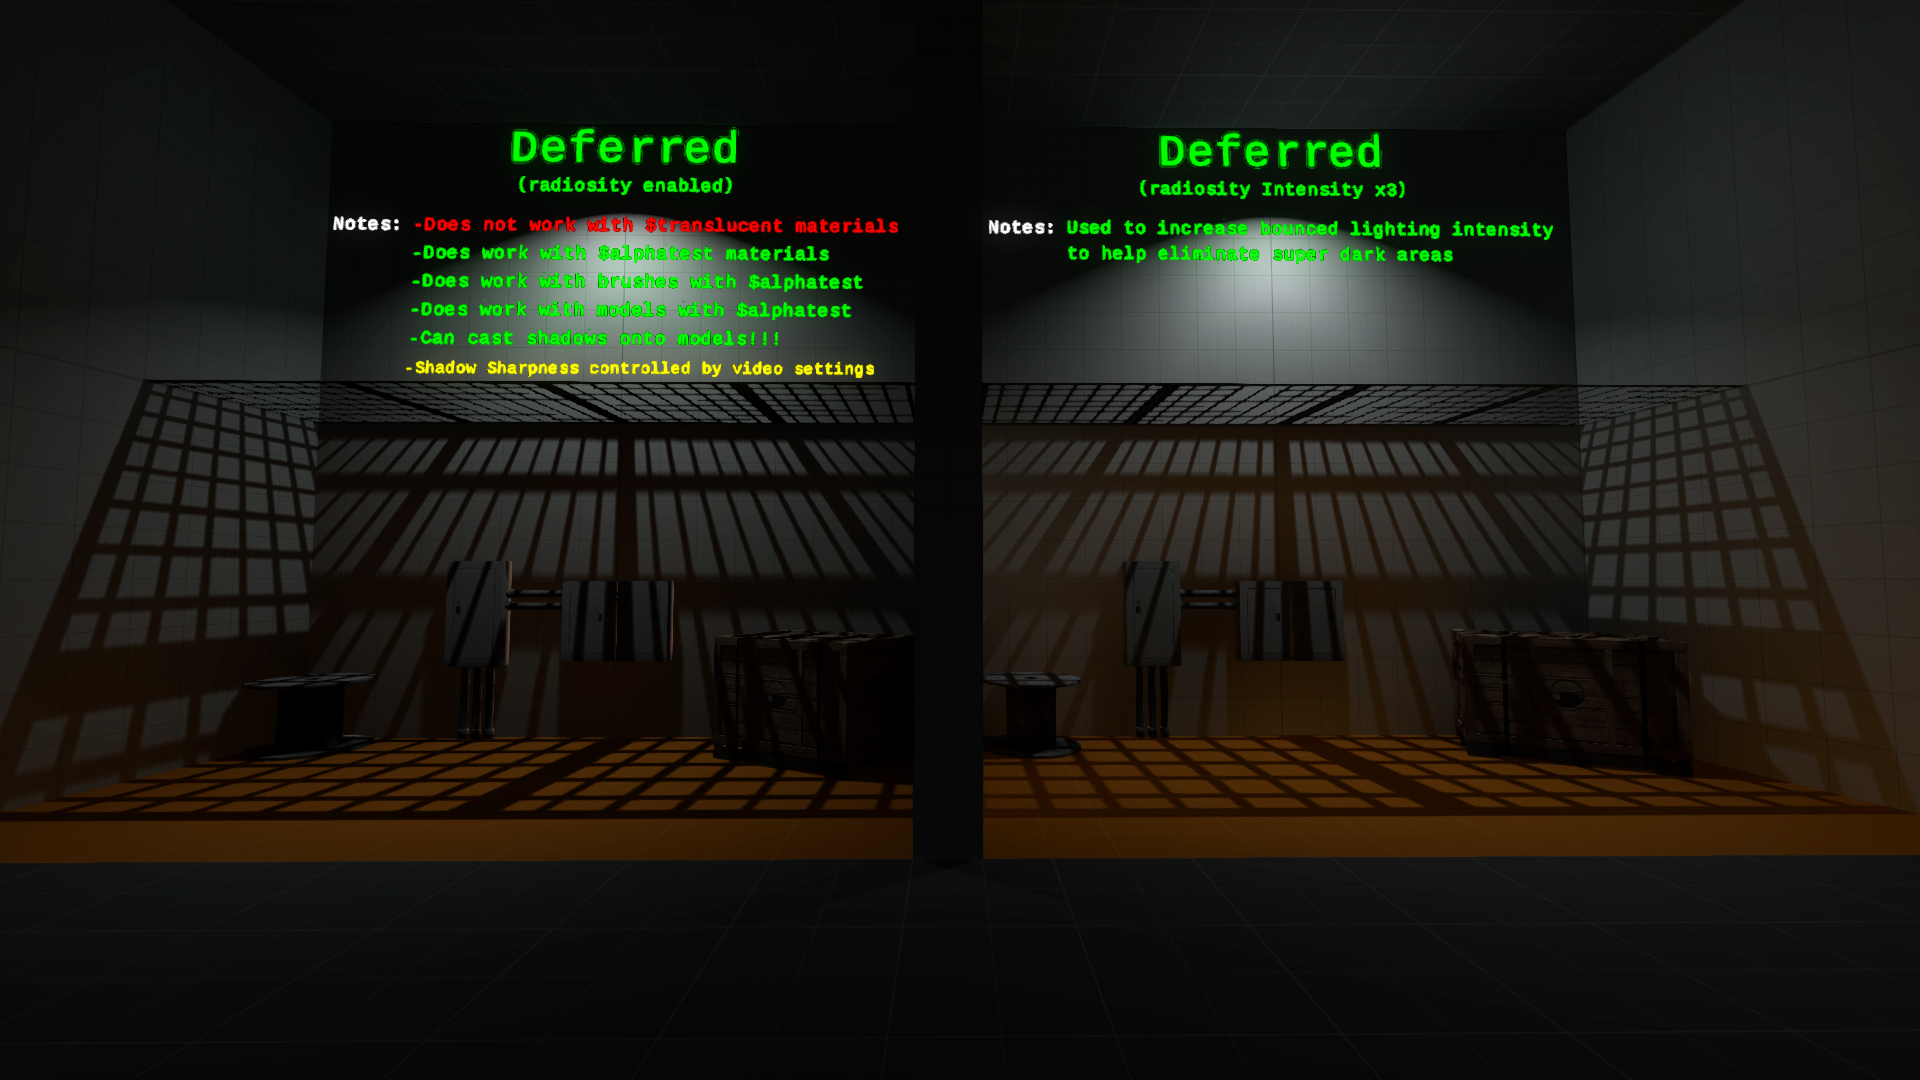
Since realtime lighting doesnt rely on baking, and implementing realtime raytracing tends to be expensive, Deferred lighting normally doesnt have any bounced lighting information in it. To implement bounced lighting for deferred and per-pixel lighting, I added the lights to the VRAD light list. However, instead of rendering the full lighting for each light on each surface, I instead computed the bounced lighting in case of the deferred lights. the intensity of the radiosity can be adjusted, as shown here.
Post Processing Stack
In addition to the lighting and shading overhauls, I also implemented a custom post processing stack for OBM. This consists of an env_post_process entity and volume that has a material for the specific post process shader that they want to render on that particular area.
This allows for multiple (up to 4, can be configured) post process materials be rendered at the same time.
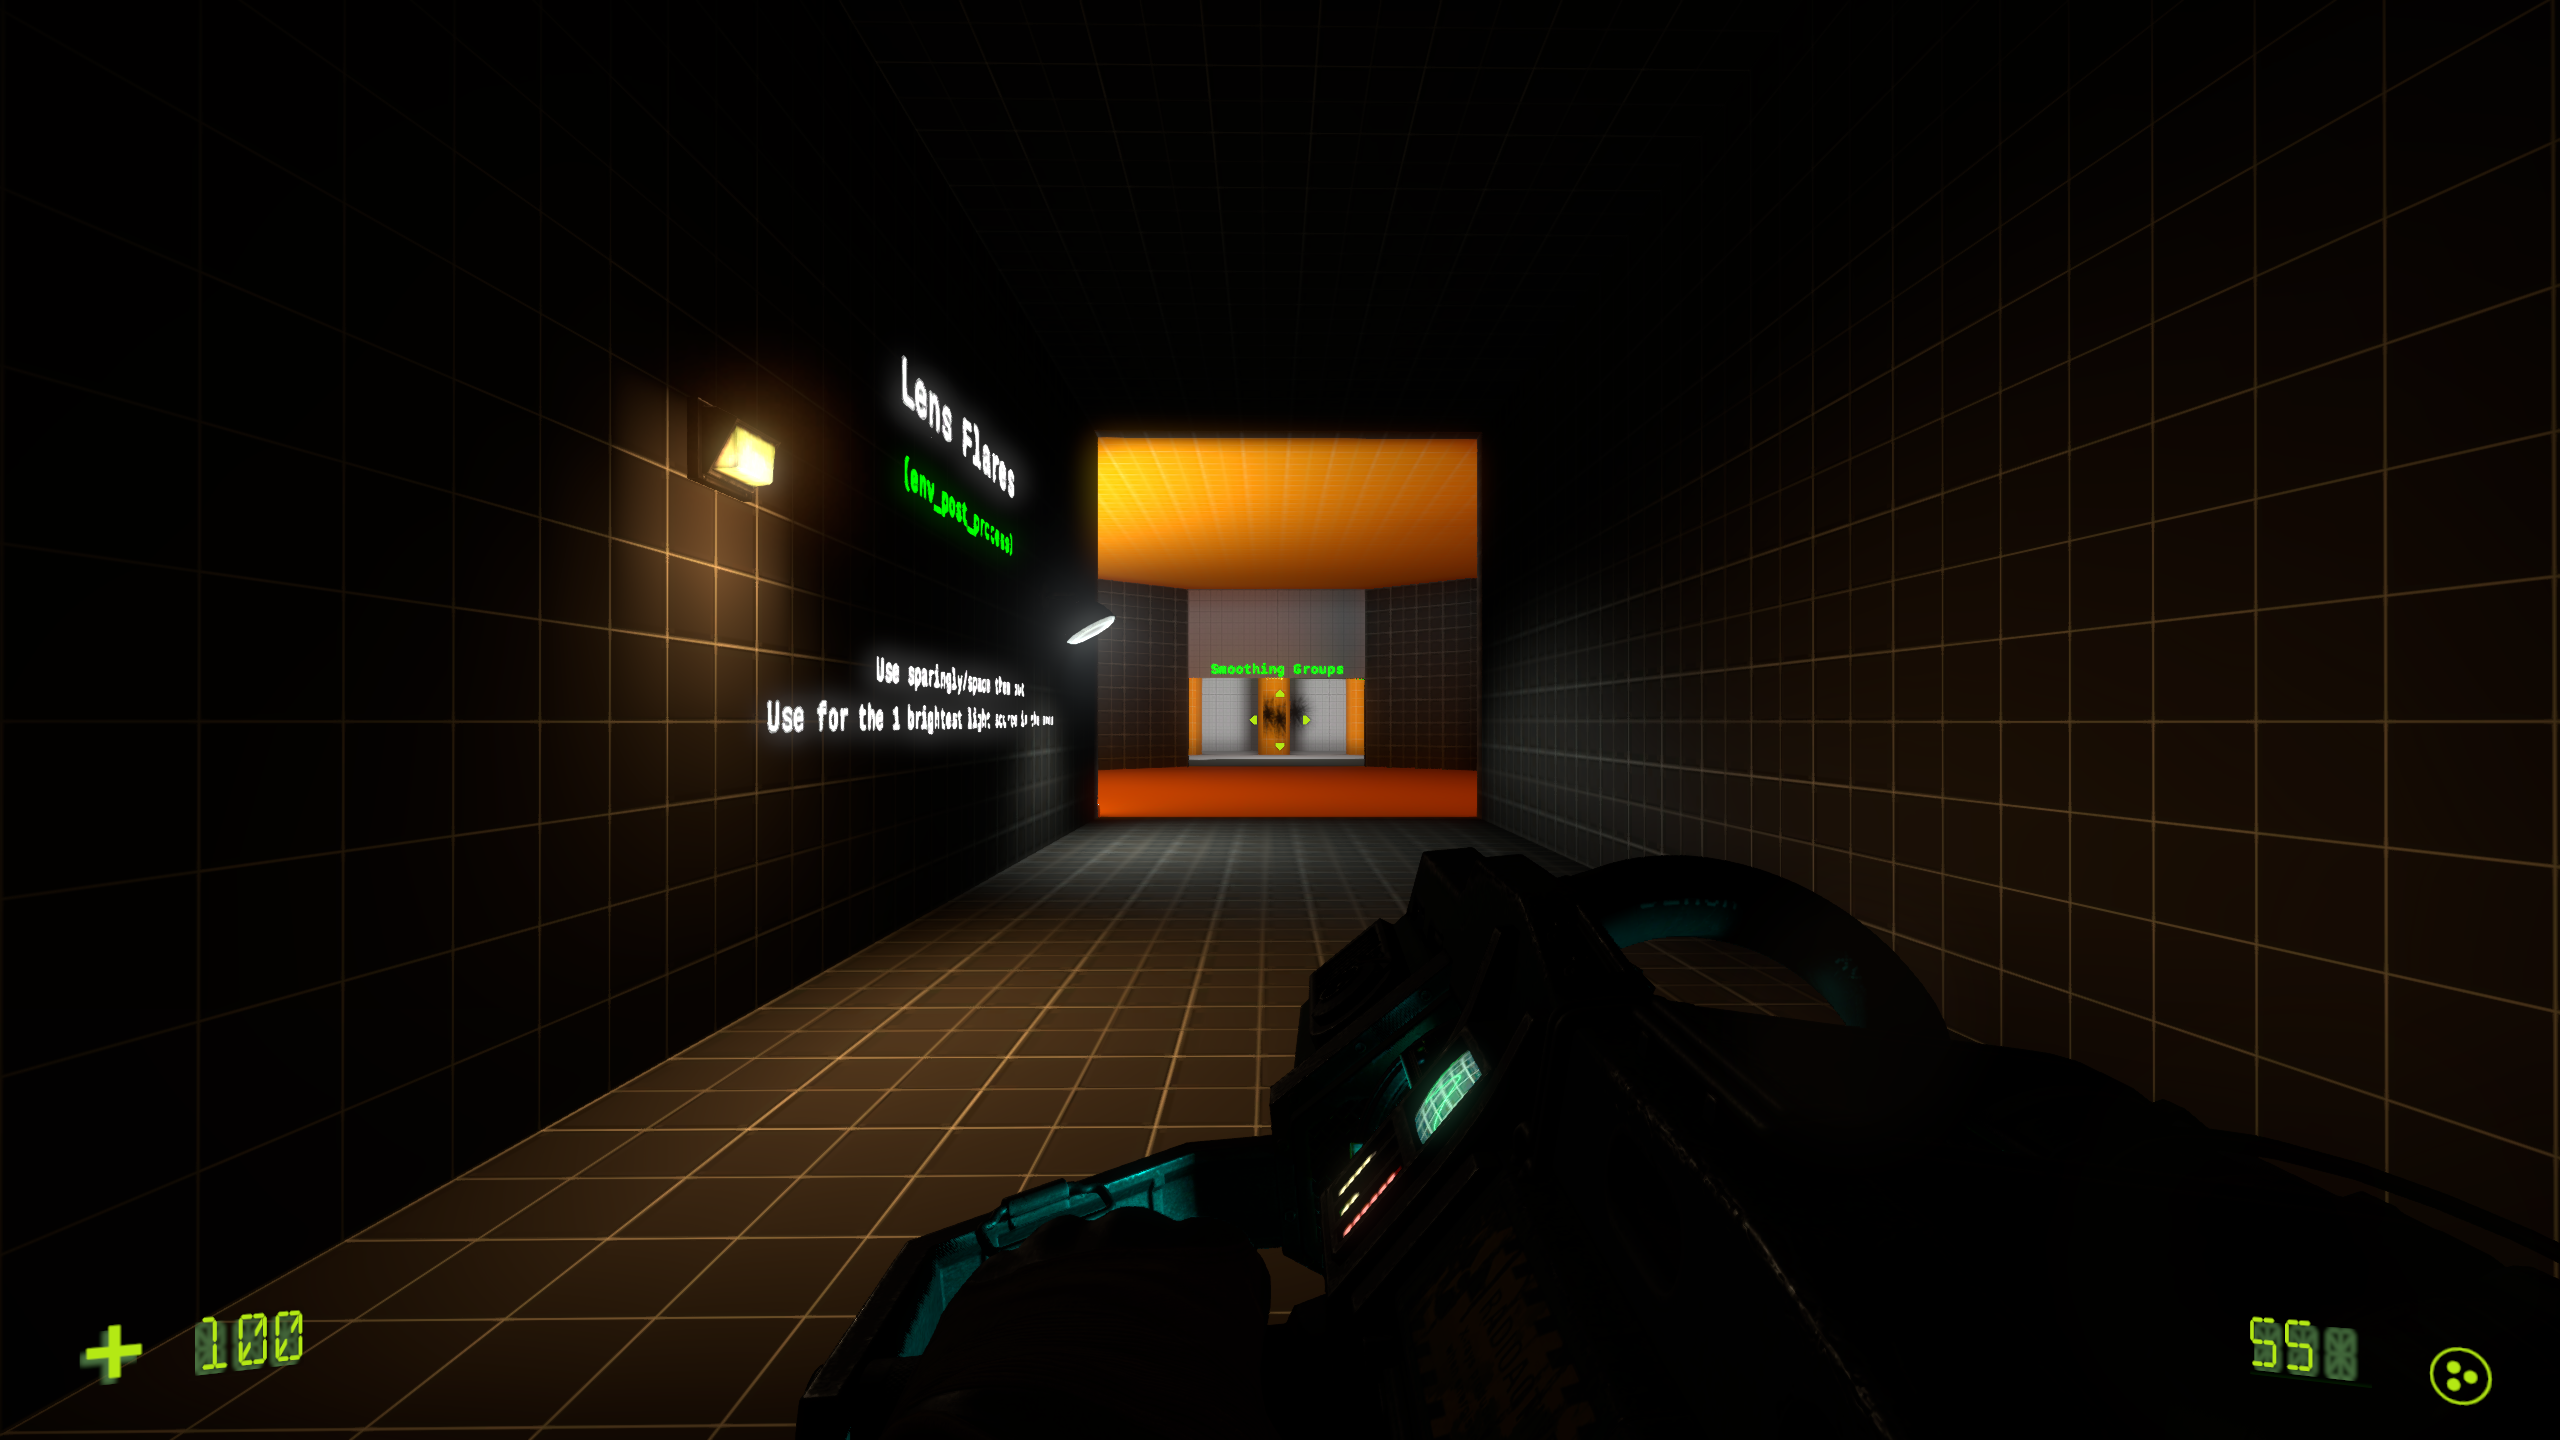
Lens Flares

I implemented lens flares which can be created at a point defined in space, or from the sun itself. Like volumetric lighting, lens flares are a great way to show a player how bright a light source is. From a design standpoint, lens flares can also be used to guide a player towards an exit in a very dark space, or blind a player when looking at a very bright light source.
Chromatic Aberration

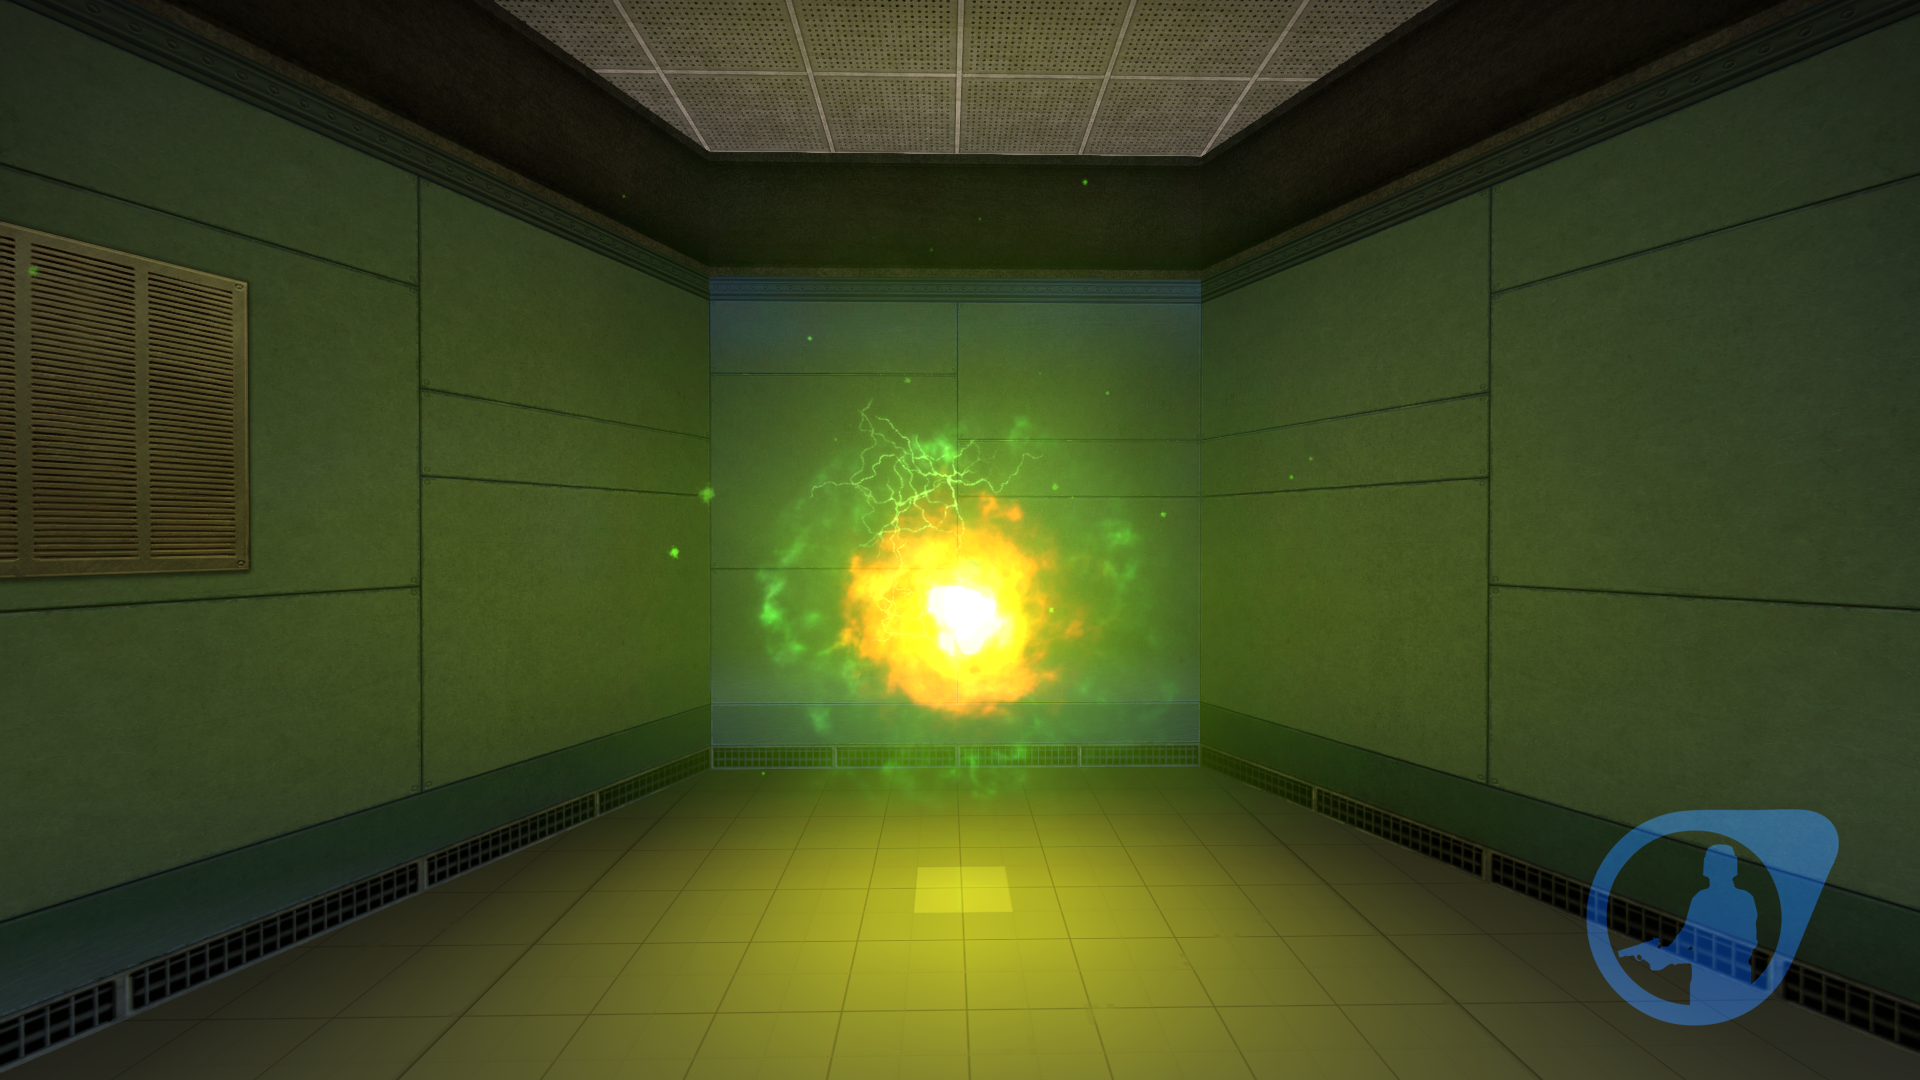
Chromatic aberration is a type of post processing effect that scatters light to create an odd, somewhat otherworldly look. This was a must-have system considering the Xen segments players explore in both Guard Duty and Operation: Black Mesa. Below you can see a screenshot of how this subtle light-altering effect enhances the scene when you approach a Xen Portal, when combined with color correction.
Chromatic aberration is also used on some game scenarios, such as taking damage, falling, and when swimming on water. This improves the feedback loop that we are trying to achieve with the game.
Screenspace Reflections
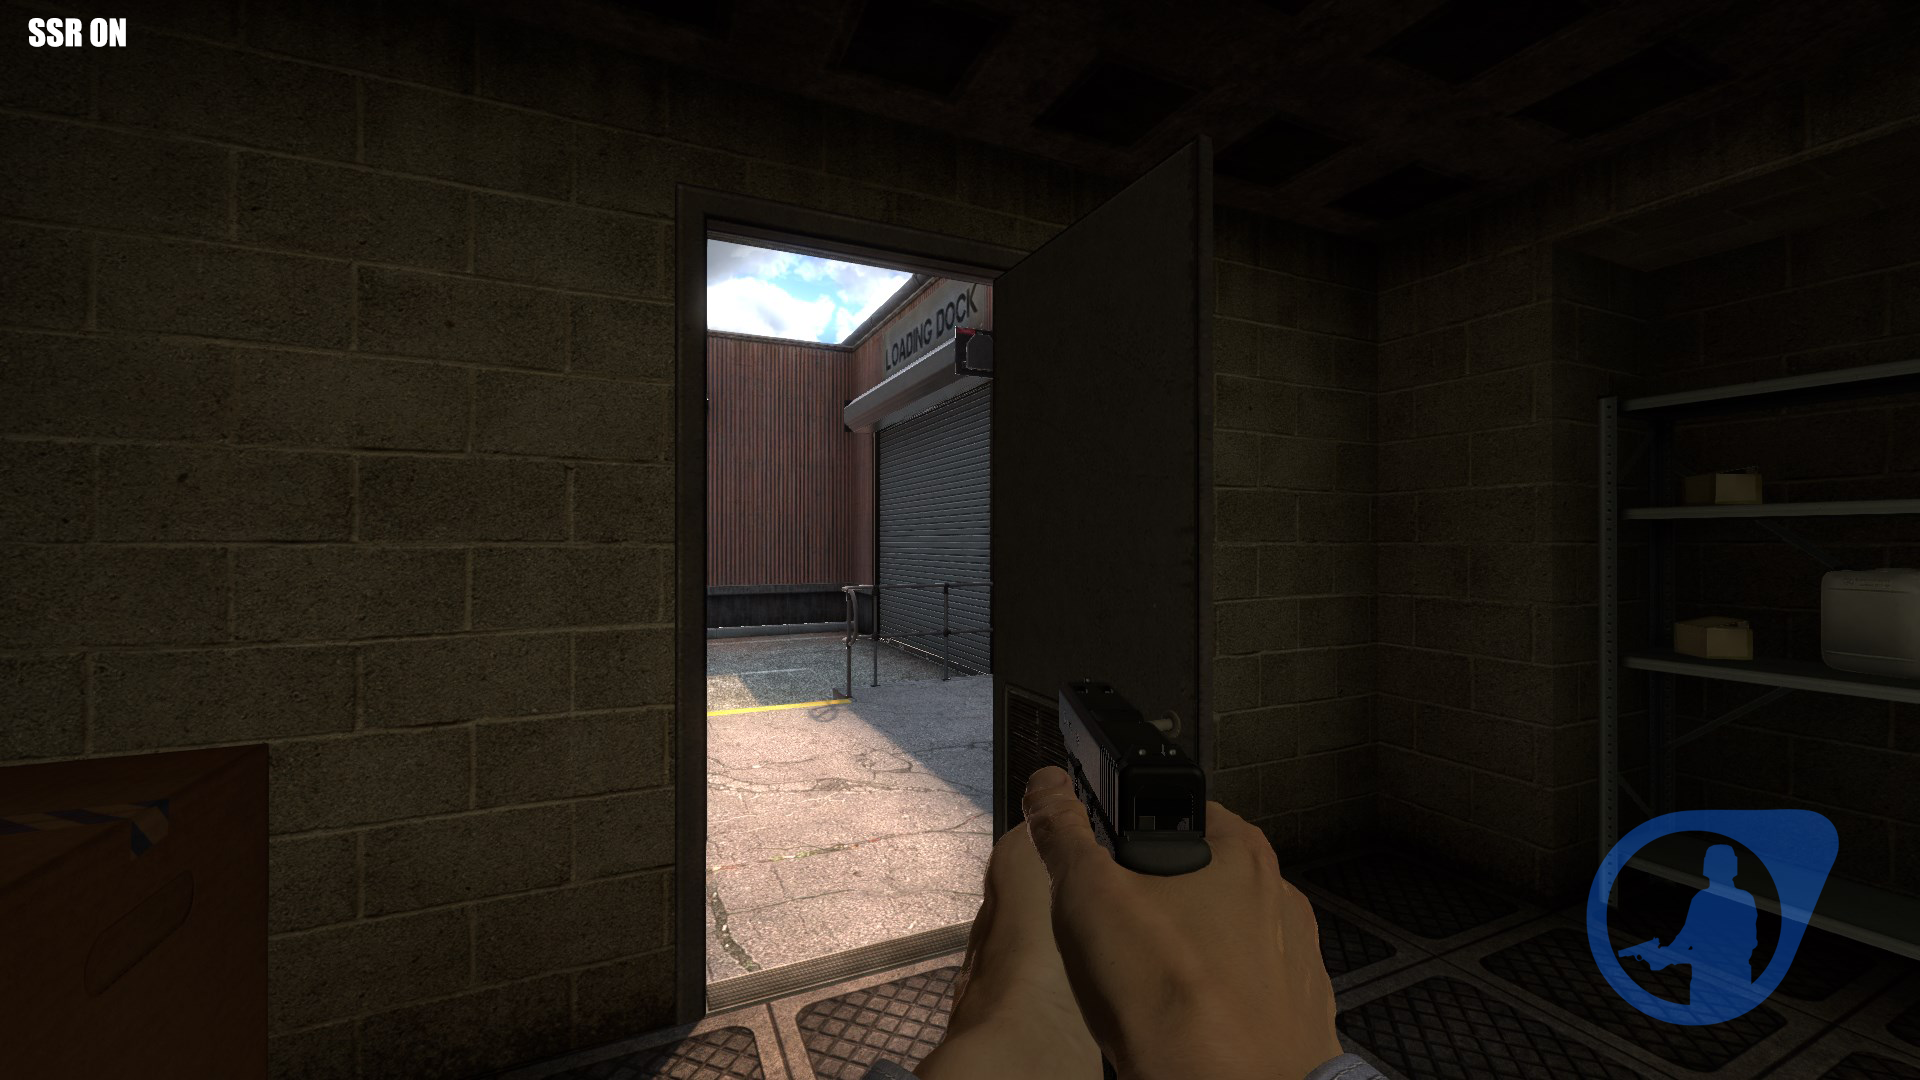
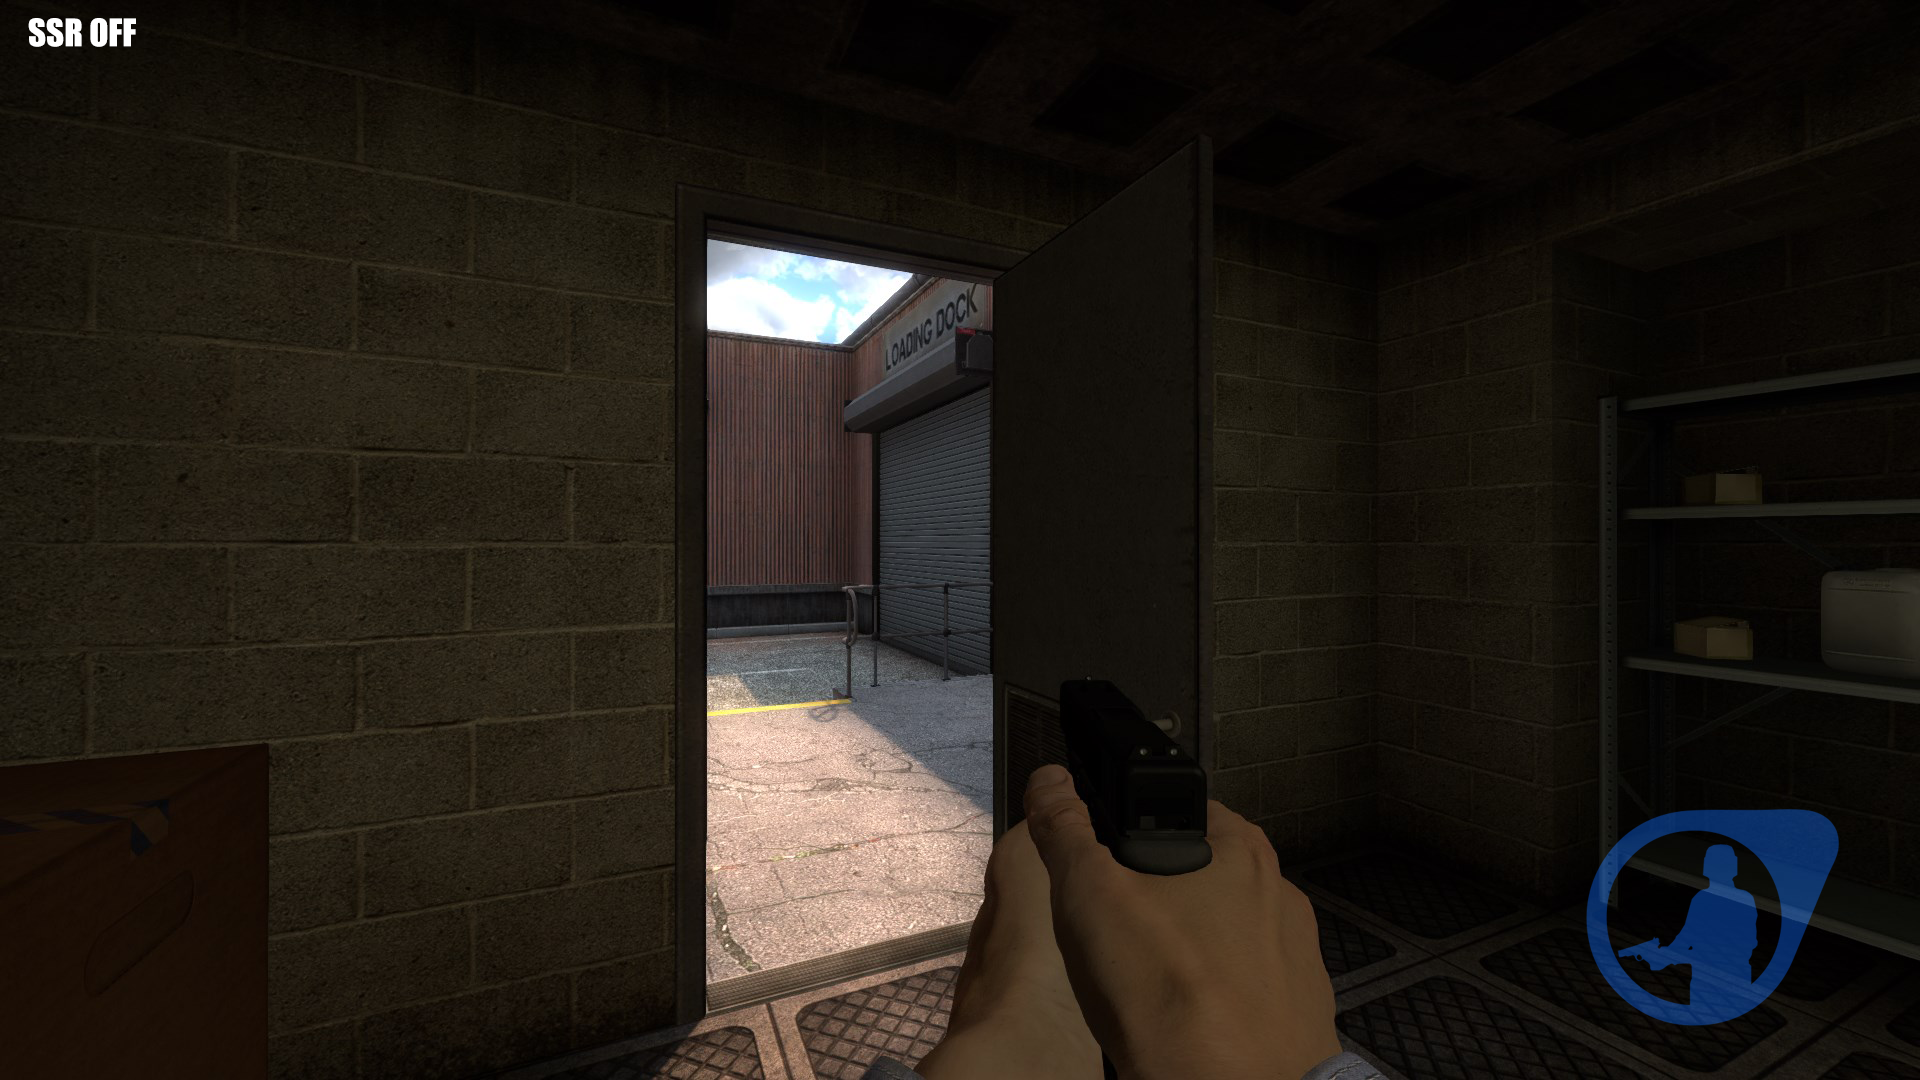
To complement the cubemap specular reflection, I Implemented screenspace reflection support. Screen space reflections is a technique used to create more accurate, and in some ways a bit more detailed reflections, This works by raymarching the reflection vector of the surface normal against a depth buffer. if it hits the depth buffer, that means that the pixel color on that particular hit is the reflection. This doesnt work as well as Ray-Traced reflection, but looks good enough especially if you have cubemaps as a fallback.
Bloom
To properly convey extremely bright specular highlights, or light sources, I implemented a new implementation of bloom to the engine. this works by doing a loop between all the mips of a copy of the framebuffer texture and using a blur pass using the previous mip’s output to the next mip. This progressive blurring allows for large bloom while keeping the small but bright pixels defined.
All of the above post process effects can be defined on a material and be used for the env_post_process entity.
Ending Thoughts
That covers most of the new rendering features that are implemented on the game before the D3D11 port. A lot of these features are possible without engine access surpisingly, and you can get far with it. Have fun!
You can read the next part of this series here.